2. Starting a new FastStore project
Create and set up your FastStore project with WebOps.
In this step, you'll use the FastStore WebOps app to create your FastStore project, connect it to GitHub, and deploy a live preview.
This establishes your project's source of truth and CI/CD path — the foundation for all later steps in this track.
What you'll accomplish
By the end of this step, you'll have:
- Created your FastStore project with basic configuration (project name, SEO tags, GTM, catalog).
- Connected your project to a GitHub repository for version control.
- Set up the CMS integration for content management.
- Deployed your project and generated a live preview of your storefront.
Your project will be accessible at
https://{accountName}.vtex.app/ and ready for local development in the next step.Getting to know the WebOps app
FastStore WebOps is the control plane for FastStore projects. It manages every stage of your storefront's lifecycle, from creation to deployment, and integrates with your GitHub repository and VTEX account to facilitate collaboration and automation.
WebOps connects your storefront code (GitHub) with your VTEX infrastructure, enabling a branch-based workflow for development and production. Keep the following in mind:
- Environment requirement: WebOps operates exclusively in the production environment. Install it only in your account's
masterenvironment. - Development workflow: FastStore uses a Git branching model for development and testing:
- The app is installed in the
masterenvironment of your VTEX account. - Development and testing occur on Git branches.
- Approved changes are merged into the repository's
mainbranch and automatically deployed to production.
- The app is installed in the
Unlike VTEX IO workspaces, FastStore uses a Git-based branching workflow.
Before you begin
Check permissions
To start a FastStore project, you must have the Owner (Admin Super) role.
Create your store catalog
Create a catalog to populate and test your store. It should include essential components such as product listing pages, search, product details, and checkout.
Developing without a catalog may result in incomplete testing, data integration issues, and rework later.
For more information, see the Catalog documentation.
Have a GitHub account
To complete the FastStore WebOps onboarding, you'll need a GitHub account to host your project. You can use either a personal account, a GitHub organization, or a GitHub Enterprise instance.
If you use a GitHub organization or GitHub Enterprise, make sure you have admin access.
GitHub Enterprise support is currently in open beta. If you want to use a GitHub Enterprise instance for your FastStore project, contact VTEX Support.
Step 1 - Setting up the project
- Open the VTEX Admin and access Storefront > FastStore WebOps.
- Click
Start Project. - In the Setup & Create Project page, configure the following options for your store:
Project
Choose the option that best fits your project's purpose.
This helps us understand what you're trying to achieve with FastStore and improve your experience.
| Field | Description |
|---|---|
| Project name | Enter your FastStore project's name, for example, John's Car store. |
| Which option best describes the goal of your project? | Choose the option that best fits your project's purpose. |
SEO tags
| Field | Description |
|---|---|
| Title tag | Enter a keyword-optimized title for your store. For example: Buy online with the best game store - GameStore. In this example, we used a length limit of 50–60 characters to ensure it is fully displayed in search results without truncation. |
| Description tag | Enter a brief description of your store, for example, Shop online at GameStore, the best game store for PC, Xbox, PS4, and Headphones. Explore our wide selection and buy your favorite games today! |
| Title template | Enter a page title that helps search engines and users better understand the content of your store. For example, The best game store - GameStore. |
| Site author | Enter the name of the agency or person responsible for the development of the storefront. |
Google Tag Manager
| Field | Description |
|---|---|
| GTM ID | Enter the Google Tag Manager ID (GTM ID) for the GTM container that manages and organizes the tags for your store. |
Catalog
| Field | Description |
|---|---|
| Catalog | Choose which catalog your store should be linked with. |
Step 2 - Setting up integrations
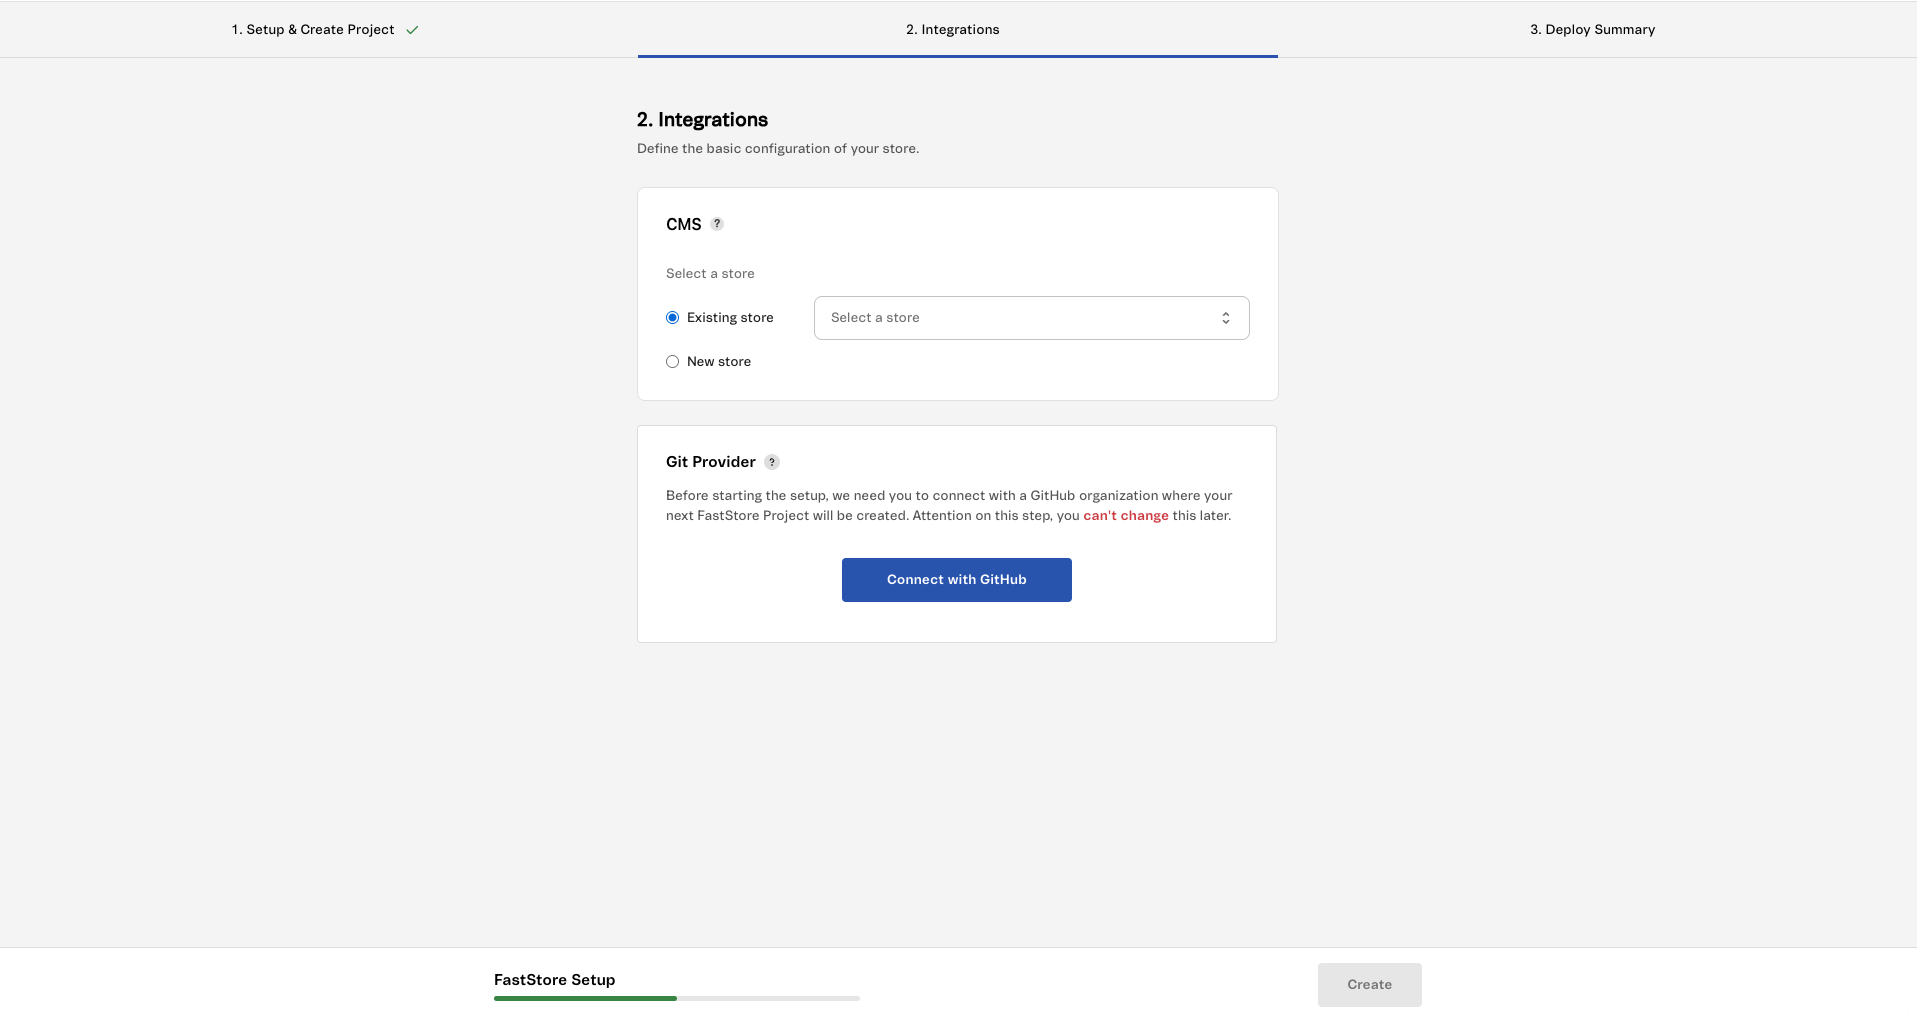
On this page, you'll set up the native CMS integration and connect to a GitHub organization.
CMS Integration
Configure the native CMS integration for your store.
Select a store
Choose whether to create a new CMS store or connect to an existing one:
- New store (default): Creates a new CMS store for your FastStore project. Fill in the following fields:
| Field | Description |
|---|---|
| Store ID | Unique identifier for the store (for example, my-store). |
| Store name | Display name for the store (for example, My Store). |
| Build type | Choose between the following options:
|
| Default locale configuration | The Default locale configuration section lets you define the primary locale for your store by setting a Language (content language, for example, Portuguese (pt)), and Region (country/market, for example, Brazil (BR)). This locale is used as the default context for your CMS content and storefront when the store is created. For more information about the available languages and regions, see Supported languages and regions. |
-
Existing store: Connects your FastStore project to a CMS store that already exists in your account. When this option is selected, a dropdown lists all available CMS stores for your account. Select the store you want to use from the dropdown.
 Use this option if you previously deleted a WebOps project and are going through the onboarding flow again without erasing existing CMS content.
Git provider
To host the source code of your FastStore project, you can connect with a:
If you choose to install the app in a GitHub organization or GitHub Enterprise, make sure you have admin access.
GitHub personal account or organization
To connect a GitHub personal account or organization to the FastStore WebOps app, follow these steps:
-
Click
Connect with GitHub. A new browser tab will open so you can integrate the app with GitHub.If you're not logged in to your GitHub account, in the new tab, you will be asked to log in. Then, you can continue to the next step. -
Once you're logged in to your GitHub account, choose the organization or personal account where you want to install the app. You'll be redirected to the Settings page on GitHub.Once you define the GitHub organization, you won't be able to change it later.
-
In Repository access, choose one of the following options: All repositories from the organization or Only select repositories.
-
Click
Install.
The following success message will be displayed:
_10Success! You can now close this page and proceed with the onboarding process.
After the success message is displayed, close the browser tab and continue the onboarding process in the VTEX Admin.
-
Now that the app is integrated with GitHub, select which repository you want to start the project:
-
New repository: Create a repository from scratch. In this option, enter a repository name and click
Create. -
Existing repository: Select an existing repository from the organization to start the project.
-
-
Click
Create. The deployment process will begin, and once it is complete, you'll be redirected to the Deploy Summary page.
GitHub Enterprise
GitHub Enterprise support is currently in open beta. If you want to use a GitHub Enterprise instance for your FastStore project, contact VTEX Support. Once enabled, follow the instructions below.
-
In the Git Provider section of the Integrations tab, you'll see two options:
-
Default (github.com): Select this to connect to a standard GitHub personal or organization account.
-
Custom Domain: Select this to connect to a GitHub Enterprise instance with a custom domain. For example,
{enterpriseName}.ghe.com, where{enterpriseName}is the name of your GitHub Enterprise account.
Once you define the Git Provider,you won't be able to change it later.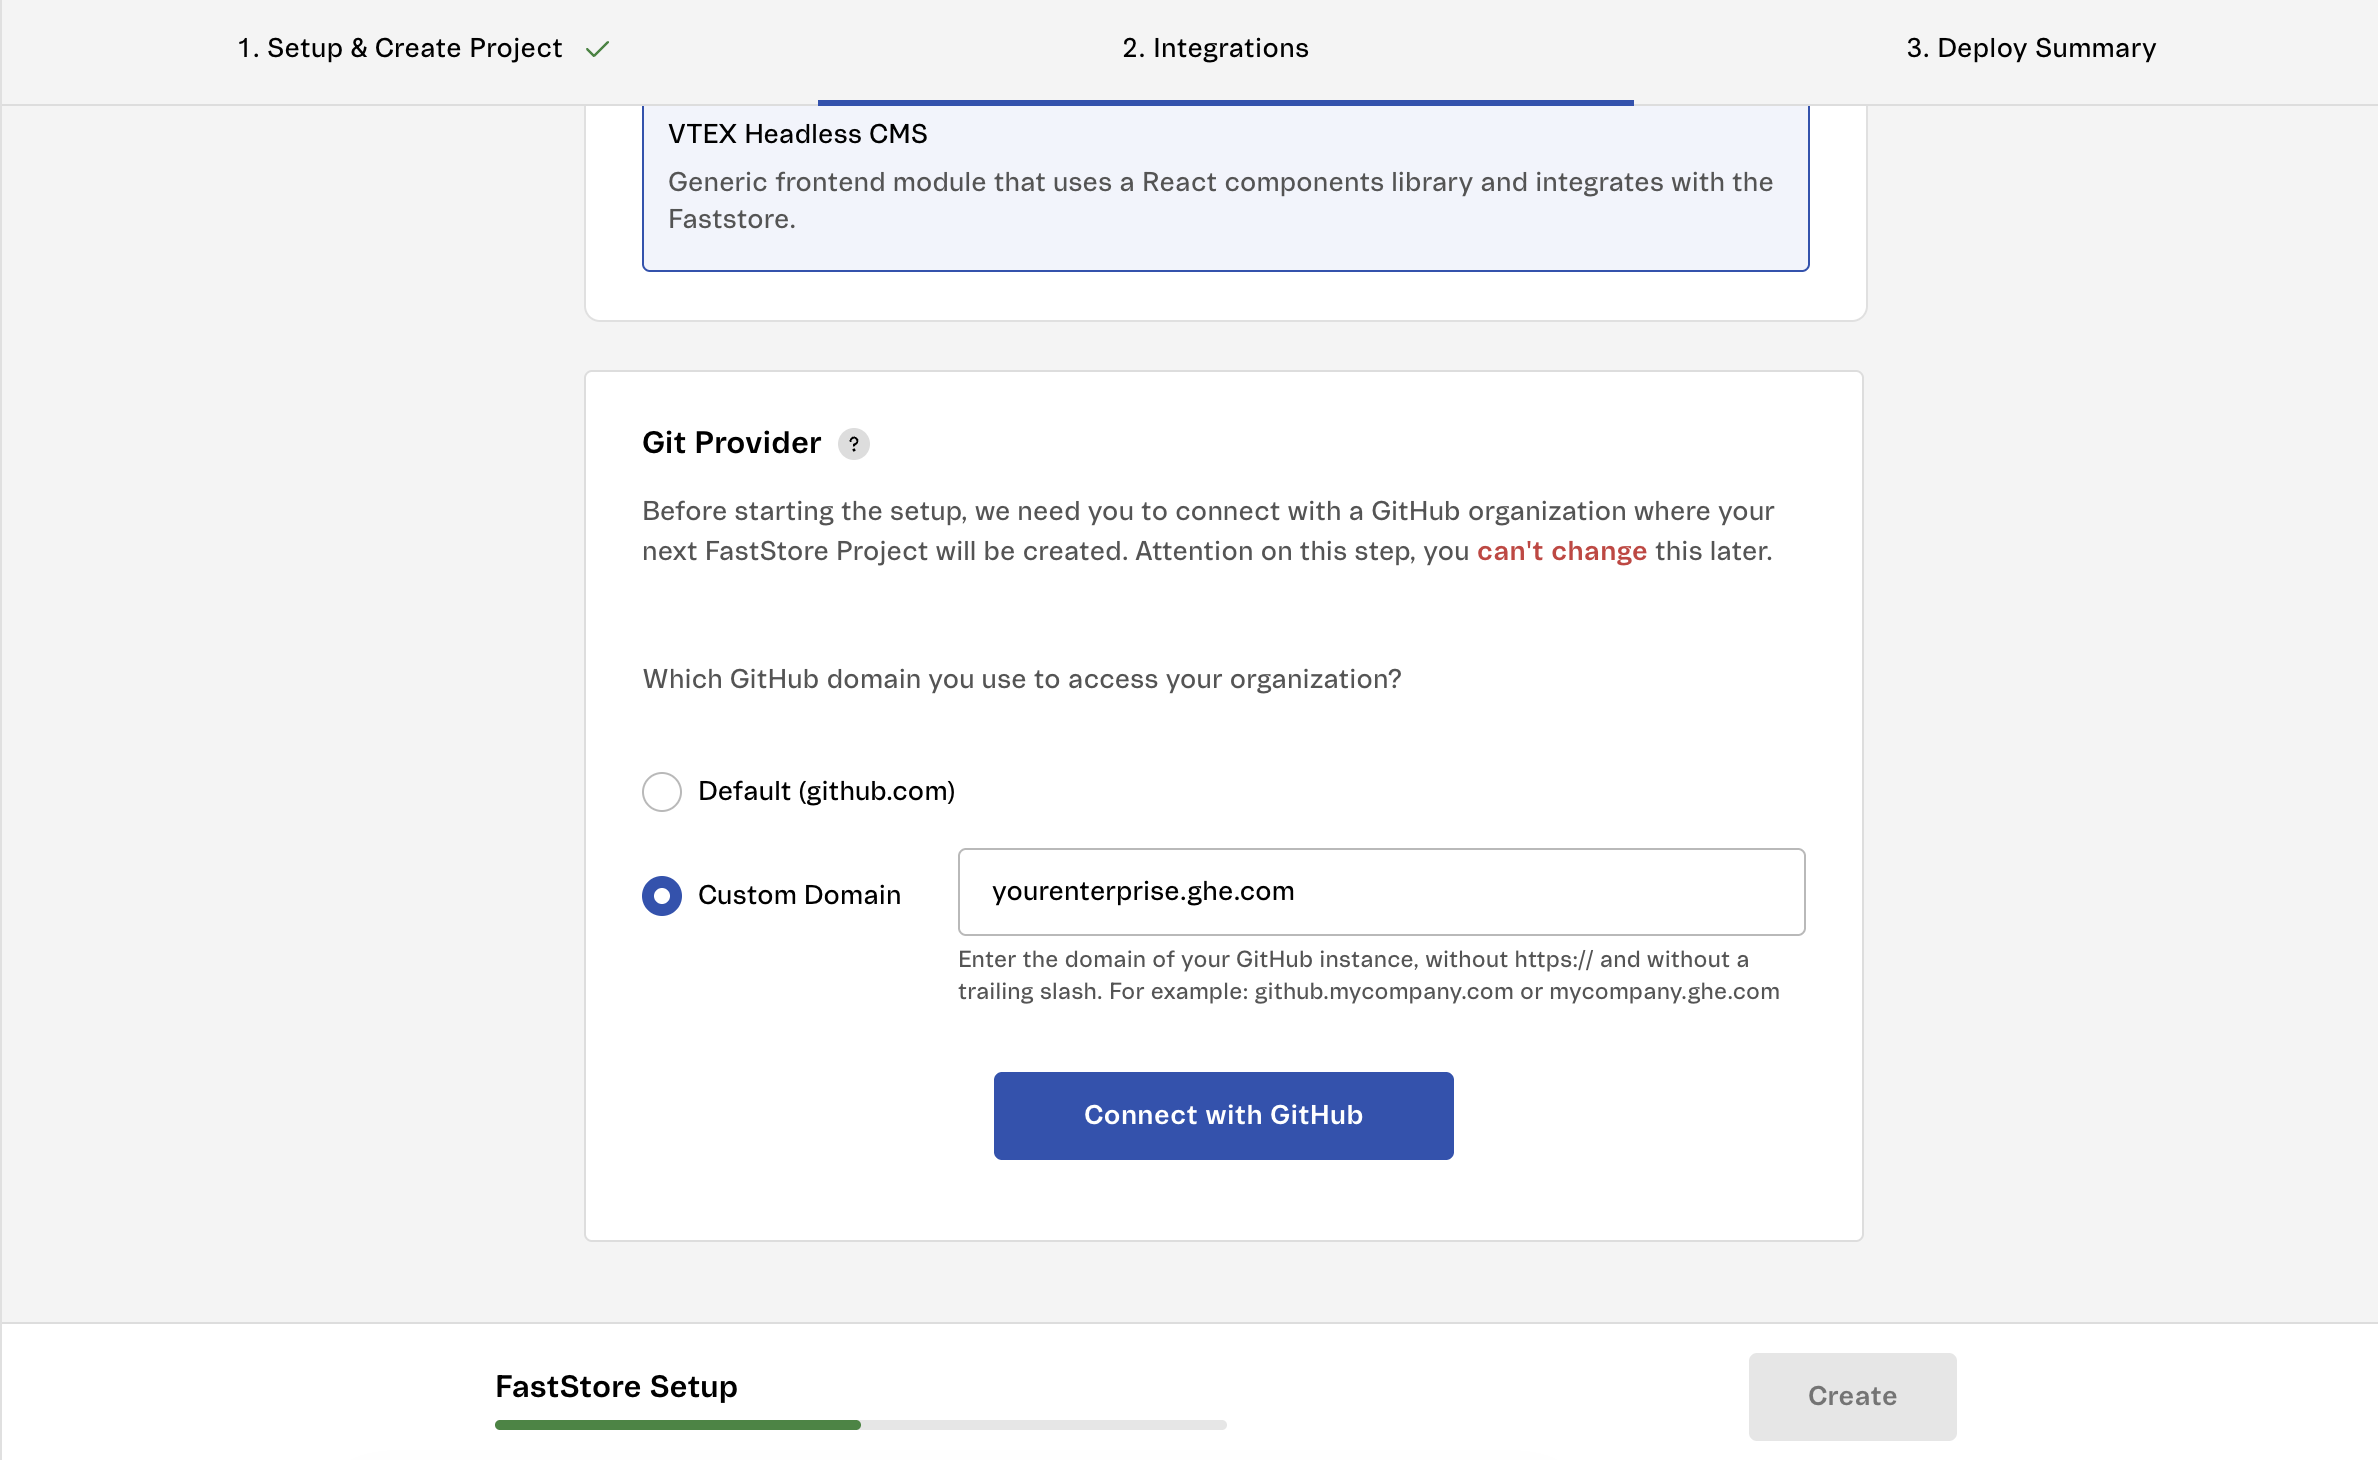
-
-
Click
Connect with GitHub. A new browser tab will open so you can integrate the app with GitHub.If you're not logged in to your GitHub account, you'll be prompted to log in in a new tab. Then, you can continue to the next step. -
Complete the GitHub app installation:
-
For Default (github.com): Once logged in to your GitHub account, choose the organization or personal account where you want to install the app. You'll be redirected to the Settings page on GitHub.
-
For Custom Domain (GitHub Enterprise): Once logged in to your GitHub Enterprise account, you'll be redirected to the app creation page for your custom domain. On the page, click
Create GitHub App for Organizationto complete the app creation process.
-
-
In Repository access, choose one of the following options: All repositories from the organization or Only select repositories.
-
Click
Install.
The following success message will be displayed:
_10Success! You can now close this page and proceed with the onboarding process.
After the success message is displayed, close the browser tab and continue the onboarding process in the VTEX Admin.
-
Now that the app is integrated with GitHub, select which repository you want to start the project:
-
New repository: Create a repository from scratch. In this option, you only need to type a repository name and click
Createto create the repository. -
Existing repository: Select an existing repository from the organization to start the project.
-
-
Click
Create. The deployment process will begin, and once it's complete, you'll be redirected to the Deploy Summary page.
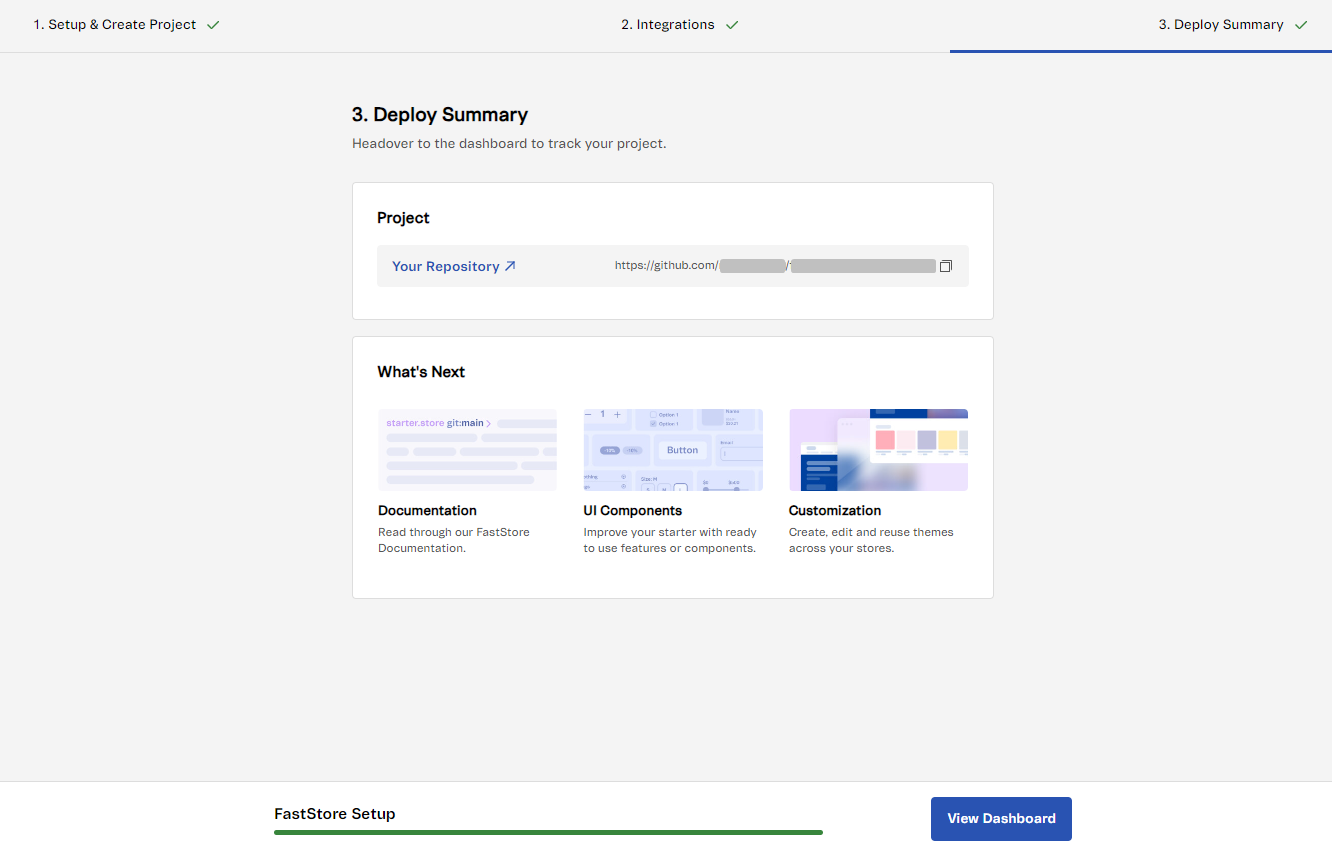
Step 3 - Deploying the project
After completing the setup for your store, the deployment process will begin. This process involves creating a GitHub repository and a default domain for your project. Once the deployment process is complete, you should see the following:
| Option | Description |
|---|---|
| Your repository | Access the store's GitHub repository and start setting up and customizing your store. |
| Documentation | Access the FastStore Portal Documentation. |
| Customization | Access the documentation for customizing your store. |
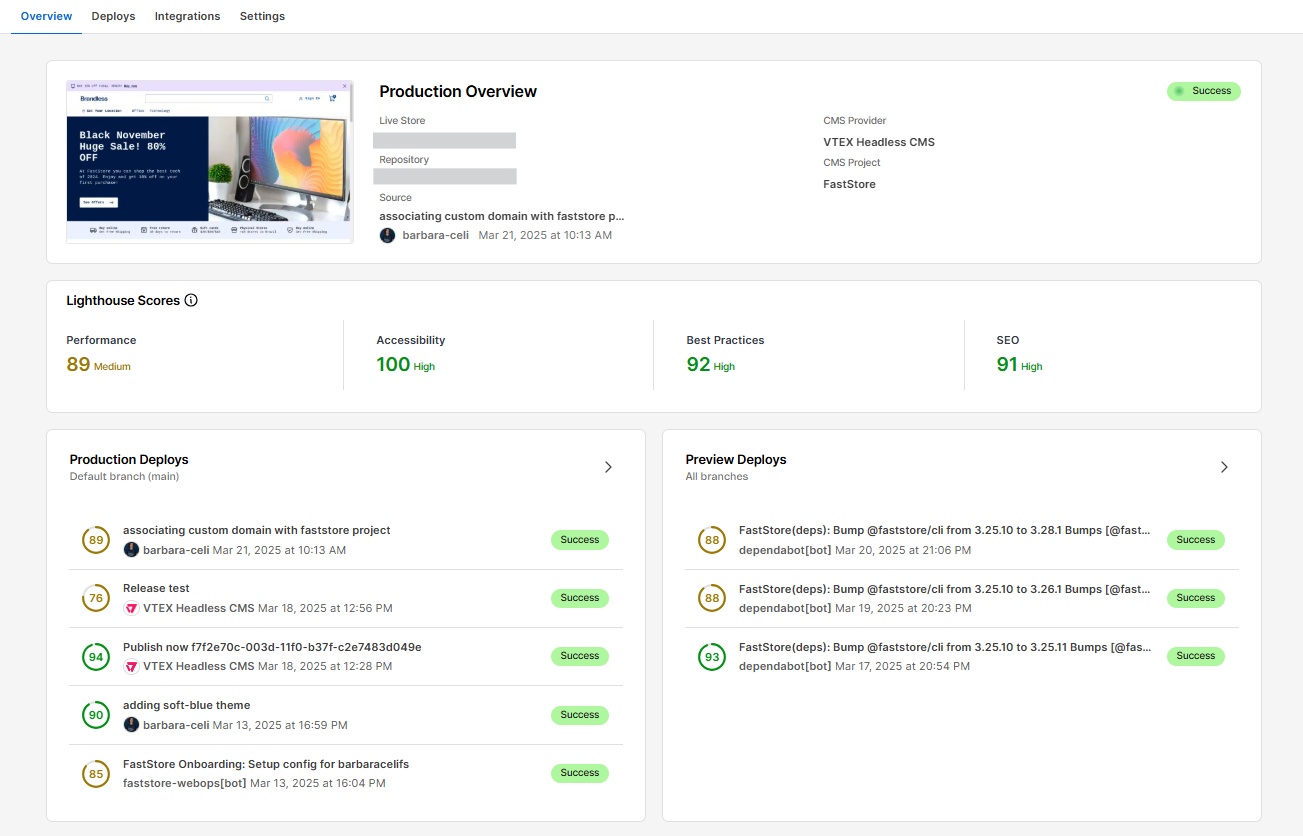
| View Dashboard | Access the Dashboard with the current status of your store, including its domains, deployed versions, store preview, and Lighthouse scores. For more information, see the Dashboard guide. |
If repository creation fails and no live preview is generated, click Retry to redeploy.
Next step
Now that your store is up and running with a live preview, set up your local development environment: 3. Running the project locally