Getting started with CMS
Set up your local environment to manage CMS schemas, from installing the required tools to scaffolding the folder structure in your storefront project.
In the CMS, developers define the content structure, including which fields exist, their types, and their names, while editors use the CMS Admin interface to create and publish pages based on that structure. This separation means every new content block starts with a developer writing a schema file, so an editor can configure the content block in the Admin panel.
This guide walks you through the tools and steps required to get started with CMS locally.
Before you begin
Before starting, make sure you have:
- A VTEX account with the Content Administrator role assigned to you in License Manager.
- Node.js is installed on your machine.
- A storefront project repository cloned locally (ex.:, a FastStore project).
Step 1 - Install the VTEX IO CLI
The VTEX IO CLI is the command-line interface for managing your VTEX account, installing apps, and running CMS commands. If you haven't installed it yet, run:
_10npm install -g vtex
After installing, log in to your VTEX account:
_10vtex login {accountName}
Replace {accountName} with your VTEX account name. You can verify you are logged in by running vtex whoami.
Step 2 - Install the Content plugin
The Content plugin extends the VTEX IO CLI with commands for managing CMS schemas. Install it by running:
_10vtex plugins install @vtex/cli-plugin-content
To confirm the installation, run:
_10vtex content
You should see an output listing the available CMS commands, such as content generate-schema, content init, and content upload-schema.
_12$ vtex content_12Generate a single schema file for CMS_12_12USAGE_12 $ vtex content COMMAND_12_12COMMANDS_12 content generate-schema Generate a single schema file for CMS_12 content init Initialize CMS folder structure with example files._12 content split-components Split CMS component files from sections.json_12 content split-content-types Split CMS content-type files from content-types.json _12 content upload-schema Upload a local schema to Schema Registry.
Step 3 - Install the CMS Admin app
The CMS Admin app (vtex.admin-content-platform-ui) provides the interface where editors manage content. You only need to install it once per account.
-
In the terminal, make sure you're logged in to your VTEX account.
-
Run the following command:
_10vtex install vtex.admin-content-platform-ui@0.x -
Verify the installation by opening the following URL in your browser, replacing
{account}with your VTEX account name:_10https://{account}.myvtex.com/admin/content-platformIf you see the CMS menu items (e.g., All content, Branches, Media), the app is installed correctly.
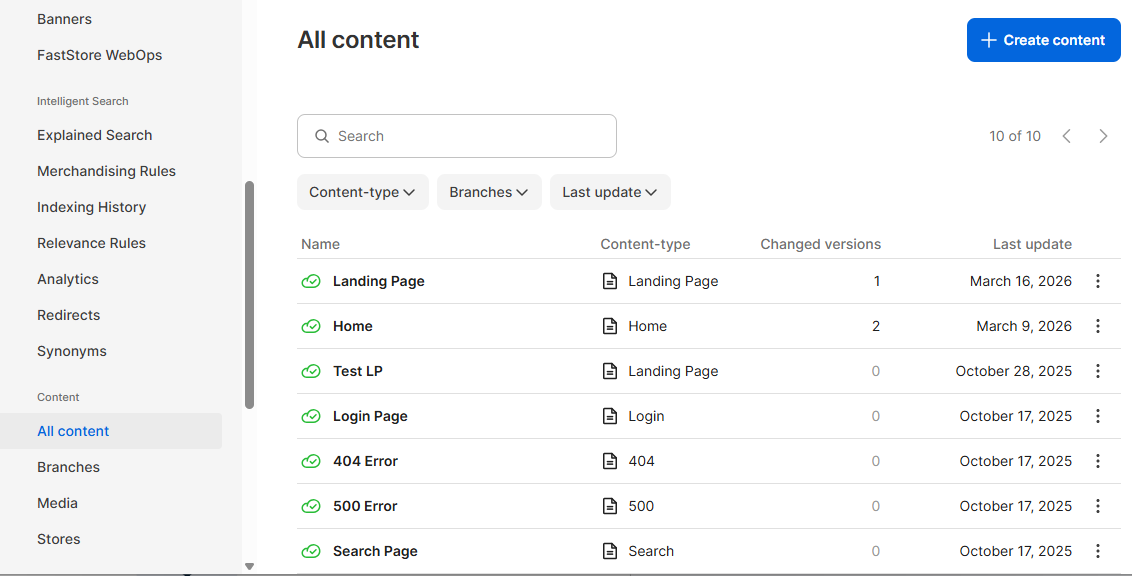
If you receive a
Permission deniederror when accessing CMS in the Admin, check the CMS schema sync errors troubleshooting guide.
Step 4 - Scaffold the CMS folder structure
The CMS folder structure organizes your component schemas and page definitions. Run the following command from the root of your storefront project:
_10vtex content init
When prompted, enter the store ID for your project or press Enter to use the default (faststore). The command creates the following structure:
_10cms/_10└── {storeId}/_10 ├── components/ ← Component schemas go here_10 └── pages/ ← Content type definitions go here
FastStore projects: The store ID typically matches the folder name inside
cms/. For other storefront technologies, use the store ID configured for your CMS integration.