Managing content with scopes and requiredScopes
Use scopes and requiredScopes to define which store sections can be added to specific pages, ensuring proper content structure for your store.
scopes and requiredScopes are Headless CMS schema definitions that determine which store sections can be added to specific pages (defined within Content Types).These features help manage the content structure and ensure store sections are used in appropriate contexts. For example, the Hero component is only available for the homepage or pages like the Product Details Page (PDP).
Before you begin
Update the @faststore/core package version
Make sure you have
@faststore/core version 3.0.18 or greater to benefit from this feature. If you do not have the updated package, follow the instructions in Updating the @faststore/core package version.Set Headless CMS
Make sure to have set up the Headless CMS files
content-types.json and sections.json in your store project by following the Setting up the Headless CMS guide. These files contain the store’s custom Content Types and sections.Understand FastStore customization options
While FastStore doesn’t support custom Content Types, you can create custom sections. To control where these sections appear, use the
requiredScopes property. Your custom sections will use the same scopes as FastStore’s default Content Types, ensuring consistency with the existing structure.scopes
scopes are labels that define the context provided by a Content Type. They help categorize Content Types based on their capabilities.The
scopes are string arrays within the definition of your Content Type in the content-types.json file. For example:
_10{_10 "id": "home",_10 "name": "Home",_10 "scopes": ["home"],_10 "isSingleton": true,_10 "configurationSchemaSets": [...]_10}
In this example, the
Home Content Type stores content for your homepage and has a home scope. This scope definition means that only sections designed for the homepage context can be used with this Content Type.Default FastStore scopes
When creating custom sections, you can restrict their usage to specific Content Types using these default scopes:
scopes name | Content Type |
|---|---|
custom | Landing Page |
global | Global Sections |
landing | Landing Page |
pdp | Product Details Page |
plp | Product Listing Page |
search | Search Page |
Custom sections must use these predefinedscopesin theirrequiredScopes. This ensures they integrate with FastStore's content architecture.
requiredScopes
requiredScopes define the Content Types a section can be used in. Similar to scopes, requiredScopes are specified as string arrays within the section definition in the sections.json file.A section is only available for a Content Type in Headless CMS if the Content Type's
scopes include at least one matching scope from the section's requiredScopes. Sections with an empty requiredScopes array can be used in any Content Type.While you can definerequiredScopesfor custom sections, they must use scopes from default Content Types to maintain consistency across all store sections.
In the following example, the
ProductShelf section is only available for PDPs:
_10{_10 "name": "ProductShelf",_10 "requiredScopes": ["pdp"],_10 "schema": {...},_10}
Empty requiredScopes
When a section has an empty
requiredScopes ([]), the section is available for all Content Types. In the following example, the Navbar section is available for use in any Content Type because it has no required scopes:
_10{_10 "name": "Navbar",_10 "requiredScopes": [ ],_10 "schema": {...}_10}
Default FastStore requiredScopes
When creating custom sections for Headless CMS, you can use these default
requiredScopes for specific Content Types:requiredScopes name | Section name |
|---|---|
custom | CrossSellingShelf |
pdp | CrossSellingShelf, Breadcrumb, and ProductDetails |
plp | Breadcrumb and ProductGallery |
search | ProductGallery |
Using scopes and requiredScopes
In the following example, we will set up a new Content Type
Custom Page to display a new Call To Action section.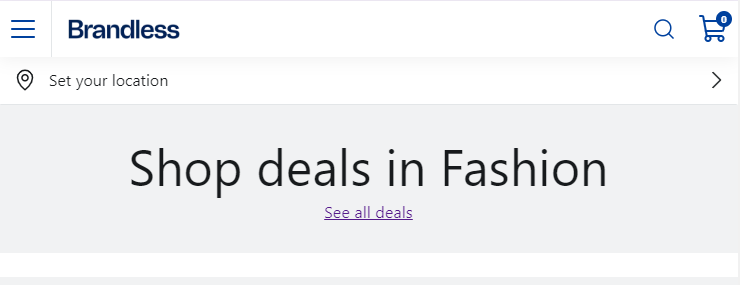
To better understand this tutorial, make sure you create the newCall To Actioncomponent by following the instructions in the Creating a new section guide.
Setting up the Headless CMS files
Make sure you have set up the Headless CMS filescontent-types.jsonandsections.jsonin your store project by following the Setting up the Headless CMS guide. These files contain the store’s custom Content Types and sections.
-
In the
content-types.jsonfile, create a newCustom PageContent Type by adding the following:We defined the"scopes": ["custom"]for the newcustomPageContent Type. Thecustomscope is also thelandingPagedefault scope in FastStore. -
In the
sections.jsonfile, add the following:
We defined that the
Call To Action section will only be available for customPage and landingPage Content Types.TheCall To Actionsection is also available for use with thelandingPageContent Type because thecustomscope is FastStore's default.
When editing the
Custom Page Content Type, the Headless CMS checks its scopes (custom) and matches them against the sections' requiredScopes (custom). Since the Call to Action section matches the custom scope (which is present in both the Custom Page and Landing Page Content Types), the section is available for use in these two Content Types.Syncing the Headless CMS changes
-
Open the terminal and run
yarn cms-syncto sync the new files created in the previous step. -
In the VTEX Admin, go to Storefront > Headless CMS, and open the FastStore project.
-
Click on the
Create Documentdropdown. -
Click on
Custom Page:
-
In the
Sectionstab, click onAdd Section(+). -
Select the Call To Action section.
-
Set the section fields as you wish.
-
Click
Save. -
Click
Previewto preview the saved content. You will see a section similar to the image below with a title Shop deals in Fashion and a Call To Action buttonSee all deals.