4. Integrating the VTEX Order Placed and My Account
To create a complete digital commerce experience for your FastStore project, you need to provide shoppers with essential features like a Checkout and My Account pages. In this guide, learn how to implement the Order Placed page, which displays a successful message right after a successful checkout, and a My Account space, which allows customers to manage their orders and personal data (e.g., profile information, password, addresses, and credit cards) on a single page.
The Order Placed and My Account pages run on VTEX's secure subdomain, separate from your FastStore domain. Customizing these pages requires using VTEX IO. In this guide, we'll use VTEX IO to build the necessary VTEX apps to integrate these pages with your store, but deep knowledge of VTEX IO is not required.
Before you begin
Before proceeding further, make sure you already have:
- Integrated your FastStore project with the VTEX Checkout. For more information, see Integrating the VTEX Checkout.
- Installed the VTEX IO CLI on your machine. For more information, see VTEX IO CLI installation and command reference.
- Installed the
vtex.edition-store 5.xversion on your VTEX account. - Stores using Legacy CMS Portal technology: the
vtex.edition-store 3.xversion should be installed on your VTEX account. - Run
vtex edition getto check if thevtex.edition-storeapp is installed on your account. If not, open a support ticket to communicate that you need thevtex.edition-store@5.xto be installed on your account so you can integrate your FastStore project with the VTEX platform. - Install npx.
Instructions
Step 1 - Creating the Order Placed and My Account app
-
Open the terminal and clone the
faststore-vtex-integrationsproject into your local files._10npx degit vtex/faststore-vtex-integrations -
Open the
faststore-vtex-integrationsdirectory in any code editor of your preference. -
Open the
manifest.jsonfile and update the value of thevendorfield with the name of your VTEX account. -
Using the terminal, log in to your VTEX account._10vtex login {account}Replace the value between curly brackets with the name of your account.
-
Create a new development workspace._10vtex workspace use {workspace}Replace the value between curly brackets with any name of your preference, making sure the name you choose is not already taken.Enter
Yto continue creating the new workspace. -
Link your app to sync your local changes with the VTEX IO cloud development environment._10vtex link
-
Now, open a new browser window and access
https://{workspace}--{account}.myvtex.comto see your changes live. Remember to replace the values between curly brackets according to your scenario. -
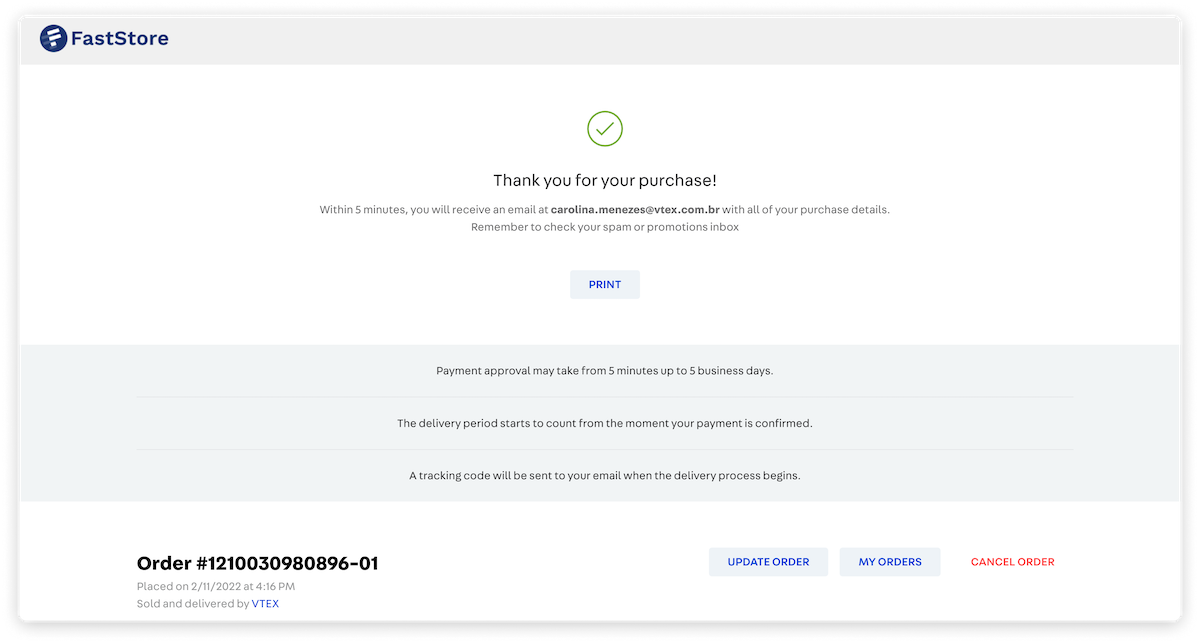
Add items to your shopping cart and proceed to checkout. Place an order and observe if you are being taken to the Order Placed page:
Step 2 - Updating the store logo
After accessing the Order Placed page, you probably noticed the FastStore logo. Let's update it so the Order Placed and My Account pages display with your store logo.
-
Save your logo inside the
assetsfolder. -
Open the
store/blocks/header.jsoncfile and update thetitle,href,url, andwidthvalues of your store logo (logo#desktopandlogo#mobile) according to your scenario: -
Save your changes.
Step 3 - (Optional) Styling the Order Placed and My Account header
If you want to change the style of the header displayed on the Order Placed and My Account pages, you can update the
vtex.flex-layout.css and vtex.store-header.css files contained in the styles/css folder. For more information, please refer to this guide.Step 4 - Publishing your app
Now that everything is as expected, you need to make your changes publicly available to your store shoppers. To do that, take the following steps:
-
Open the terminal and create a production workspace._10vtex use {workspace} --production
-
Change to the
faststore-vtex-integrationsdirectory. -
Release a new app version._10vtex release major stable
-
Publish your app as a candidate version._10vtex publish
-
Install the candidate version indicating the app's version as follows:_10vtex install {vendor}.{name}@{version}Replace the values between curly brackets according to the
manifest.jsonfile of yourfaststore-vtex-integrationsapp. -
Deploy the candidate version as a stable version._10vtex deploy {vendor}.{appname}@{appversion}
-
Promote your Production workspace to master to make your changes publicly available to your store shoppers._10vtex workspace promote
That's all. Now, if you place an order in your store, you'll be presented with the Order Placed page. Similarly, you'll also have access to the My Account page.