Using CSS handles for store customizations
Learn how to customize your storefront using CSS handles.
In this guide, you'll learn how to customize your storefront using CSS handles. These unique identifiers assigned to HTML elements allow you to target and add CSS classes to a component within your store theme.
CSS handles can override a storefront's default styles, enabling independent customization of specific blocks within a store theme. For example, consider you want to customize the menu-item blocks of the menu component. You can apply a general customization or customize a single block.
Instructions
Identifying CSS handles
-
Open your browser and go to your store's development workspace using this URL:
https://{workspace}--{account}.myvtex.com?__inspect. Replace the values inside curly braces with your specific workspace and account names.Always use a development workspace and make sure your store domain is under
myvtex.com. -
Hover your mouse over the page element you want to customize. A box will appear showing the available CSS handles (names starting with
.), CSS file names, and related information.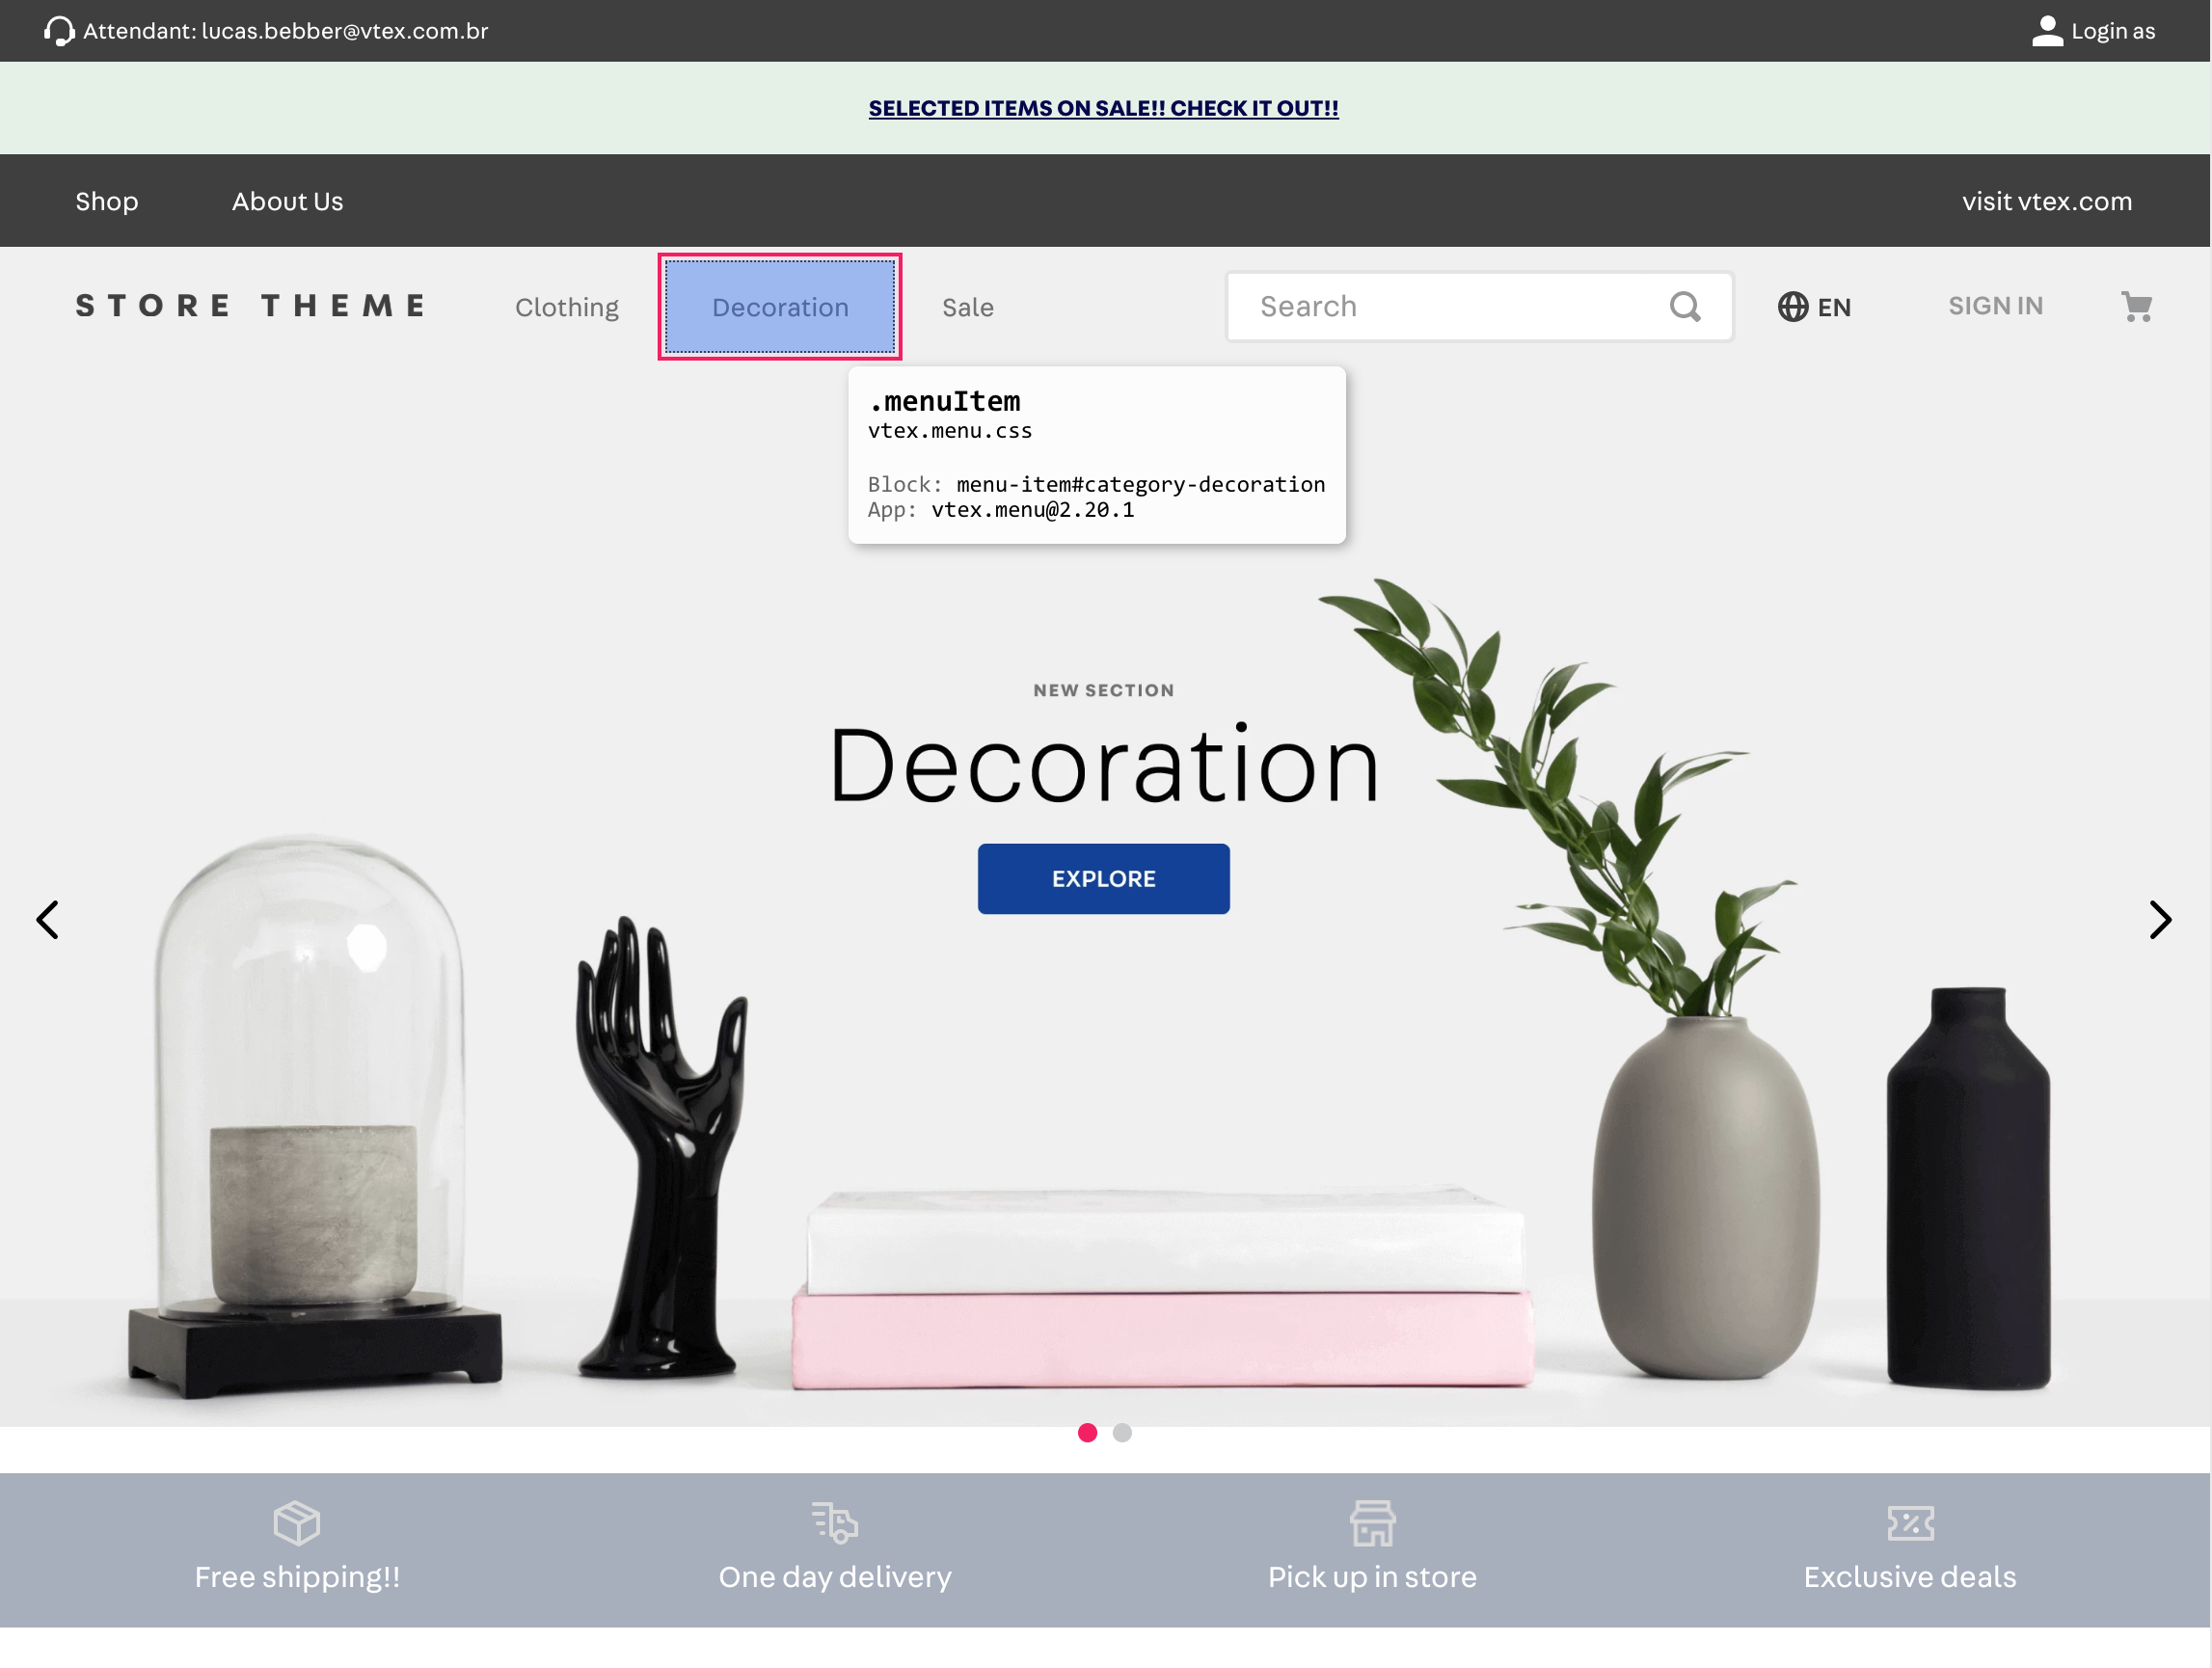
-
Check the CSS handles table in the app or block documentation that renders the HTML element. This allows you to confirm whether the inspected handle is valid and if the customization requires another add-on, such as the HTML element attribute.
If a handle requires an HTML element attribute for customization, inspect the page again using your browser's developer tools instead of the
?__inspectoption. Find the desired HTML element and copy its associated attribute for the upcoming customization.
Applying a general customization
Follow the steps below to apply a style that affects every block instance:
-
Open your store theme code using the code editor of your choice and go to the
cssfolder. -
In the
cssfolder, create a new CSS file named after the component you're targeting. For example,vtex.menu.css. -
In the new file, use one of the listed CSS handles and customize its properties. For example:
_10.menuItem {_10background: rgba(0, 0, 0, 0.2);_10margin: 5px;_10border-radius: 5px;_10}If the handle requires an add-on, such as the HTML element attribute or a handle modifier, add it next to the handle name, following this format:
{cssHandleName}--{addon}. -
Link your app to see the changes. Once linked, the new style applies to all
menu-itemblocks in the workspace you're working on.
Customizing a single block
To customize a single, specific block without affecting other blocks of the same type, use the blockClass property, which serves as the block's unique identifier for customization:
-
In the
jsonfile where your target block is declared, add the propblockClassto the element you want to customize. Assign any unique name as its value. For example:_10"menu-item#your-item": {_10"props": {_10...,_10"blockClass": "header"_10},_10..._10} -
Save the file to update the workspace you're working on.
-
Inspect the element by following the instructions in Identifying CSS handles. You'll see a new, more specific CSS handle composed of the original handle and the
blockClassvalue you provided.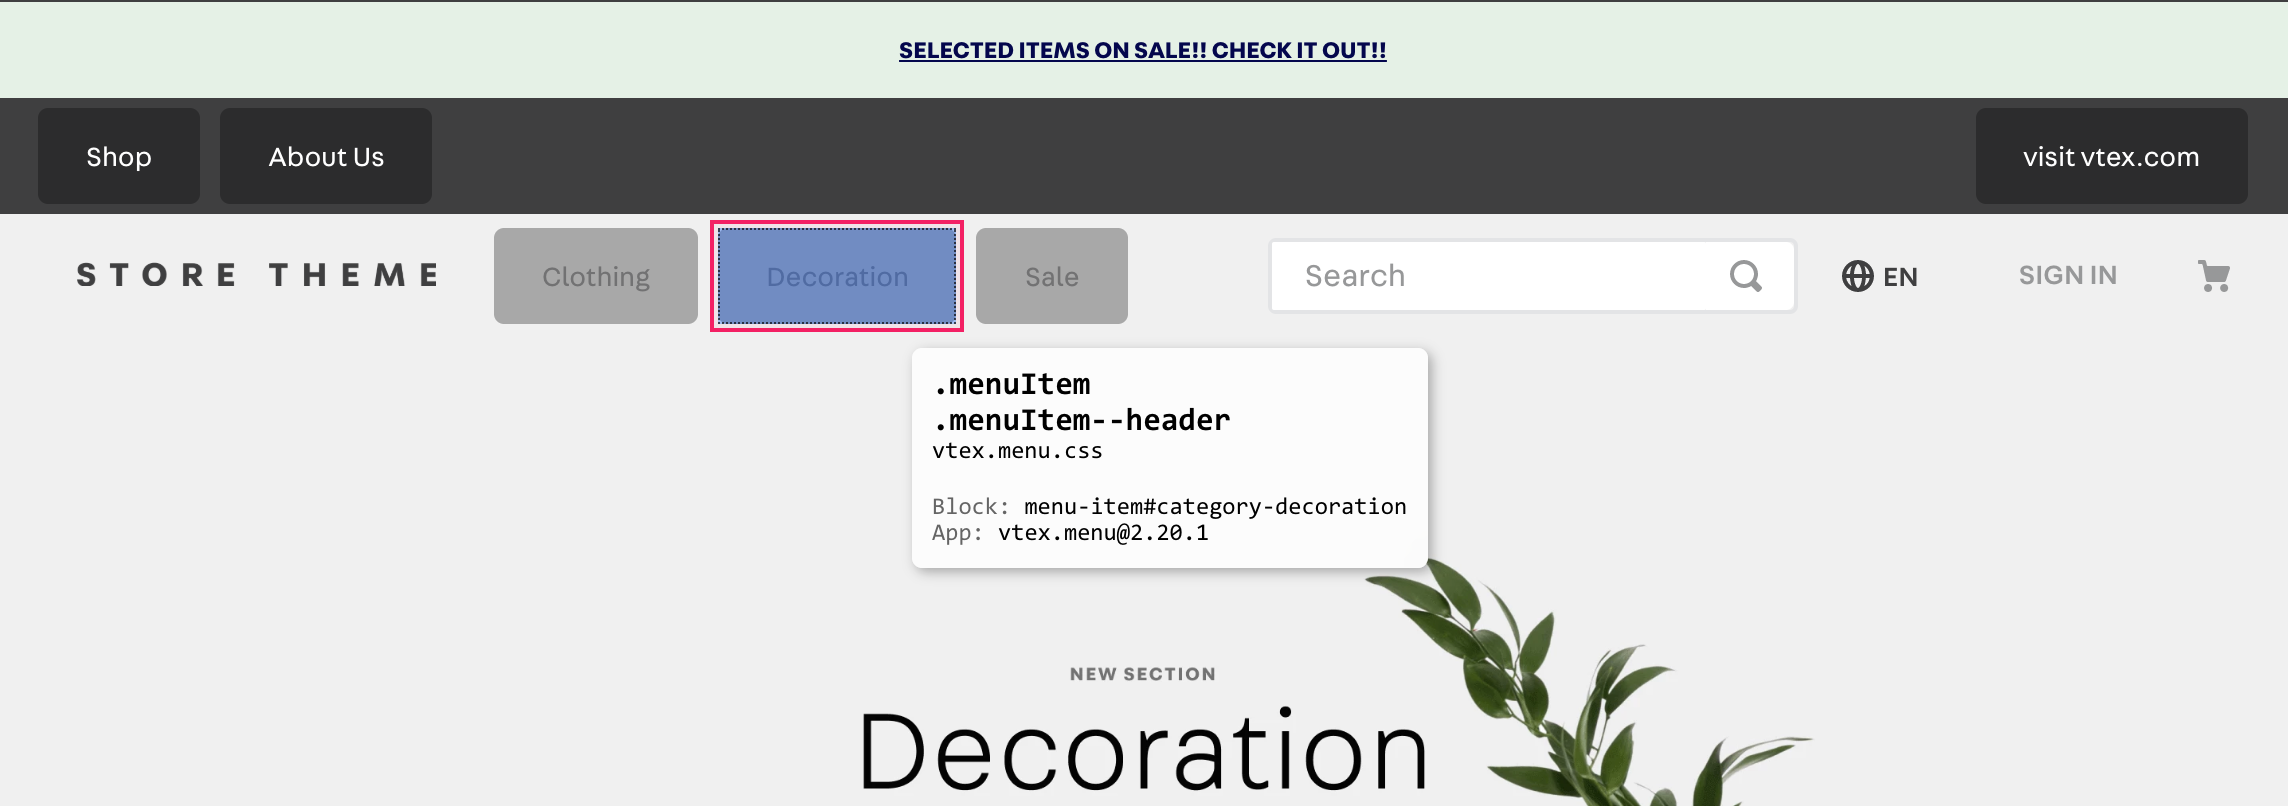
-
In your CSS file, you can now use this new class (for example:
.menu-item--header) to target only the block with that specificblockClass.
Best practices
CSS selectors are commonly used for customization, but this depends on the HTML structure. If you change the HTML, it can affect your customizations. To standardize CSS customization and avoid potential layout issues, we recommend using CSS handles only for store customizations.
Customization using CSS selectors is mostly deprecated. The following selectors are the only ones allowed for store customization:
- Class selectors (for example,
.foo) - Pseudo-selectors
:hover,:visited,:active,:disabled,:focus,:local,:empty, and:target :not():first-childand:last-child:nth-child(even),:nth-child(odd), and:nth-child(2n), or any other step like4n,5n, and so on.- All pseudo-elements, such as
::before,::after, and::placeholder - Space combinator (for example,
.foo .bar) [data-...]:global()for selection of global CSS classes, such as::global(vtex-{AppName}-{AppVersion}-{ComponentName})for selecting elements from different apps.:global(.tachyons-class)for Tachyons utilities.
- Media queries, such as
@media (max-width: 768px)(responsive override for screens up to 768px wide) and@media (prefers-reduced-motion: reduce)(remove transitions if user prefers reduced motion).
CSS selectors that are not included in this list, such as
:nth-child(2),foo > bar, and[alt="bar"], aren't supported. Using them can cause issues such as app linking failures.