Implementing Delivery Promise
This feature is in closed beta, which means that only selected customers have access to it. If you're interested in implementing it in the future, please contact our Support team.
Delivery Promise is a feature that provides accurate and reliable delivery estimates for available products based on the customer's location. It ensures that customers only see products that are in stock and can be delivered to their address or picked up at a nearby location.
This solution continuously updates product availability throughout the buying journey by responding to changes in catalog, pricing, inventory, or shipping settings. These updates are then sent to Checkout and Intelligent Search, ensuring customers see up-to-date options based on their region.
In this guide, you'll learn how to configure Delivery Promise in your FastStore project.
To understand how Delivery Promise operates, see the Understanding Delivery Promise operation guide. For more information about Delivery Promise components, see the Working with Delivery Promise components guide.
Default settings
Delivery Promise is defined in the
deliveryPromise section of the discovery.config.js file.The default settings are:
enabled: When set to true, Delivery Promise activates, allowing the store to provide delivery estimates based on the user's location.mandatory: When set to true, users must provide a postal code. By default, this is false, allowing users to browse and add items to the cart without entering their postal code. However, without a postal code, the accuracy of delivery information may be limited.
Before you begin
Get the search-session app
Check if you have version
0.5.0 or later of the search-session app installed.- In your terminal, run the
vtex listcommand. - In the returned results, search for the app.
- If you don't have this app installed, run the command
vtex install vtex.search-session.
Enable the VTEX Intelligent Search app
To enable the Intelligent Search app, check the version of your Edition Store account.
In your terminal, log in to your account by running
vtex login {accountName} and run vtex edition get to see the Edition app version installed. Remember to replace the values between curly braces with your account name.Accounts with vtex.edition-store@5.x
If your account is using the
vtex.edition-store@5.x major version, the VTEX Intelligent Search app is already included, and you need to integrate it via VTEX Admin.To integrate VTEX Intelligent Search, access Store Settings > Intelligent Search > Integrations in the VTEX Admin, and click
START INTEGRATION.Accounts with an edition version older than 5.x
-
In the VTEX IO CLI, log in to your VTEX account by running
vtex login {accountName}. Remember to replace the values between curly braces with your account name. -
If the VTEX Intelligent Search app isn't installed in your account, run the following command:_10vtex install vtex.search-resolver@1.x vtex.admin-search@1.x
After installing the app, integrate it by going to Store Settings > Intelligent Search > Integrations in the VTEX Admin, and clicking
START INTEGRATION.Accounts that want to migrate to version 5.x
If you're using a different major version and want to migrate, please open a ticket with VTEX Support and request the installation of Edition app
vtex.edition-store@5.x.Update the @faststore/cli package
Run the
yarn upgrade @faststore/cli command to update the @faststore/cli package to the latest version.Open a ticket with VTEX Support
Open a ticket with VTEX Support and request the activation of Delivery Promise in your account.
Instructions
Step 1 - Enabling deliveryPromise
-
Open your FastStore project using the code editor of your choice.
-
Open the
discovery.config.jsfile. -
Under the
deliveryPromisesection, set theenabledvalue totrue. Set themandatoryvalue based on your business needs. Learn more in the Default settings section.
Step 2 - Syncing your FastStore project with Headless CMS (legacy)
Run the
faststore cms-sync command to sync the cms folder of your FastStore project with Headless CMS (legacy).The expected response is the message
CMS synced successfully.... The native regionalization components and sections will be automatically updated. You can check them in the VTEX Admin:-
Regionalization component: Go to Storefronts > Headless CMS > Global Sections > NavBar > Navigation > Regionalization.
-
Region Bar section: Go to Storefronts > Headless CMS > Global Sections > Region Bar.
-
Region Modal section: Go to Storefronts > Headless CMS > Global Sections > Region Modal.
You only need to add a new section:
Region Popover.Step 3 - Adding the Region Popover section
RegionPopover is a section that manages user location inputs. It's used when location data is missing or the store default postal code is applied. RegionPopover is available in @faststore/core and uses the Popover component as its UI base.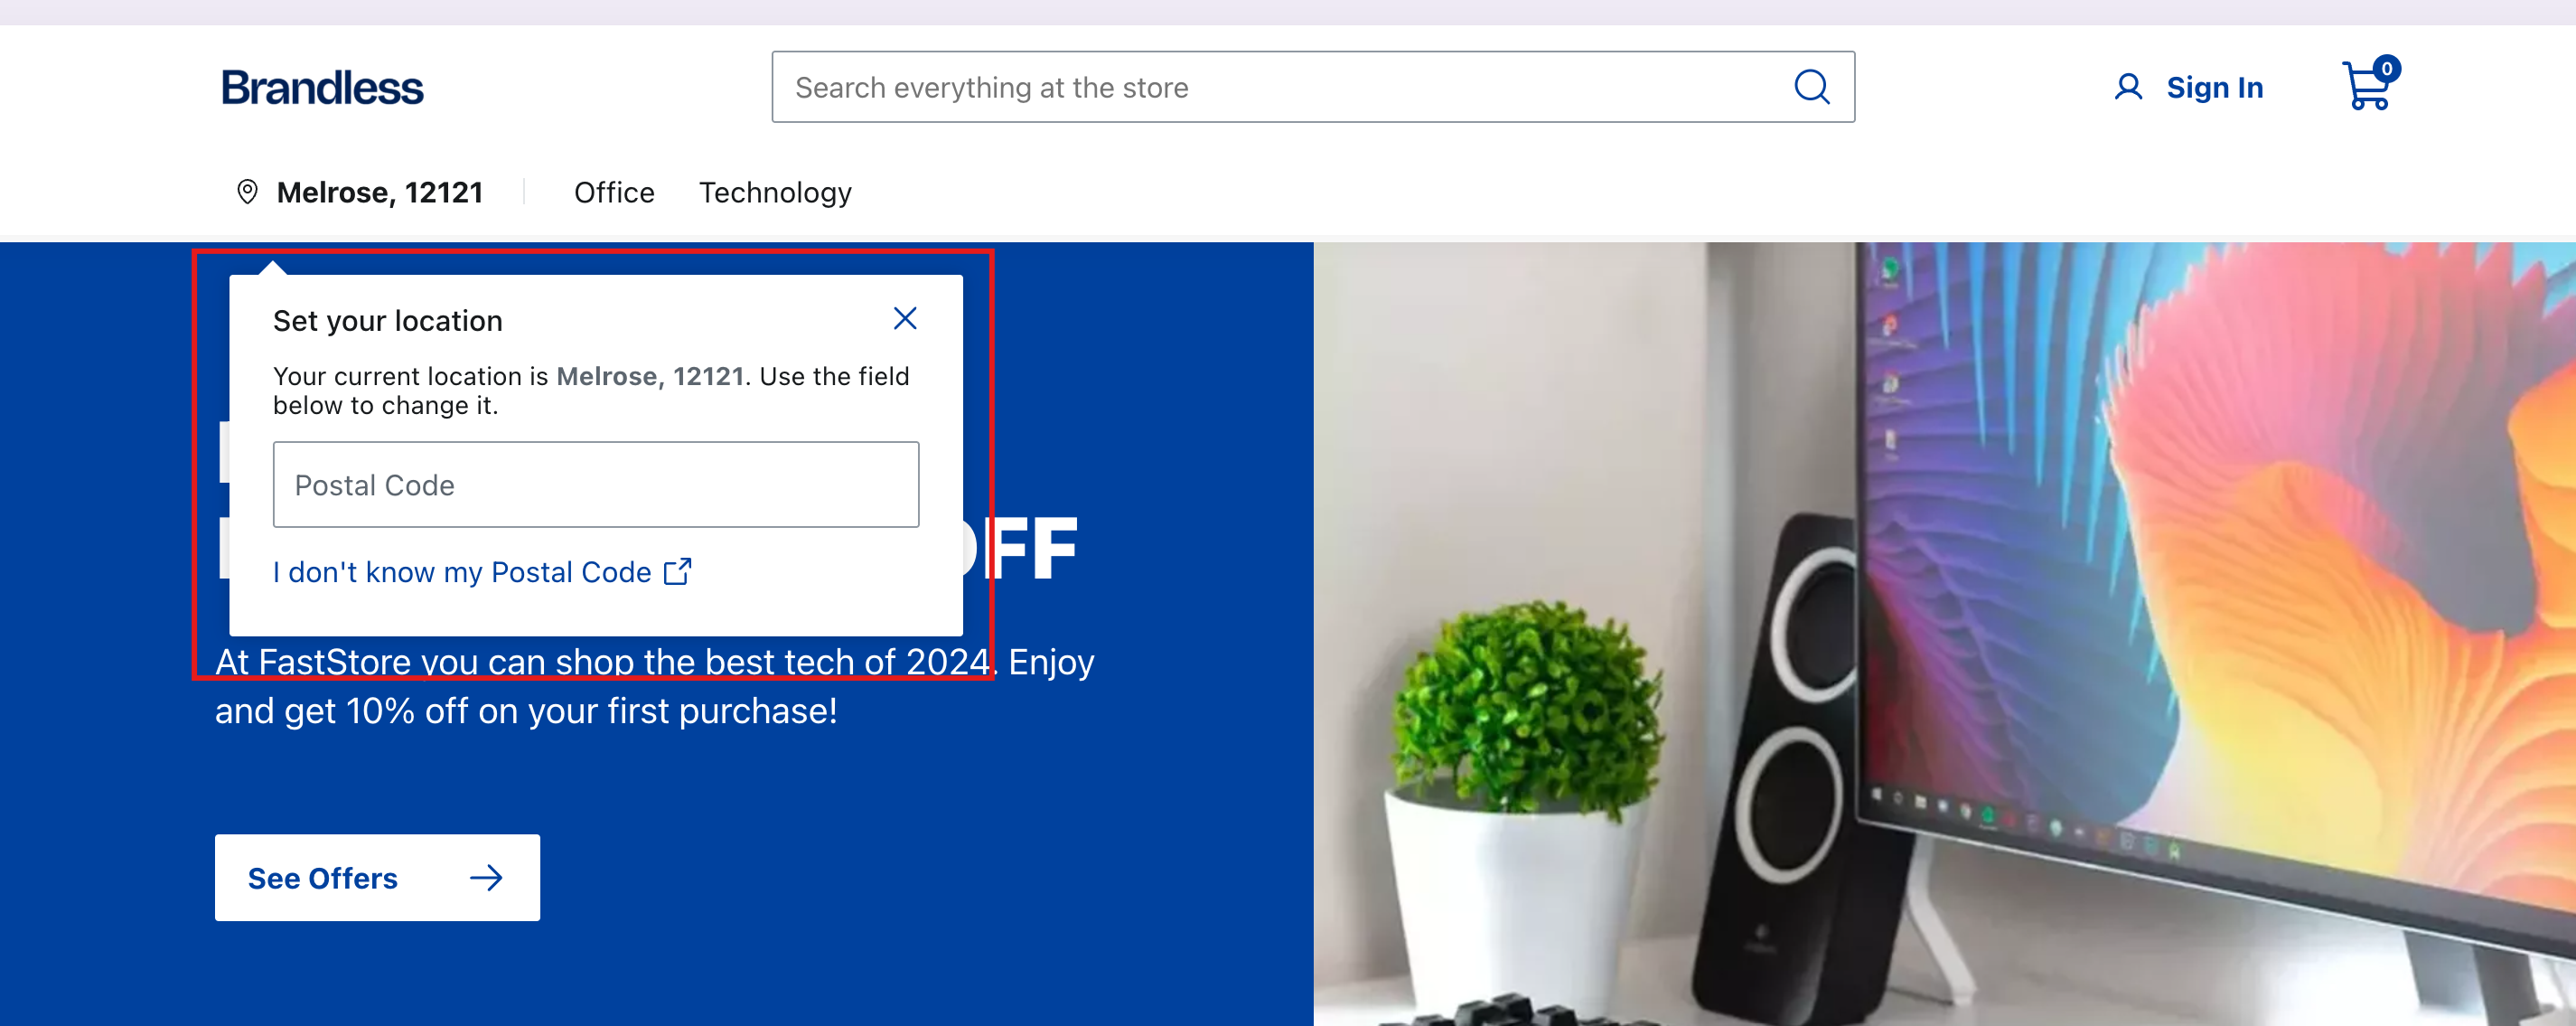
RegionPopover code
Follow the steps below to add the
RegionPopover section to Headless CMS (legacy).- In the VTEX Admin, go to Storefront > Headless CMS > Global Sections.
- In the Sections tab, click
+to open a modal with a list of section options. - Search for the Region Popover section and click it to add it.
- Set the
TitleandClose popover aria-labelfields with your values. - Click
Saveto save your changes. - Click
Publishto open a dropdown list with the optionsAdd to Release(to schedule the update) andPublish now(to publish immediately).
Learn more in Adding sections to Headless CMS (legacy)
Step 4 - (Optional) Defining a default postal code
The default postal code is a fallback mechanism when users don't provide a location, aren't logged in, or have no saved address.
To set a default postal code for your store, follow the steps below:
-
Open your FastStore project using the code editor of your choice.
-
Open the
discovery.config.jsfile. -
In the
sessionobject, set your defaultpostalCode. See the example below:
Managing Delivery Promise filters and labels
Delivery Promise filters help shoppers narrow products by delivery/pickup availability for their location, while badges visually indicate shipping/pickup availability for the shopper's location when Delivery Promise data exists.
By default, filters and badges are active once Delivery Promise is enabled and implemented in the store. However, you can deactivate them (Global Filter by Pickup Point, Delivery Option, and Badges and edit their labels in the Headless CMS (legacy). To do this, follow these steps.
For more details on filters and badges, see the Working with Delivery Promise components guide.
- Access the VTEX Admin and go to Storefront > Headless CMS.
- Click the Global Sections Content Type.
- Click the Settings tab.
- Go to the Delivery Promise section and change the labels and settings to suit your scenario.
Enabling the Availability (In-stock) filter
By default, the Availability filter is disabled in the Headless CMS (legacy). To enable this feature, follow these steps:
Setting up hideUnavailableItems
-
Open your FastStore project in the code editor of your choice.
-
Open the
discovery.config.jsfile. -
In the
hideUnavailableItemsproperty, change the value tofalse._10..._10api: {_10storeId: "newstore",_10workspace: "master",_10environment: "vtexcommercestable",_10hideUnavailableItems: false,_10incrementAddress: false,_10},_10... -
Create a new branch and open a pull request to deploy the change made in the
discovery.config.jsfile to production.
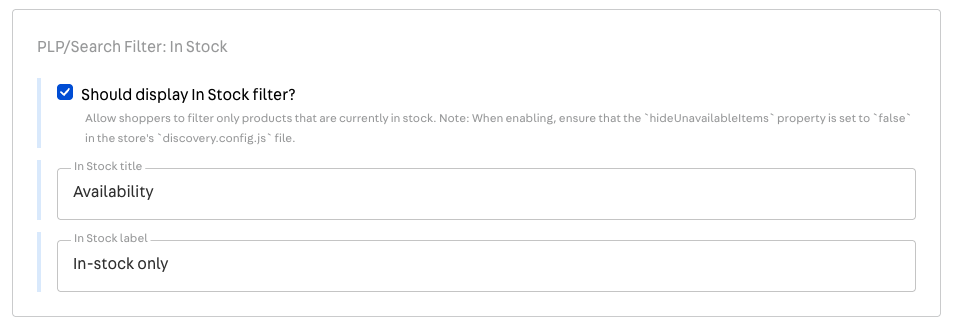
Enabling the filter in the Headless CMS (legacy)
After changing the
hideUnavailableItems value to false, you can enable this filter in the Headless CMS (legacy).- Access VTEX Admin and go to Storefront > Headless CMS.
- Click the Global Sections Content Type.
- Click the Settings tab.
- Go to the Delivery Promise section and check the field Should display In Stock filter?