Personal Shopper is a platform that allows businesses to host live shopping sessions in the store, enabling real-time interaction with customers. During these sessions, a personal shopper can showcase products, answer questions, and add products to the customer's cart. This interactive shopping experience is designed to engage customers, increase sales, and build brand loyalty.
Personal Shopper is designed for sellers who want to show new collections to high-value customers or B2B clients. These customized live sessions are intended to provide a more personalized shopping experience than public Live Shopping.
The Personal Shopper app is compatible with desktop and mobile devices.
| Personal Shopper on mobile | Personal Shopper on desktop |
During a live in the Personal Shopper app, the personal shopper and the customers have access to various features and functionalities. Here are some of the key features and their respective availability for personal shoppers and customers:
| Feature | Description | Advisor | Customer |
|---|---|---|---|
| Camera and microphone settings | Control the camera and microphone settings to turn them on or off during the call. | ✅ | ✅ |
| Share live link | Share the live link with others to enable additional participants to join the conversation. | ✅ | ✅ |
| Screen sharing | Share screens to allow participants to view the entire screen or specific applications. | ✅ | ❌ |
| Chat | Communicate through text messages to exchange information and facilitate real-time conversation. | ✅ | ✅ |
| File sharing | Send files during the call to enable the sharing of relevant documents or images. | ✅ | ✅ |
| Search for specific products and provide recommendations to the customer. | This allows the shopper to immediately add the recommended products to the cart and complete the purchase seamlessly within the same process. | ✅ | ❌ |
| Satisfaction survey | Complete a survey to provide feedback on the call experience, ensuring service quality and gathering valuable insights for improvement. | ❌ | ✅ |
| Product highlight and add to cart | When an advisor sends a product, customers can add it to their cart immediately, selecting any variations within the same modal, with a notification confirming it was added. | ❌ | ✅ |
| Picture in Picture | When the customer clicks the Picture in Picture icon, the sales associate's image appears in a smaller window. This allows the customer to browse the website while keeping the advisor visible. | ❌ | ✅ |
Personal Shopper is available in the following languages: English, Spanish, Portuguese and Catalán.
To get started, follow this guide to install the Personal Shopper app in your VTEX environment.
Before you begin
Personal Shopper is a paid app with different subscription plans: Standard and Pro. The subscription cost depends on your chosen plan, with each providing a specific number of monthly live stream minutes.
For more information about plans and pricing, see the Personal Shopper page.
Finally, before proceeding with this guide, you must install VTEX IO CLI on your machine. For more information, check the guide VTEX IO CLI.
Installation
To install the Personal Shopper app, follow the steps below.
We recommend creating a workspace. Otherwise, it will be installed in the main workspace by default.
Prerequisites
- It is necessary to have the CLI VTEX. Go to the next documentation for install it: VTEX IO CLI
Initial Steps for VTEX IO and VTEX CMS/Headless accounts
-
Open the terminal and log in to your VTEX account using VTEX IO CLI.
-
Install the Personal Shopper app by running the following command:
_10vtex install vtexventures.personal-shopper-free
For VTEX IO
-
In the
manifest.jsonfile, add the Personal Assistant app to the list of peer dependencies for the theme:_10"peerDependencies": {_10"vtexventures.personal-shopper-free": "0.x"_10} -
Add the
pa-widgetblock to display a call-to-action button in the page. For example:
- Product Details Page (PDP) (
product.json):
_10{_10 "store.product": {_10 "children": ["pa-widget"]_10 }_10}
- Home page (
home.json):
_10{_10 "store.home": {_10 "blocks": ["pa-widget"]_10 }_10}
- Deploy your changes to the Store Theme app by publishing a major version. For details, refer to the guide: Making Your New App Version Publicly Available.
Note: Adding a new peer dependency to the Store Theme app requires deploying a new major version of the app. After making the changes, publish this new major version and install it in a productive workspace (not master) to ensure it works as expected before deploying it to the live environment.
-
In the productive workspace, follow the guide Migrating CMS Settings After a Major Update to update the content for the new version.
Note: Proceed with caution to avoid deleting store content..
-
Validate the workspace and confirm the configured content. Once ready, promote the workspace to master (it will be automatically deleted after promotion).
For VTEX CMS/Headless
Note: Wherever you find {{nameOfTheAccount}} you must replace it with the name of the account/store.
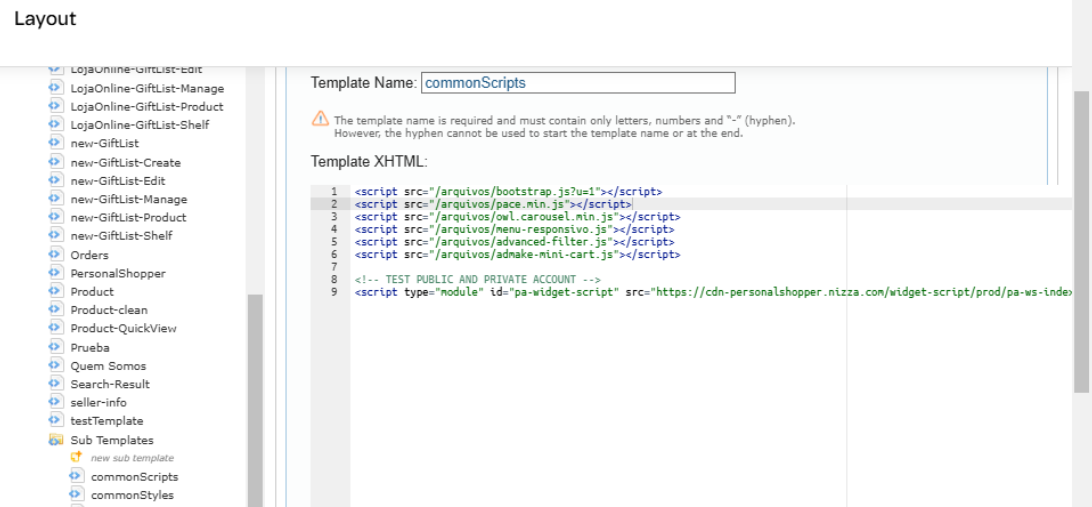
- Add global script.
Load the following script in a global place on the page, it must be executed only once. A valid example is in the commonScripts template.
_10<script_10 type="module"_10 id="pa-widget-script"_10 src="https://cdn-personalshopper.nizza.com/widget-script/prod/pa-ws-index.js?account={{nameOfTheAccount}}"_10></script>
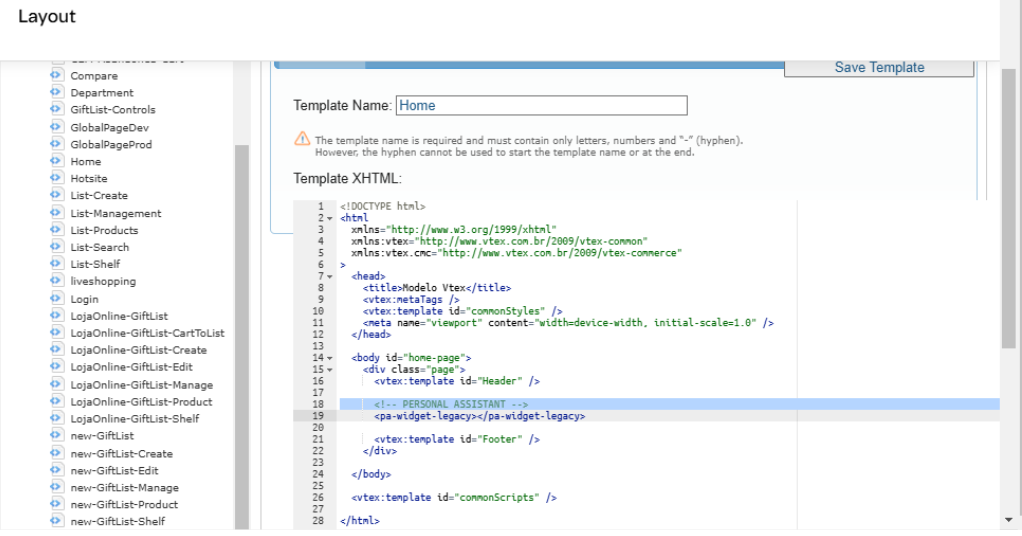
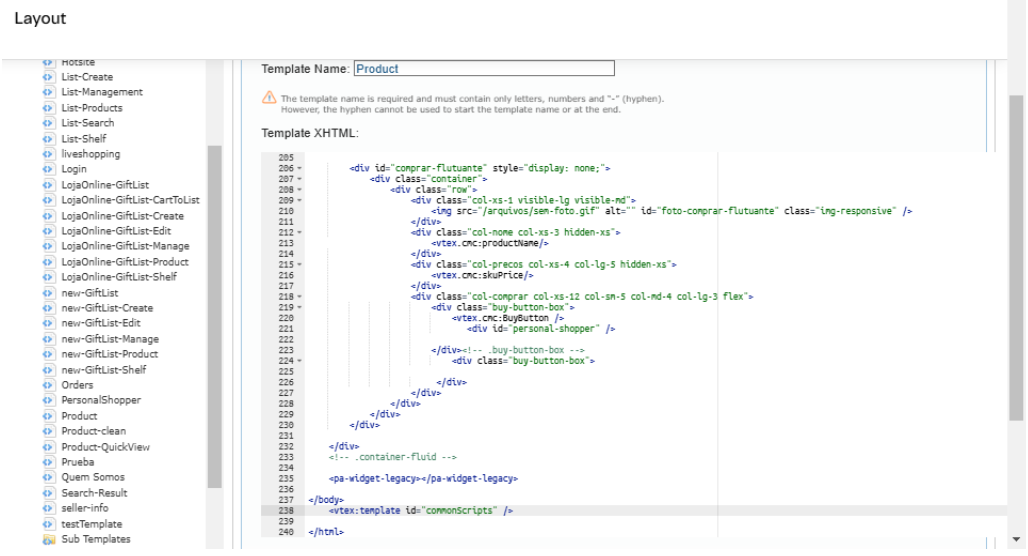
- Add widget button on the home or product detail page (PDP).
Add the web-component <pa-widget-legacy></pa-widget-legacy> in the home or pdp.
_10<pa-widget-legacy></pa-widget-legacy>
-
Home page:
-
PDP page:
Latest Steps for VTEX IO and VTEX CMS/Headless accounts
UI Admin
Configure Personal Assistant Setting
In VTEX admin Navigate to: Personal Shopper > Settings > Personal Shopper Setup > General Settings.
The following fields need to be configured:
-
URL Client: This is the public domain of your store. Example: https://www.your-store.com/.
-
Store Name: This is the name of your store. It must be configured because it is associated with the emails sent to customers and personal shoppers. Example: Your Store Name.