This app is no longer maintained by VTEX. This means support and maintenance are no longer provided.
This app allows you to add content badges to an ecommerce site. In the Admin panel, you can create, edit, and remove badges. There is also a storefront component that lets you add these badges to your store theme.
Configuration
In order to set up the Badges app in your store, follow these steps:
- Install the app. You can do this by going to the Badges app page in the VTEX app store or by running this command in your terminal:
_10 vtex install vtex.badges@3.x
- Add Badges to the
peerDependenciesin yourmanifest.jsonfile:
_10"peerDependencies": {_10 "vtex.badges": "3.x"_10}
With this, you should be able to start using the app.
Managing badges
After installing the app, you can access it by going to the OTHER section of the Admin panel and clicking Badge Management.

Creating badges
The Add badges tab allows you to create new badges by following these steps:
- Fill in the name of the badge.
- Select the badge type, which can be
IMAGE,TEXT, orHTML. - Insert the badge content according to the selected type.
- Select the badge priority level, where
1is the maximum priority and5is the minimum. - Set up the activation rule, which is composed of one or more conditions.
- Click
SAVE.
See below a badge creation example.

Note that each badge must contain at least one activation rule condition with the verb
is. The app will not work properly if all activation rules conditions useis not.
Editing badges
To edit an existing badge, go to the Edit badges tab and follow these steps:
- Click the menu icon in the row corresponding to the badge you wish to edit.
- Click
Edit. - Edit the badge attributes.
- Click
EDIT.

Deleting badges
If you wish to delete an existing badge from your store, go to the Edit badges tab and follow these steps:
- Click the menu icon in the row corresponding to the badge you wish to edit.
- Click
Delete. - In the prompt that will be displayed, click
DELETE.
Filtering badges
To improve badge search results, you can select which fields you want the search to filter by. This makes searching the Database simpler and more efficient when returning badges to your website. To configure it, just enter the My Applications area. Then choose App Badges and select which fields you want the search to be related to.
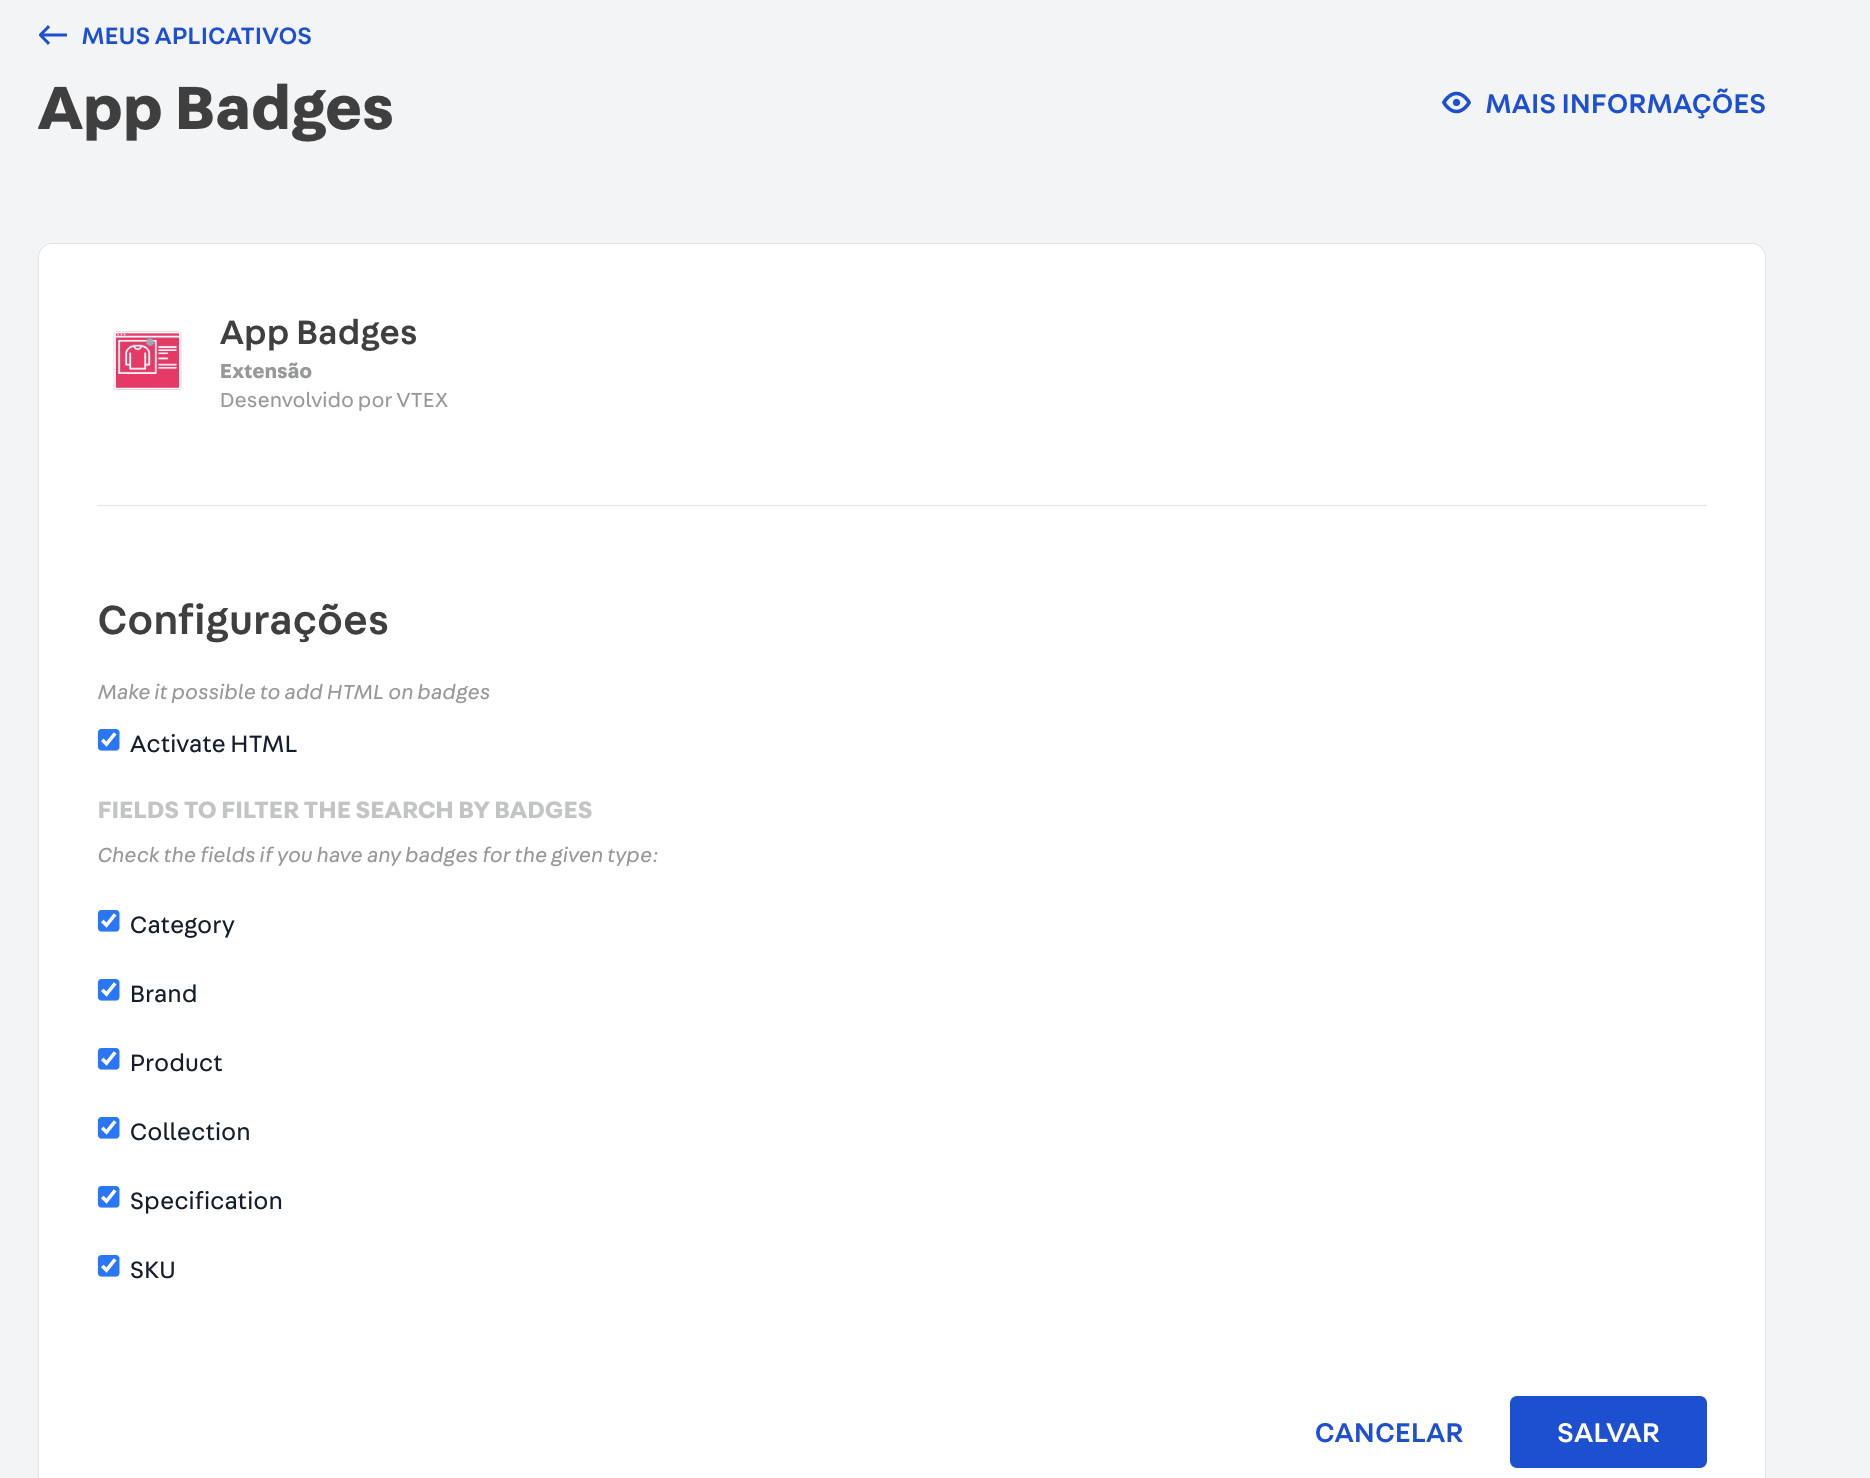
Remember that by default, all fields are used as a filter.
Displaying badges in your store
In order to display the created badges in your store, you must add the store-badges component to a product page (store.product) or a product-summary. See an example of how to add badges to a product page below.
_32 "store.product": {_32 "children": [_32+ "store-badges",_32 "stack-layout",_32 "breadcrumb",_32 "flex-layout.row#main",_32 "condition-layout.product"_32 ]_32 },_32_32+ "store-badges":{_32+ "props": {_32+ "numberOfBadges": 1,_32+ "text":{_32+ "font": "t-heading-5",_32+ "textColor": "blue",_32+ "textAlignment": "CENTER",_32+ "textPosition": "CENTER",_32+ "htmlId": "teste1"_32+ },_32+ "image":{_32+ "blockClass": "container",_32+ "height": 500,_32+ "width": 500,_32+ "minWidth": 25,_32+ "minHeight": 25,_32+ "alt": "teste",_32+ "title": "title",_32+ "preload": true_32+ }_32+ }_32+ }
Component props
These are the props available for customization of the badge component.
| Prop name | Type | Description |
|---|---|---|
numberOfBadges | number | Number of badges that will be rendered. |
text | array | Defines values that will be used when rendering a badge. To learn more about this prop, see Rich text. |
image | array | Defines values that will be used when rendering image badges. To learn more about this prop, see Store image |
Final result
After finishing all the steps, you can check the result in your store. The order of the badges is set according to the priority defined when creating them. See the image below that corresponds to the badge setup in this tutorial's examples.
