Payment Provider Homologation
Validate your payment provider integration and complete the homologation process using the Payment Provider Test Suite.
The last step to complete the implementation process is to check if the integration was done correctly.
To do so, you can simulate the integration functioning with the Payment Provider Test Suite app.
Install the Test Suite app
There are two ways to download it: accessing the VTEX App Store or through the Admin.
Considering that you want to download the app through the Admin, proceed as follows:
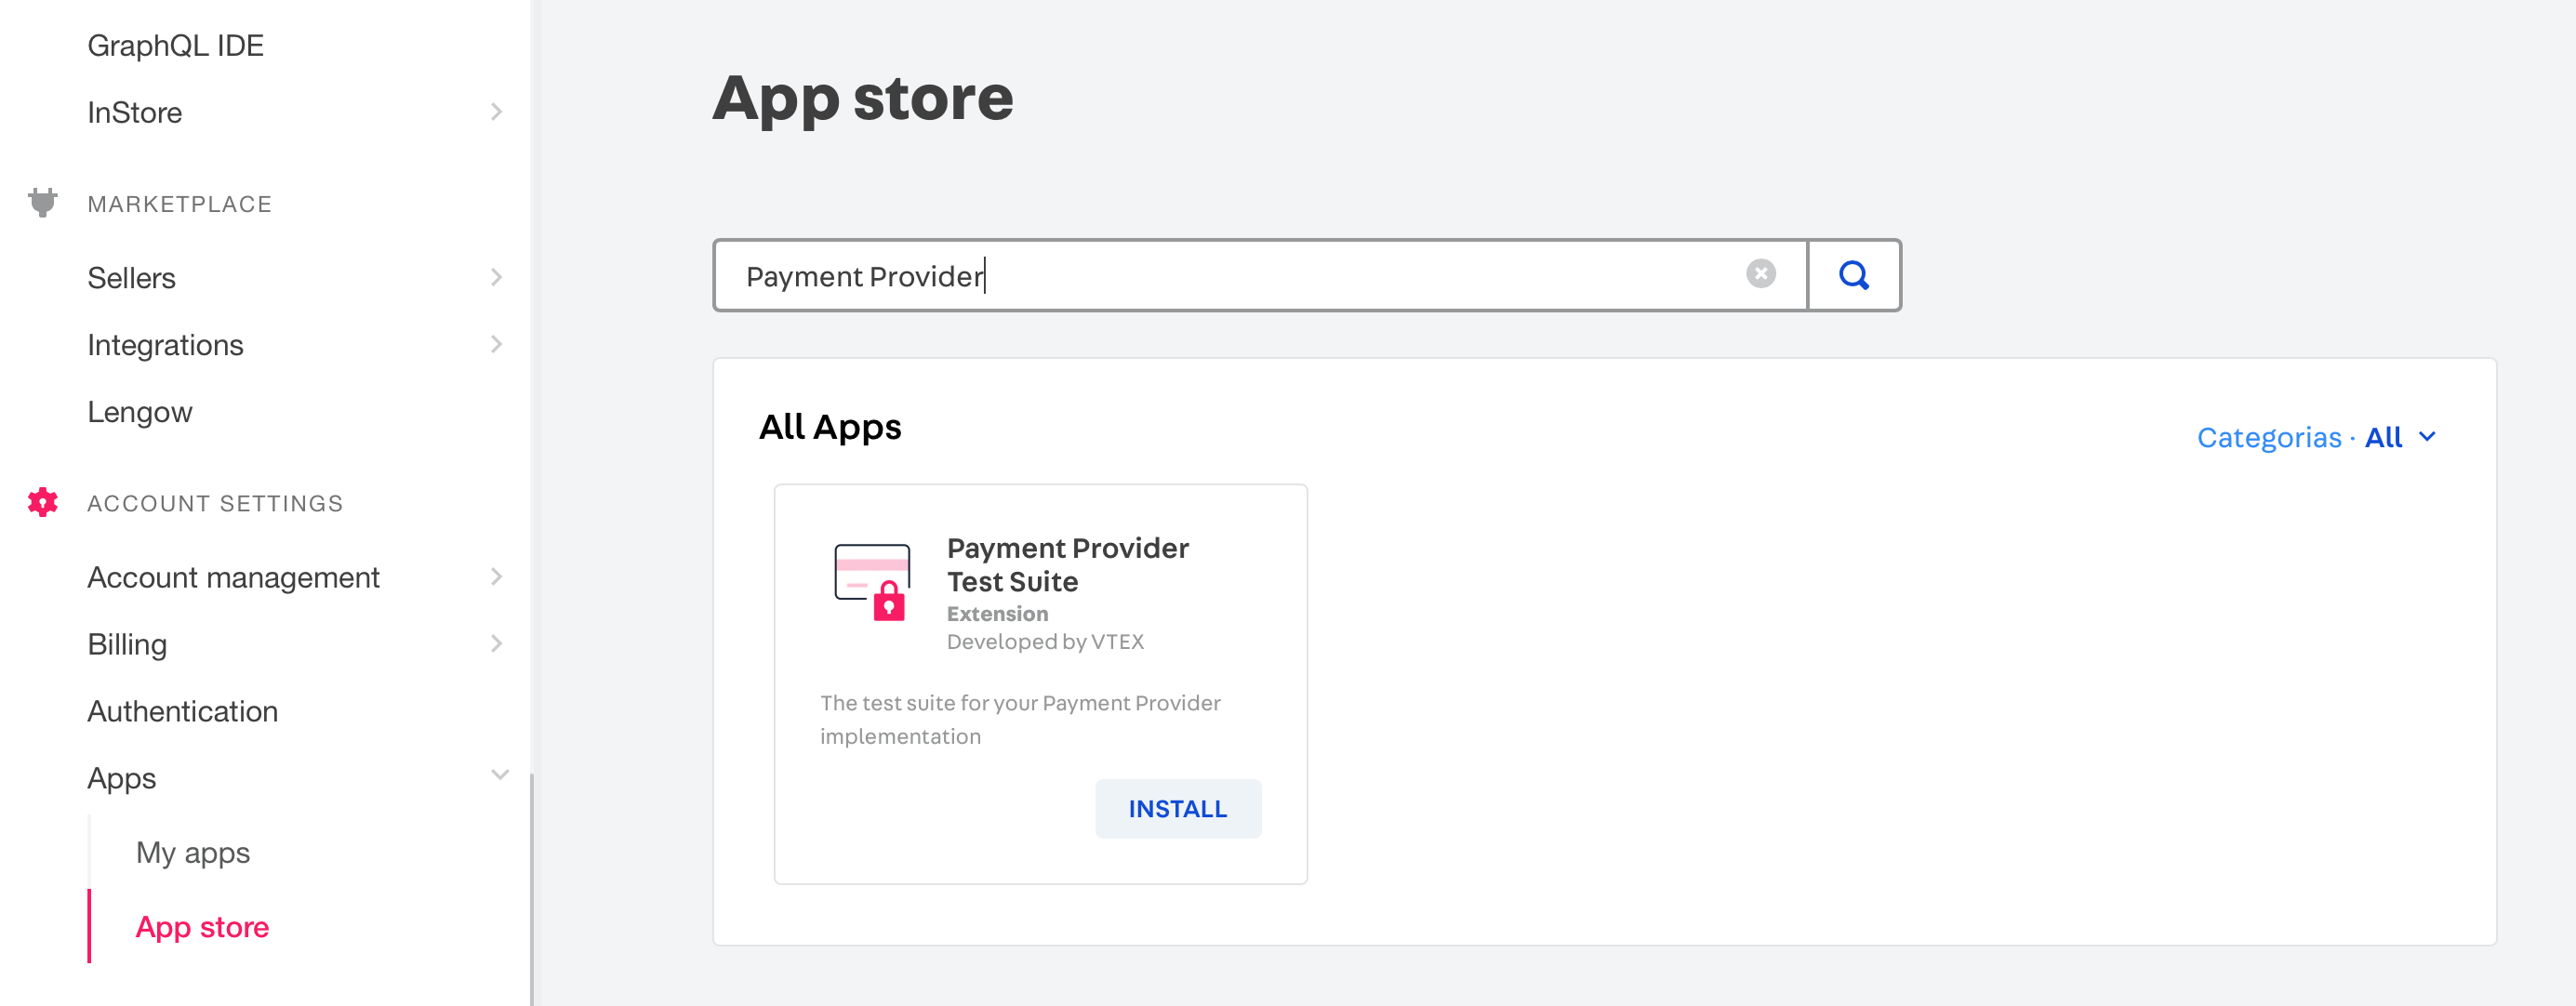
- Access the Admin.
- Go to the ACCOUNT SETTINGS module.
- Click on Apps then App Store.
- Now look for Payment Provider Test Suite in the search bar.
- Click Install.
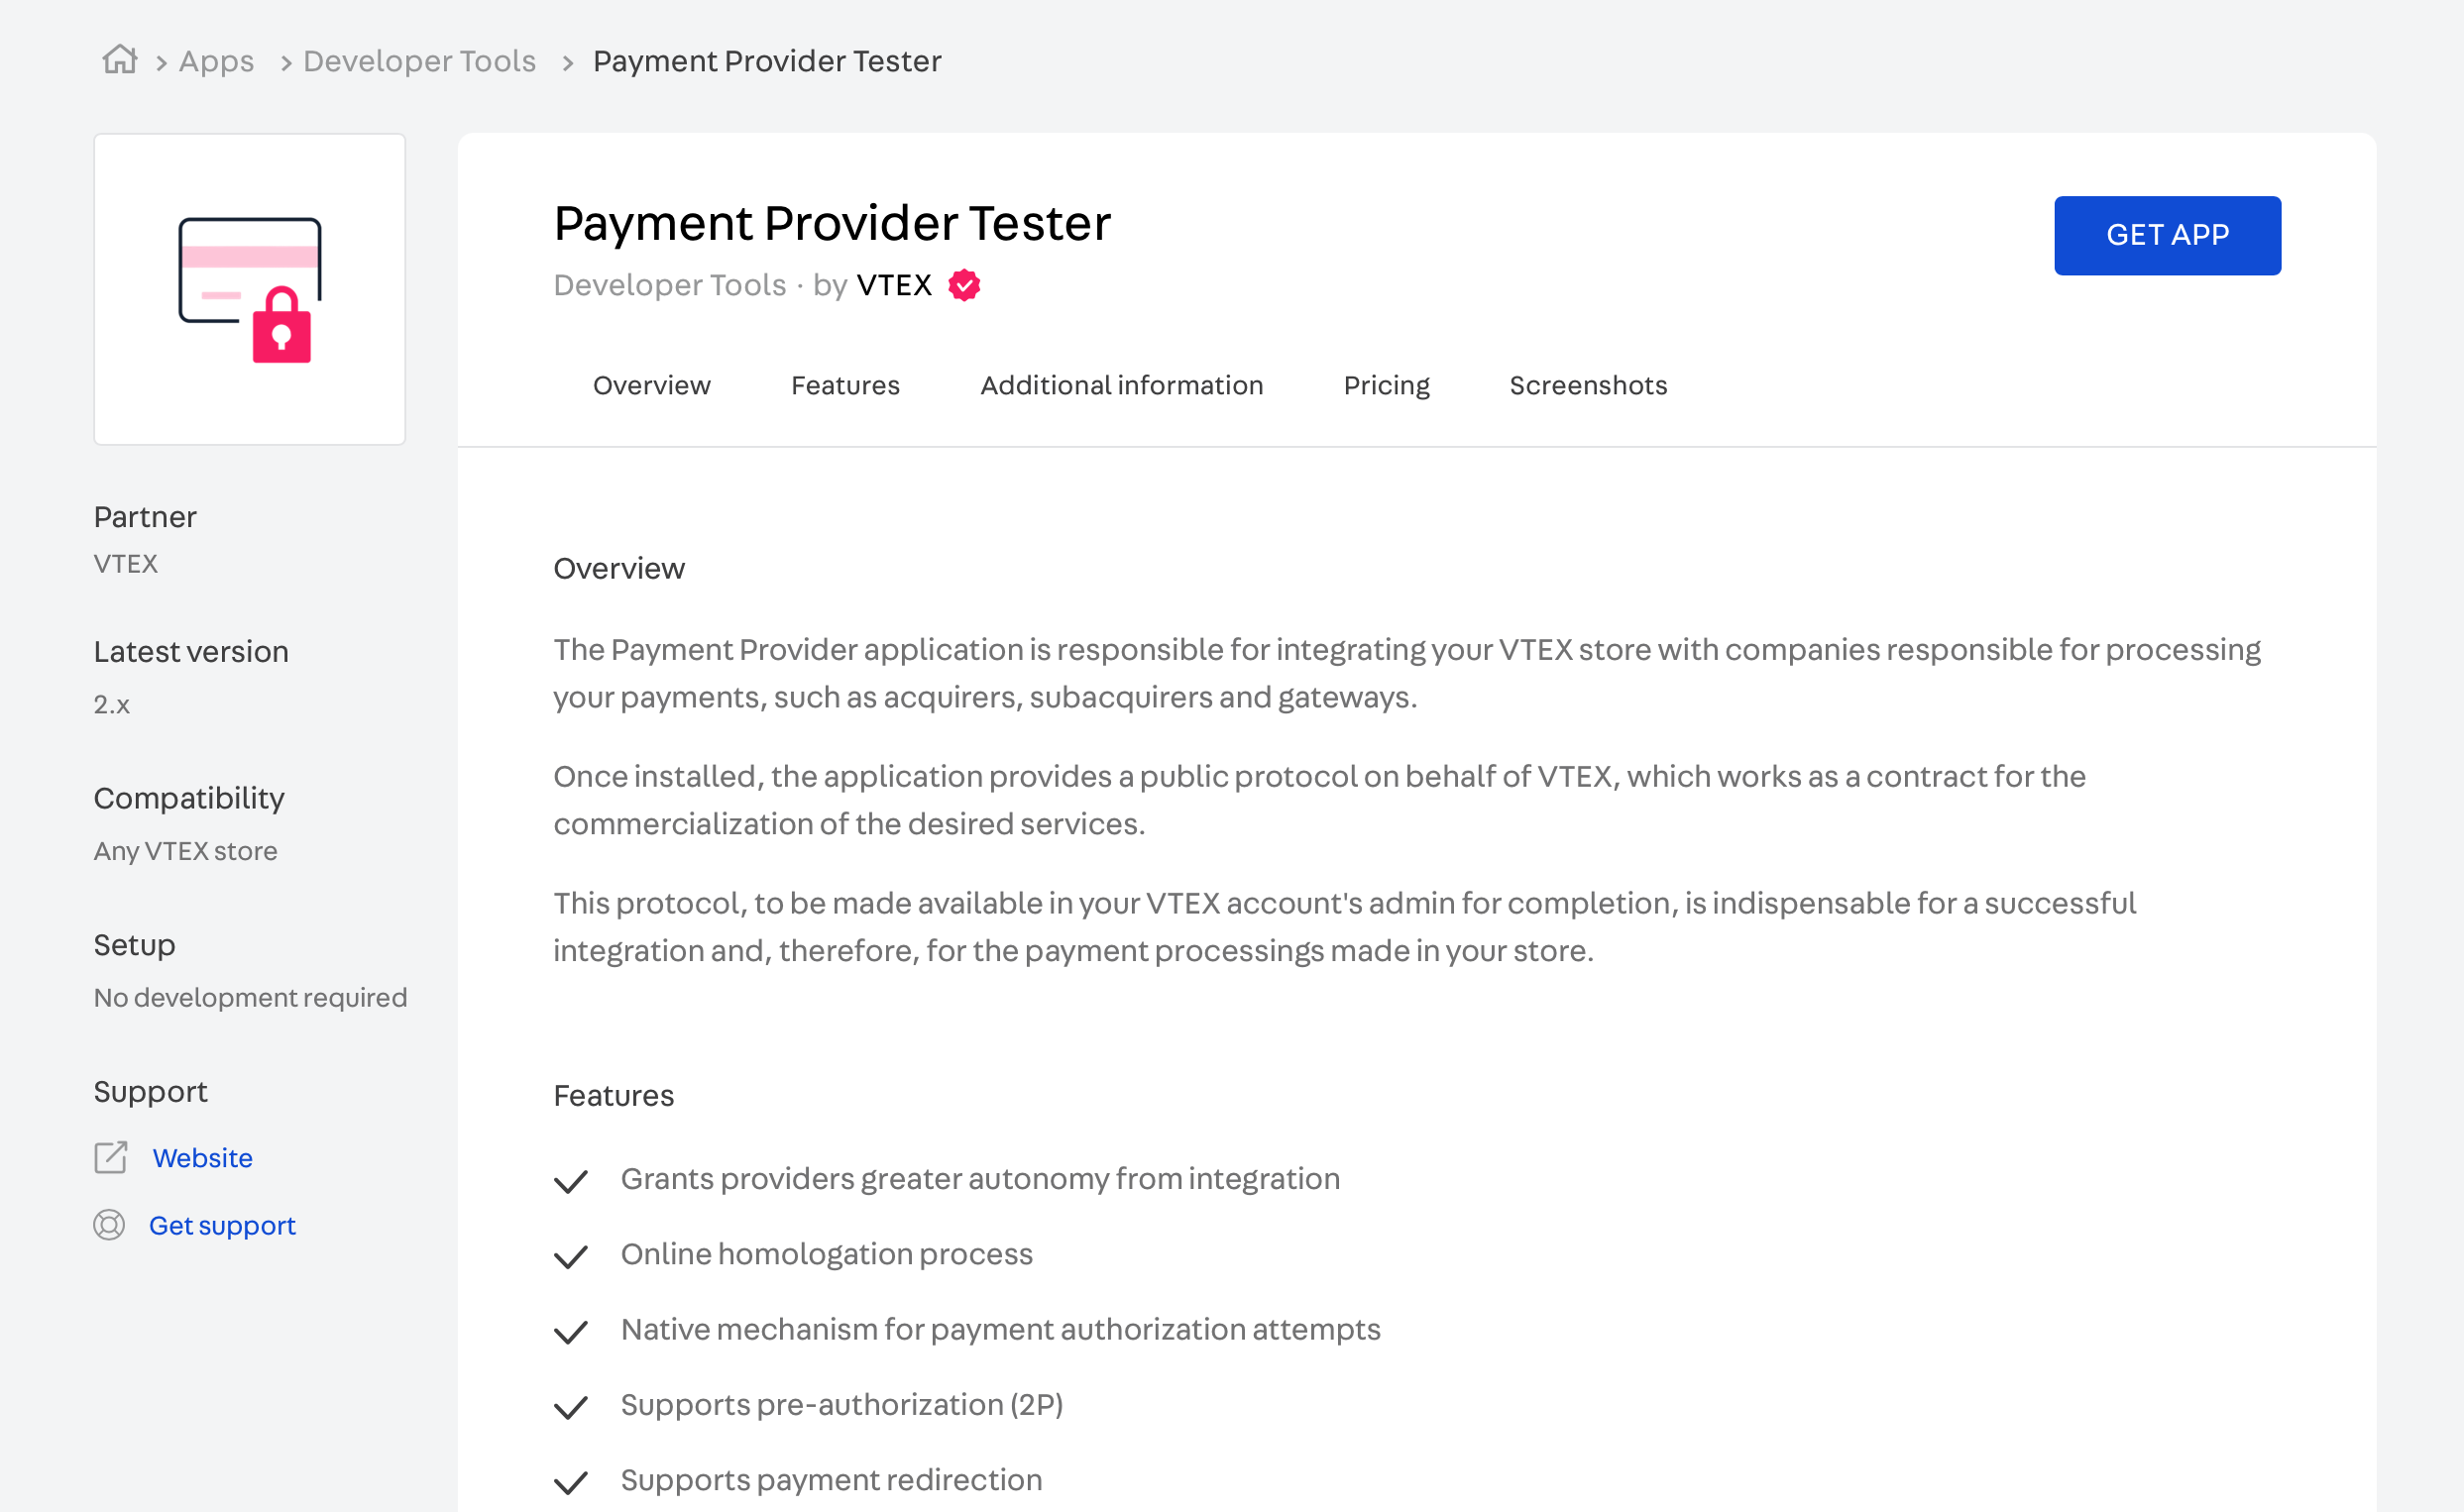
- After that, you will be redirected to the VTEX App Store. Click the GET APP button at the top right corner of the page.
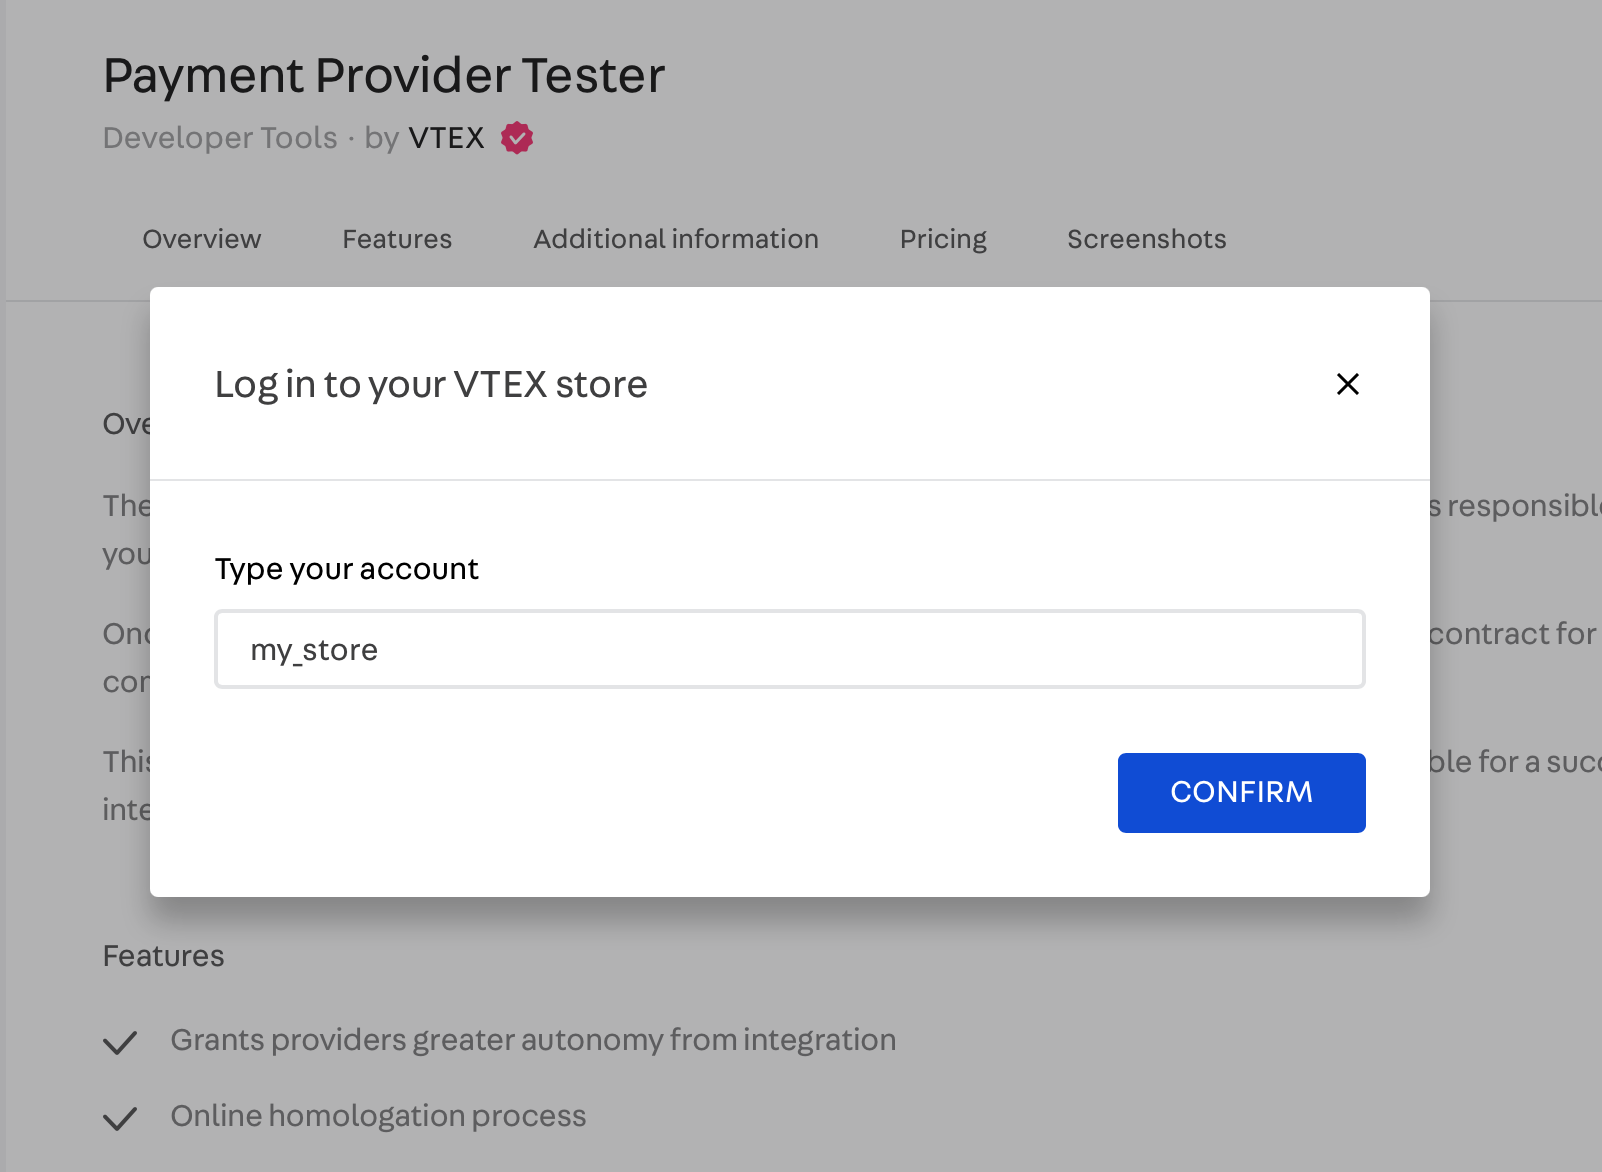
- Then, on the popup screen, type your account's name in lowercase, with no spaces, and click the CONFIRM button.
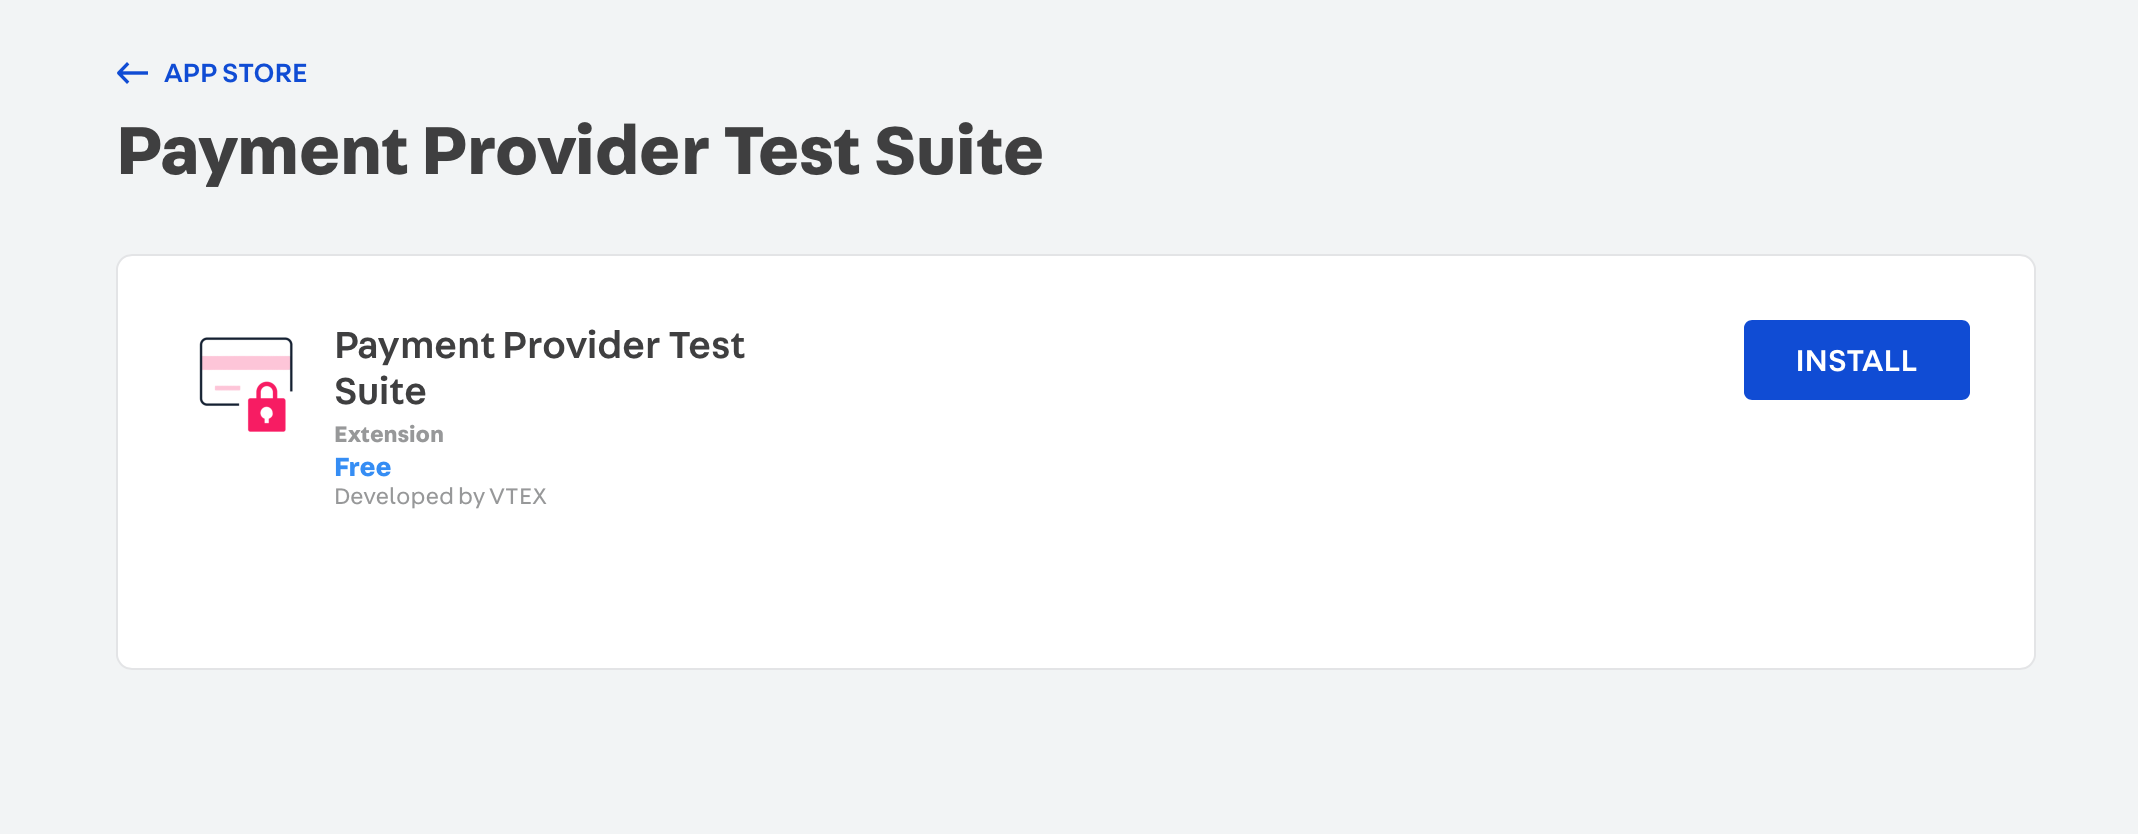
- Click INSTALL to complete the installation process.
After that, the Test Suite app will be installed in your Admin.
Run the tests
After having proceeded with the Homologation process, you can start running tests to validate the integration.
Service information
To start, fill in each field according to the instructions below:
- Service URL: The provider’s endpoint. VTEX will use this URL to contact the provider system.
- Connector Name: How your connector will be named in VTEX. The connector name has to be necessarily related to your brand. Also, the Connector Name is case-sensitive. That means that it considers uppercase and lowercase.
- X-VTEX-API-AppKey: Fill it in with the value
X-VTEX-API-AppKey. - X-VTEX-API-AppToken: Fill it in with the value
X-VTEX-API-AppToken.
Once you define the connector name, it can not be changed.
Then, click the Check URL button. This action will call the GET List Payment Provider Manifest endpoint. The response will indicate which payment methods can be analyzed in the next step (Tests form).
Tests
After the call, the payment methods implemented will be exposed in the form and the switches will be activated automatically.
Check if the right options were activated. Then, click the Run Tests button.
Logs
All the operations performed in the test phase will be exposed in the Logs box, including the ones that may present some errors in the integration.
If errors occur, make all the adjustments necessary to adapt your connector to the Payment Provider Protocol rules and try to run the test again.
If everything is ok, you need to open a ticket to the VTEX support team informing them that the integration was completed. However, before opening the ticket, make sure you have the following information:
- Connector Name: A description of the provider. Use max. 16 alphanumeric characters. This name cannot be modified after being published.
- Partner contact: Partner email address in case we need to communicate changes and new features of our protocol.
- Production Service Provider Endpoint: The base path that will be used for API calls to the provider, e.g.,
https://vtex.pagseguro.com>. It has to respond to the route{{serviceUrl}}/manifest. This endpoint must be publicly available. - Sandbox Service Provider Endpoint: The base path that will be used in test mode for API calls to the provider (e.g.
https://sandboxserviceproviderendpoint.com). - Owner account: The VTEX account name which will be used in callback requests. This account must be available at
*[account].myvtex.com*. - Allowed Accounts: Describe which VTEX accounts from this provider will be available (all accounts or specific accounts).
- New Payment Method: Inform whether this connector supports a payment method that is not yet available in the VTEX Admin.
- New Payment Method purchase flow: If a "New Payment method" is supported, inform whether it works with Redirect or Payment App. For more information, access Purchase Flows.
If the connector processes payments with credit, debit, or cobranded cards, it will also be necessary to send the AOC (Attestation of Compliance for Onsite Assessments – Service Provider Version) submitted with the homologation request ticket.
The SLA required for the payment team to carry out the homologation is 30 days. This term will start only after the submission of the document Master Partner Agreement for Financial Services (MPA). For homologation requests without using the MPA, the SLA term may be extended due to the need for additional analysis by the payment team.
Do not open the ticket for homologation if the Logs box presents any type of error. Redo the operation until the Logs box results are clear. If you need help in this scenario, talk to your Partner Account Manager.
It is mandatory to open a ticket with VTEX Support. Without doing so, the implementation will not be recognized by our system.
After that, the VTEX support team will inform you whether the implementation was performed correctly.
When is payment provider homologation not required?
A connector is exempt from the payment provider homologation process only if all of the conditions below are met simultaneously:
- It is a PPF connector, developed using VTEX IO.
- It only uses payment methods already available on the VTEX platform.
- It is installed locally, restricted to specific accounts.
- The target account is already using an IO/PPF connector.
If any of these conditions is not satisfied, the connector must follow the homologation process.