Webstore (OAuth 2.0)
VTEX stores can identify returning customers by requesting that they provide login information. That way, logged-in customers can access their previous purchases, and the store can display customized content based on customer profile information.
By default, our platform stores user information in our secure servers, but sometimes it is helpful to integrate external identity providers with the authentication process. The framework described in this guide will allow the VTEX platform to connect pre-existing user bases in private servers. The same protocol enables clients to use their Google accounts to log in to a third-party application.
In this guide, you will learn about:
OAuth2
The OAuth2 specification defines a framework that enables applications (service providers) to ask anyone requesting access to protected data for user authentication without having to interact with their private credentials. It achieves this by interacting with a trusted partner (identity provider) that handles user identification, validates their credentials, and returns to the application the information it needs to proceed safely. You can learn more about the OAuth2 Authorization Framework by reading its specification document.
This is an example of VTEX's custom OAuth2 authentication flow:
User agent
The user agent in this context is the user's browser. The user interacts with the browser manually, but it's the application that sends requests to servers, follows redirects and renders pages to the user.
Redirects
All server communications in this guide happen via the HTTPS protocol. One feature of this protocol is responding to a request by redirecting the user agent to a different URI. When the browser receives a redirect response, it instantly proceeds to the specified URI. For example, when a user tries to access protected areas of a store, they can be redirected to a login page.
VTEX ID
VTEX ID is the service used to identify users on our platform. Applications usually talk to it to obtain the token required to access protected information.
Relevant requests
Some steps of the OAuth2 authentication process are worth highlighting and describing in more detail.
Note that some of the variable names in the requests mentioned below are customizable when you implement a custom OAuth option. You can adapt them to the specifications of your identity provider.
Authorization request
When an unauthenticated user requests access to protected resources in a store, VTEX ID will start the authentication process by generating a unique identifier for this authentication session, storing the URI of the requested resource for this session, and redirecting the user agent to this endpoint with the following query variables:
Client ID: Client identification.state: The state containing the unique identifier.redirect_uri: This will always behttps://vtexid.vtex.com.br/VtexIdAuthSiteKnockout/ReceiveAuthorizationCode.ashx.
In this endpoint, the user is expected to be presented with a way to send their credentials or redirected to an endpoint that displays it. This is usually a form requesting a username and password. It is also common practice to check for cookies indicating the user is logged in.
Once the identity provider has safely identified the user, it should generate an authorization code with more than 64 characters. Store it so you can use it later to identify this session, and redirect the user agent to the authorizationCode endpoint with the code in a query variable named code. The state variable will also be forwarded as received. The identity provider can also pass a query string parameter error to inform occasional errors on its side.
Authorization code callback request
The user agent should be redirected to this endpoint after the identity provider has successfully checked its user credentials. VTEX ID will retrieve two parameters from the query variables: code and state.
code: Single-use code that should expire after a few minutes, as indicated by the RFC specification. If there are multiple attempts to use this code, the credentials must be revoked.state: Used to identify the authentication session, which is important to detect replay attacks. In addition, thecodevariable will be used so VTEX ID can get the access token by using the __Access Token Exchange__endpoint.
Access token exchange
This is a simple endpoint that expects a POST request with three parameters in the body:
client_idclient_secretcoderedirect_uri(https://vtexid.vtex.com.br/VtexIdAuthSiteKnockout/ReceiveAuthorizationCode.ashx)
The values of client_id and client_secret are stored in VTEX ID when the identity provider is configured and should be used by this endpoint as credentials to guarantee that only VTEX ID and other well-known customers can have access. VTEX ID expects two parameters in the response body:
access_token: The credential that VTEX ID needs to use in the Get user information exchange.expires_in: The time, in seconds, before the token expires.
Get user information
This endpoint should only allow requests with valid access_token credentials, which can be used to identify the user and return the following user information in the request body:
userId(required)email(required)name
A user's email is the key to uniquely identifying each VTEX user. VTEX ID needs this information to finish the authentication process.
Custom OAuth
In addition to the default options of using Google and Facebook as identity providers for your store, VTEX allows you to implement a custom OAuth connection, in case you have another identity provider that you want to enable for your customers.
You should understand all the expected behavior for the identity provider endpoints. However, implementing the server from scratch is not necessarily a good idea. There are many certified OAuth2 libraries, and you should take a look at them before writing your own code. Any lack of verification or mishandled steps can pose a severe security risk for your store and customers.
Integration
You can implement a custom OAuth option by going to your Admin and providing information about the communication between VTEX and your identity provider as shown in the relevant requests described above.
Each VTEX store may have up to one custom OAuth implementation, which will be active for all store names in that account.
The table below lists the information you need to configure for each request. After the table, you will find more details about each configuration step.
| Request | From | To | Fields requiring setup |
|---|---|---|---|
| Authorization request | VTEX | Custom identity provider | - URL - Custom parameters (optional) |
| Authorization callback request | Custom identity provider | VTEX | - Authorization code key |
| Access token exchange | VTEX | Custom identity provider | Request: - URL - Content-Type - Authorization code key - Custom parameters (optional) Response: - Access token key - Token duration key |
| User information exchange | VTEX | Custom identity provider | Request: - URL - Where to send the access token (bearer token or query string) - Access token key (if sent in query string) - Custom parameters (optional) Response: - User email key - User ID key - User name key |
Note that many of the field values indicated in the table are dynamically generated or come from the identity provider. Because of this, you must define only the key under which this information will be sent to VTEX so the platform knows how to handle each piece of information properly. Examples include the authorization code key, token duration key, and user email key.
Configuration steps
To set up this process, follow the steps below:
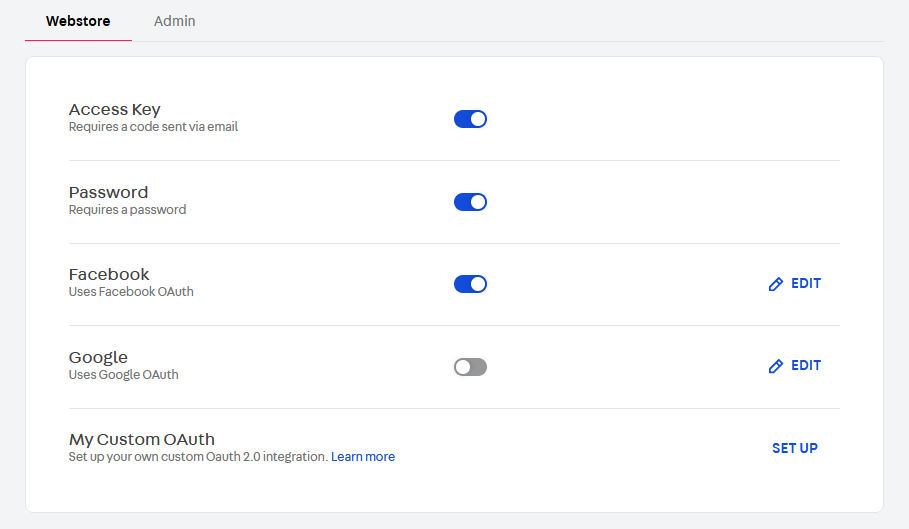
- Go to the Admin > Account Settings > Authentication.
- In the Webstore tab, click
SET UPin the My Custom OAuth section.
- Set the provider details.
- Configure the authorization code requests.
- Configure the access token exchange request.
- Configure the get user information request.
When configuring these steps, you will be able to preview the outcome in the respective Request preview and Expected response preview sections. We recommend checking them thoroughly when setting up the integration.
3. Setting the provider details
When you start the custom OAuth setup, you must complete the following information:
- Identity provider name
- Client ID key (
client_id) - Client ID value
- Client secret key (
client_secret) - Client secret value
These keys are the names under which VTEX should send or expect to receive the information value when communicating with the identity provider. They must be
client_idandclient_secret, respectively.
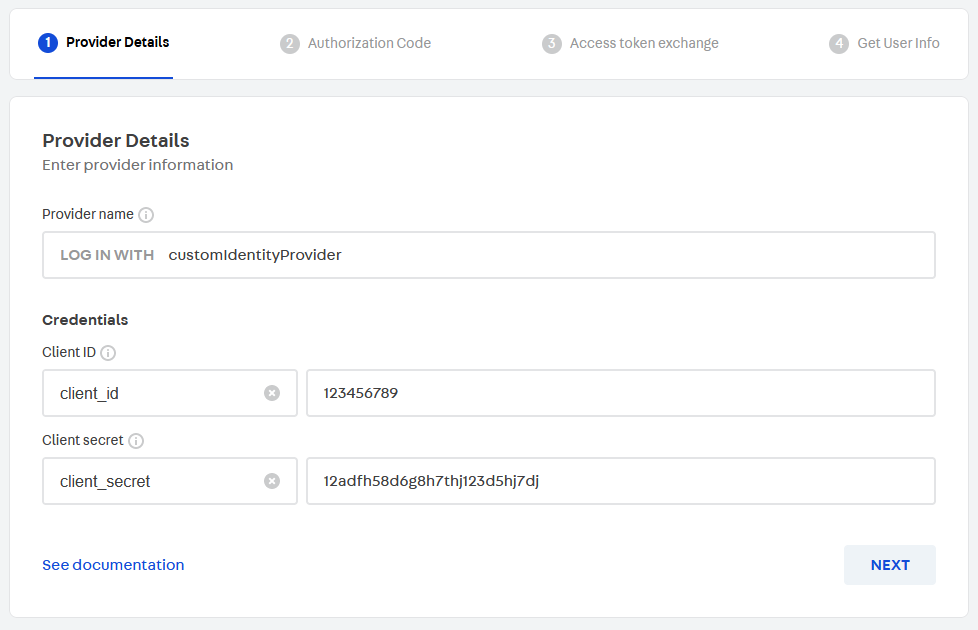
Click NEXT.
4. Configuring the authorization code requests
In this step, you must first provide the authorization request URL.
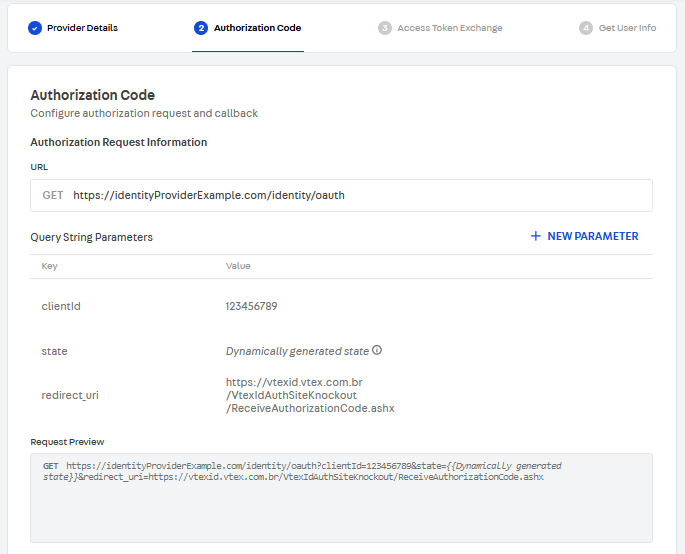
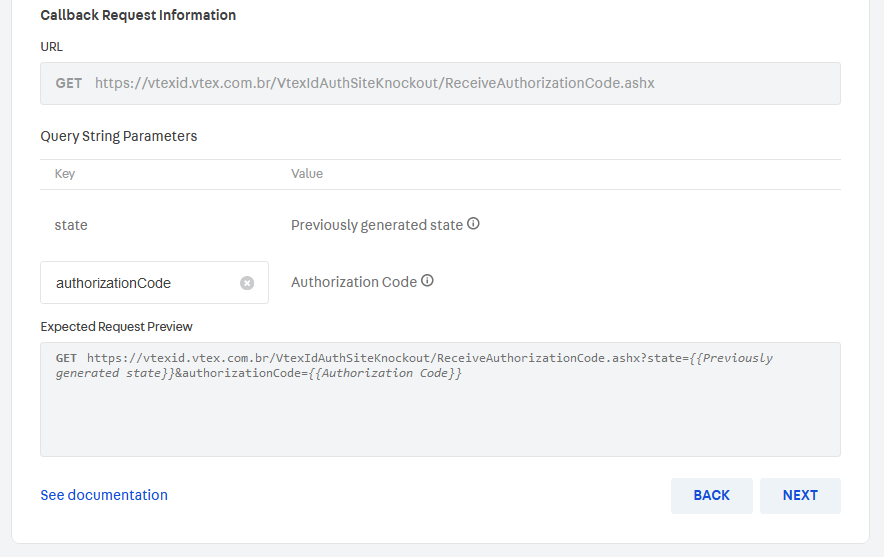
If you want, you can also add custom parameters to this request. Then, scroll down to the Callback Request Information section and enter the Key under which the authorization code will be sent by the identity provider to VTEX.
ClickNEXT.
5. Configuring the access token exchange
To configure the access token exchange request, you need to provide:
- The request URL.
- The authorization code key under which VTEX should send the authorization code to the identity provider.

If you want, you can also add custom parameters to this request.
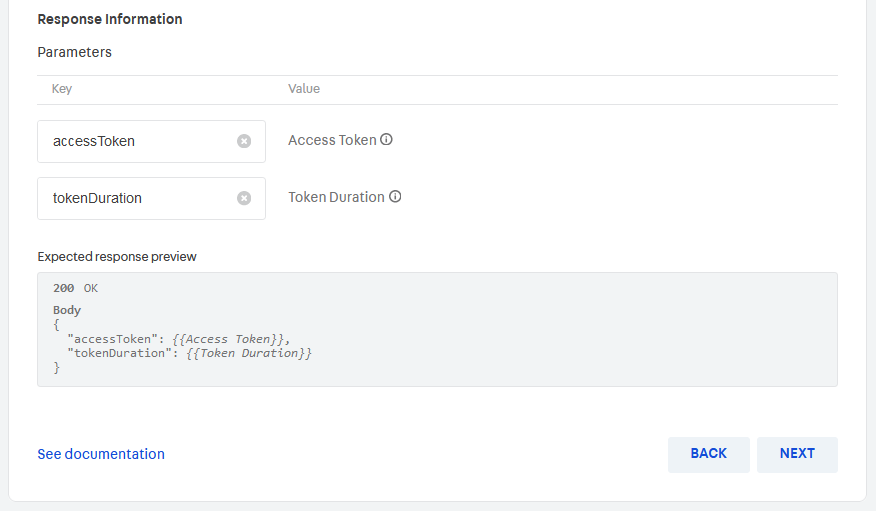
Then, you may scroll down to the Response Information section and enter the Keys under which VTEX should expect to receive user information:
- Access token key
- Token duration key
NEXT.
6. Configuring the user information exchange
Now, you must provide the details about the user information exchange:
- Request URL.
- Where to send the access token. It is sent as a bearer token by default. Use the toggle if you want to change it to Send in query string.
Check the Request Preview section to make sure it matches the format expected by the identity provider. Also, note that if you toggle Send in query string, you can edit the access token key under which VTEX will send it to the identity provider.
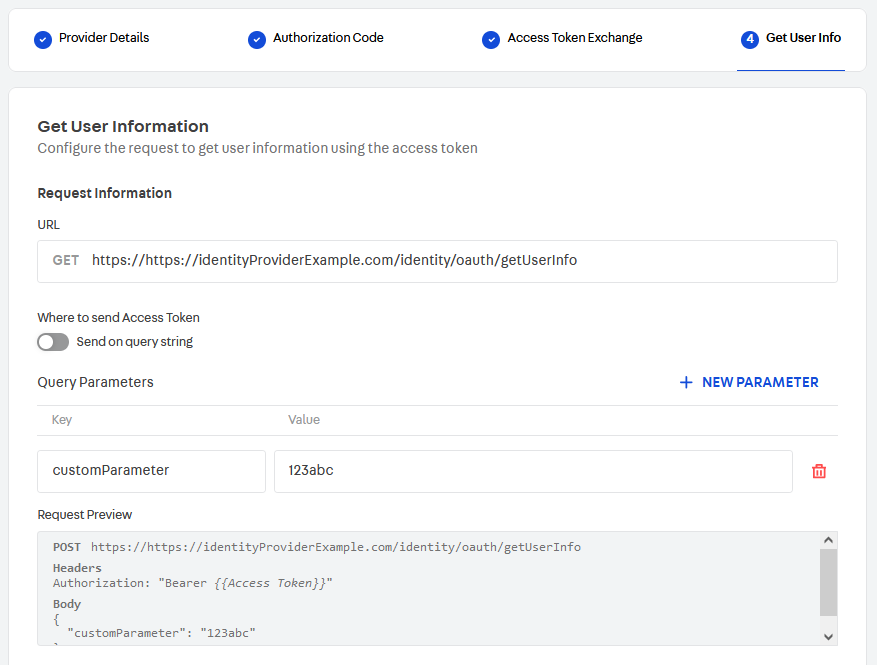
If you wish, you can also add custom parameters to this request.
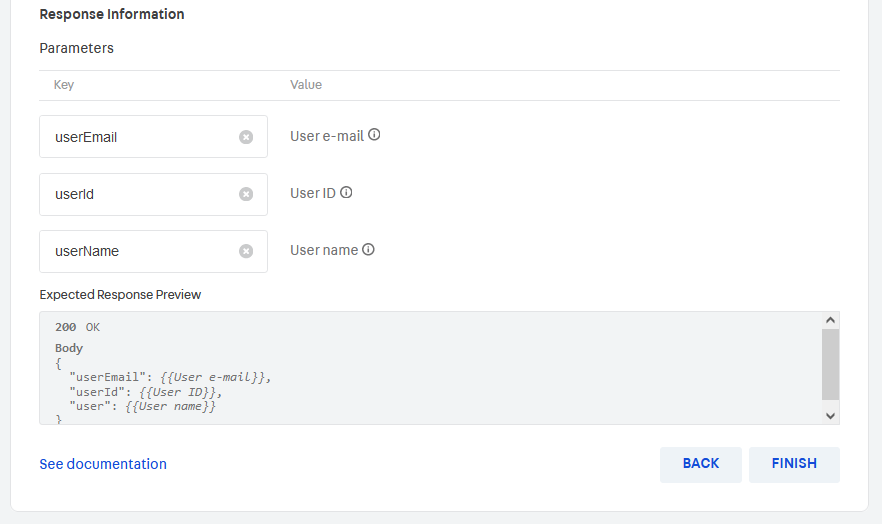
Scroll down to the Response Information section, and provide the Keys under which VTEX should expect to receive user information:
- User email key
- User ID key
- User name key
FINISH to complete your Custom OAuth configuration.
Custom parameters
You can configure custom parameters with static values for each of the relevant requests that VTEX sends to the identity provider. To do this, follow these steps:
- Click
+ NEW PARAMETER. - Enter the custom parameter Key.
- Enter the custom parameter Value.
Editing the custom OAuth
After you set up your custom OAuth option, you can edit it by following the same implementation steps described below.
If your implementation was initially set up via VTEX Support instead of the process described above, you must be extra careful when editing it through the Admin. Incorrect values may cause your custom OAuth to stop working. We recommend you check the previews thoroughly and ensure they match what the identity provider expects.