Implementing reCAPTCHA in integrations
If your store uses integrations to place orders, such as mobile apps or proprietary web-based storefronts, follow the steps below to implement reCAPTCHA validation.
In order to have your implementation validate users with reCAPTCHA, you must first obtain the appropriate reCAPTCHA key and then use that key to integrate reCAPTCHA on your storefront. Once the shopper correctly solves the validation, the integration receives a token that must be sent in the request that places the order.
The implementation process may vary depending on whether you are using a mobile or web-based storefront. More details below.
Getting the reCAPTCHA key
There are different ways of obtaining the reCAPTCHA key. See below the method that best applies to your context.
Getting the reCAPTCHA key for mobile implementations
In order to implement reCAPTCHA validation in a mobile app that places orders, follow the steps below.
-
Create a Google Cloud project, according to the instructions in the article Create, shut down, and restore projects.
-
Create a Google Cloud API key, according to the instructions in the article Authenticate using API keys provided by Google.
-
Create a reCAPTCHA enterprise key, according to the instructions in the article Creating reCAPTCHA keys provided by Google.
-
Get your current VTEX Checkout settings, with the Get orderForm configuration API request.
-
Add your newly created reCAPTCHA key to your VTEX Checkout settings, by sending a request to the Update orderForm configuration endpoint. Use the configuration retrieved in step 3 as your request body and add your key information in this field:
_13{_13…,_13"recaptchaKeys": [_13{_13"clientId": "{id-of-your-recaptcha-key}",_13"clientSecret": "{secret-key}",_13"projectId": "{id-of-your-google-cloud-project}",_13"label": "{key-name-in-vtex}",_13"score": "{recaptcha-score}"_13}_13],_13…_13}recaptchaKeys: array of objects with keys information.clientId: ID of your reCAPTCHA key.clientSecret: your Google Cloud API key.projectId: ID of your Google Cloud project. If you do not have your project ID at hand, check the Google Cloud documentation to learn how to locate your project IDlabel: use this field to identify your key. We recommend that you indicate the mobile platform in which you intend to use the key (e.g.,android-001).score: reCAPTCHA score (optional).
After completing this steps, see how you can integrate reCAPTCHA on your storefront.
If you have multiple integrations (e.g., an app for Android and another for iOS), create one key for each and register each one as an object in the
recaptchaKeysarray.
Finding your reCAPTCHA key (mobile implementations)
Once you create your reCAPTCHA key, it will be available in this address:
_10https://console.cloud.google.com/security/recaptcha?project={projectId}
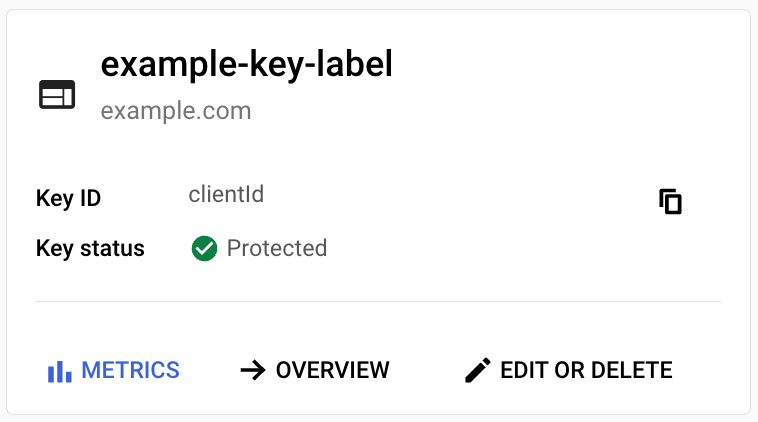
When you get to the reCAPTCHA Enterprise page, your reCAPTCHA key is available in the Key ID field of the section corresponding with the key you want to use.
Finding your Google Cloud API key (mobile implementations)
Once you create your Google Cloud API key, it will be available in this address:
_10https://console.cloud.google.com/apis/credentials?project={projectId}

When you get to the credentials page, click SHOW KEY on the line corresponding to the key you wish to use.
Getting the reCAPTCHA key in web-based implementations
If you are implementing a web-based storefront, you must get the reCAPTCHA key from the checkout API you use to place the order.
There are two different ways of placing orders via API. It can be done through the orderForm transaction endpoint or the Place order endpoint.
The first is based on a pre-existing shopping cart (orderForm), while the latter requires passing all of the order’s information in a single request body. Because of that distinction, different integrations must use different methods to obtain the reCAPTCHA key.
At this stage you must choose a key compatible with your desired implementation:
recaptchaKey: if you are integrating with reCAPTCHA checkbox (equivalent to v2).recaptchaKeyV3: if you are integrating with score-based reCAPTCHA (equivalent to v3).
Learn more about the different versions of reCAPTCHA for VTEX Checkout.
orderForm transaction key
This method of creating orders is based on existing orderForm, meaning a payment method has already been selected and VTEX already knows if reCAPTCHA validation is needed.
Whenever reCAPTCHA validation applies, according to your recaptchaValidation configuration, the Checkout API should respond with a recaptchaKey field similar to this:
_10{_10 ...,_10 "recaptchaKey": "5Lc5UOBTRDBDBLNo2iOCPG0q7JCUgHUerDIJEHR-",_10 "recaptchaKeyV3": "6LfnCR8mAAAAAGfsca_MuJ4oXTWJWOJ4TkPFOXzT"_10}
Now you can use this key to display the reCAPTCHA widget on your storefront.
Place order key
If a reCAPTCHA validation token is necessary for a given order and this request is made without it, you should get an error response with the recaptchaKey in the fields object, like in the example below.
_12{_12 "fields": {_12 "recaptchaKey": "5Lc5UOBTRDBDBLNo2iOCPG0q7JCUgHUerDIJEHR-",_12 "recaptchaKeyV3": "6LfnCR8mAAAAAGfsca_MuJ4oXTWJWOJ4TkPFOXzT"_12 },_12 "operationId": "749dt09-34d3-4b5b-b244-978473d0d373",_12 "error": {_12 "code": "CHK0082",_12 "message": "ReCAPTCHA necessário. Tente novamente passando o token reCAPTCHA junto com a chave fornecida.",_12 "exception": null_12 }_12}
Now you can use this key to display the reCAPTCHA widget on your storefront.
Integrating reCAPTCHA on your storefront
See below instructions for integrating reCAPTCHA depending on whether you are implementing a mobile or web-based storefront.
Integrating mobile apps
See the documentation provided by Google to learn how to integrate score-based reCAPTCHA (equivalent to v3) on your mobile app according to the mobile platform of your choice:
Integrating web-based storefronts
Having obtained the reCAPTCHA key, you can apply validation on your storefront according to the version of reCAPTCHA you are using:
- reCAPTCHA checkbox (equivalent to v2): pass the
recaptchaKeyvalue you got as thesiteKeyproperty when displaying the validation widget as described in the reCAPTCHA v2 documentation. - Score-based reCAPTCHA (equivalent to v3): integrate the validation according to the instructions in the reCAPTCHA v3 documentation.
Since reCAPTCHA application may vary according to payment method, we recommend that the integration is prepared apply the validation after the payment selection step.
Final validation
After the shopper successfully solves the validation, the integration should receive a response token. This token should be included in the API request that places the order, along with the recaptchaKey that was used, be it with the orderForm transaction endpoint or the Place order endpoint. The example below works for both cases.
_10{_10 ...,_10 "recaptchaKey": "5Lc5UOBTRDBDBLNo2iOCPG0q7JCUgHUerDIJEHR-",_10 "recaptchaToken": "03AERD8Xp5arKO6-vS76sxlAFIMqCQwHOp2XTKO-DF7HcNZZVVZGJrCmHGIBCywHstiaoOpsdmAUp5pIRVD0hOwSydYvubdor45EmSH37QuBbD4qmKfjyatKTMLpsIfmXSy40kmooZ2_TZAlVH0jnKBH5avX1BdYM4qN2uihVPjlRI1RX6ze05PG3ZDn9RQmjqHLot5jDX16nSLMauiZgCqhFPPZaKXz5qNXi2irsuM6xDIfoju50wKp9fJkDmY5eyT4_1iqEVOYkGjMq8hAorY2B6KmaiqxOYWwOPwyrPYP1sFbELO2teGeFYCuxqjOSi7Zq22xEYqQhWGeFHmu4L0ydfhbk3cHnHEyYdQpr3gaG-wHK2dVI1cMD6MYYiLwDfxZ_LgdruW7O-fT12WZCtZhUrwrefaw53hQ"_10}
You must send the key used to display the challenge that was solved in the field
recaptchaKeyregardless of the reCAPTCHA version of the key previously used.
Handling errors
The reCAPTCHA token is valid for only one attempt. So in case of error during validation, the widget has to be displayed again to the shopper, in order to get a new token. The key used to display the validation widget after the error may vary depending on the error and order placement method, as described below.
orderForm transaction errors
In case of internal error (status 500), the widget has to be displayed using the recaptchaKey from the latest updated orderForm.
If validation fails (status 403), the API returns the same error CHK0082 as mentioned above. Note that the recaptchaKey returned in the error may be different than the one used previously.
Place order errors
In case of internal error (status 500), the widget has to be displayed again. The recaptchaKey that was used the first time may be used this time.
If validation with the Place order endpoint fails (status 403), the API returns the same error CHK0082 as mentioned above. Note that the recaptchaKey returned in the error may be different than the one used previously. Be sure to use the latest one received.