Managing URL redirects
Learn how to manage your store's URL redirects to prevent 404 errors.
URL redirection is a method of forwarding website visitors and search engines from one URL to another. Redirects might be useful when you need to move content to a new URL, remove an old product page, or forward users from a specific region to a custom page. Implementing the appropriate redirects can improve the user experience by preventing visitors from hitting 404 error pages.
Check the following sections to learn how to create, remove, and verify your store's URL redirects.
Before you begin
_10vtex plugins install redirects
Creating URL redirects
-
Using the CSV file template as a reference, create a
.csvfile containing the redirects you wish to create. -
Save the file under the name of your choice.
-
Open the terminal and log in to your VTEX account.
-
Import redirects to your account by running the following command:
- Replace
{CSVpath}with the path to your.csvfile.
_10vtex redirects import {CSVpath} - Replace
Once your file is processed, the redirects will take effect. Please keep in mind that this may take some time.
Deleting URL redirects
-
Using the CSV file template as a reference, create a
.csvfile with the redirects you wish to delete. -
Save the file under the name of your choice.
-
Open the terminal and log in to your VTEX account.
-
Delete redirects from your account by running the following command:
- Replace
{CSVpath}with the path to your.csvfile.
_10vtex redirects delete {CSVpath} - Replace
Verifying URL redirects
-
Open the terminal and log in to your VTEX account.
-
Retrieve the full list of your store's redirects into a
.csvfile by running the following command.- Replace
{fileName}with any name of your choice.
_10vtex redirects export {fileName}.csv - Replace
After running this command, a file named {fileName}.csv containing all the redirects of your store will be created in your current directory.
Check the CSV file template to understand the meaning of each field of the .csv file generated.
CSV file template
To create or delete URL redirects in your store, you must create a .csv file as in the following example.
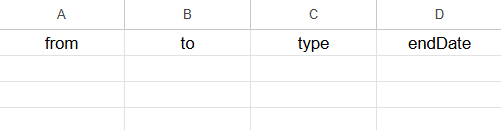
Notice that the file must contain a row with four columns and the following values:
| Property name | Description | Example |
|---|---|---|
from | Original path. | /blouse/p |
to | Relative path or full URL to which you want to redirect your visitors. | /shirts/p |
type | Redirect type. TEMPORARY or PERMANENT | TEMPORARY |
endDate | Only for TEMPORARY redirects. Expiration date of the redirect on the format mm/dd/yyyy. | 5/20/2020 |
You must not modify this row. Otherwise, you will not be able to create or delete redirects.
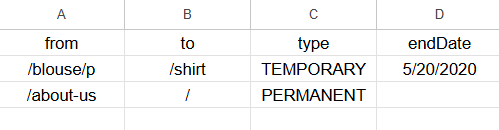
Under the first row of your .csv file, enter the from, to, type, and endDate values corresponding to the redirects you want to create or delete, as in the following example:
Keep in mind that:
- The
fromcolumn can only receive relative paths. - The
tocolumn can receive either relative paths (e.g.,/shirts/p) or full URLs (e.g.,https://myotherstore.com).
You cannot create redirects using wildcards or variables. You must specify each redirect using relative paths or full URLs.
TEMPORARYredirects receive the302status code, whilePERMANENTredirects receive the301status code.- The
endDatemust be left empty if the redirect isPERMANENT.