Configuring custom images for the SKU Selector
In this guide, you'll learn how to configure custom images for the SKU selector component. By following these steps, you can display a specific image for each SKU in the selector, different from the default thumbnail.
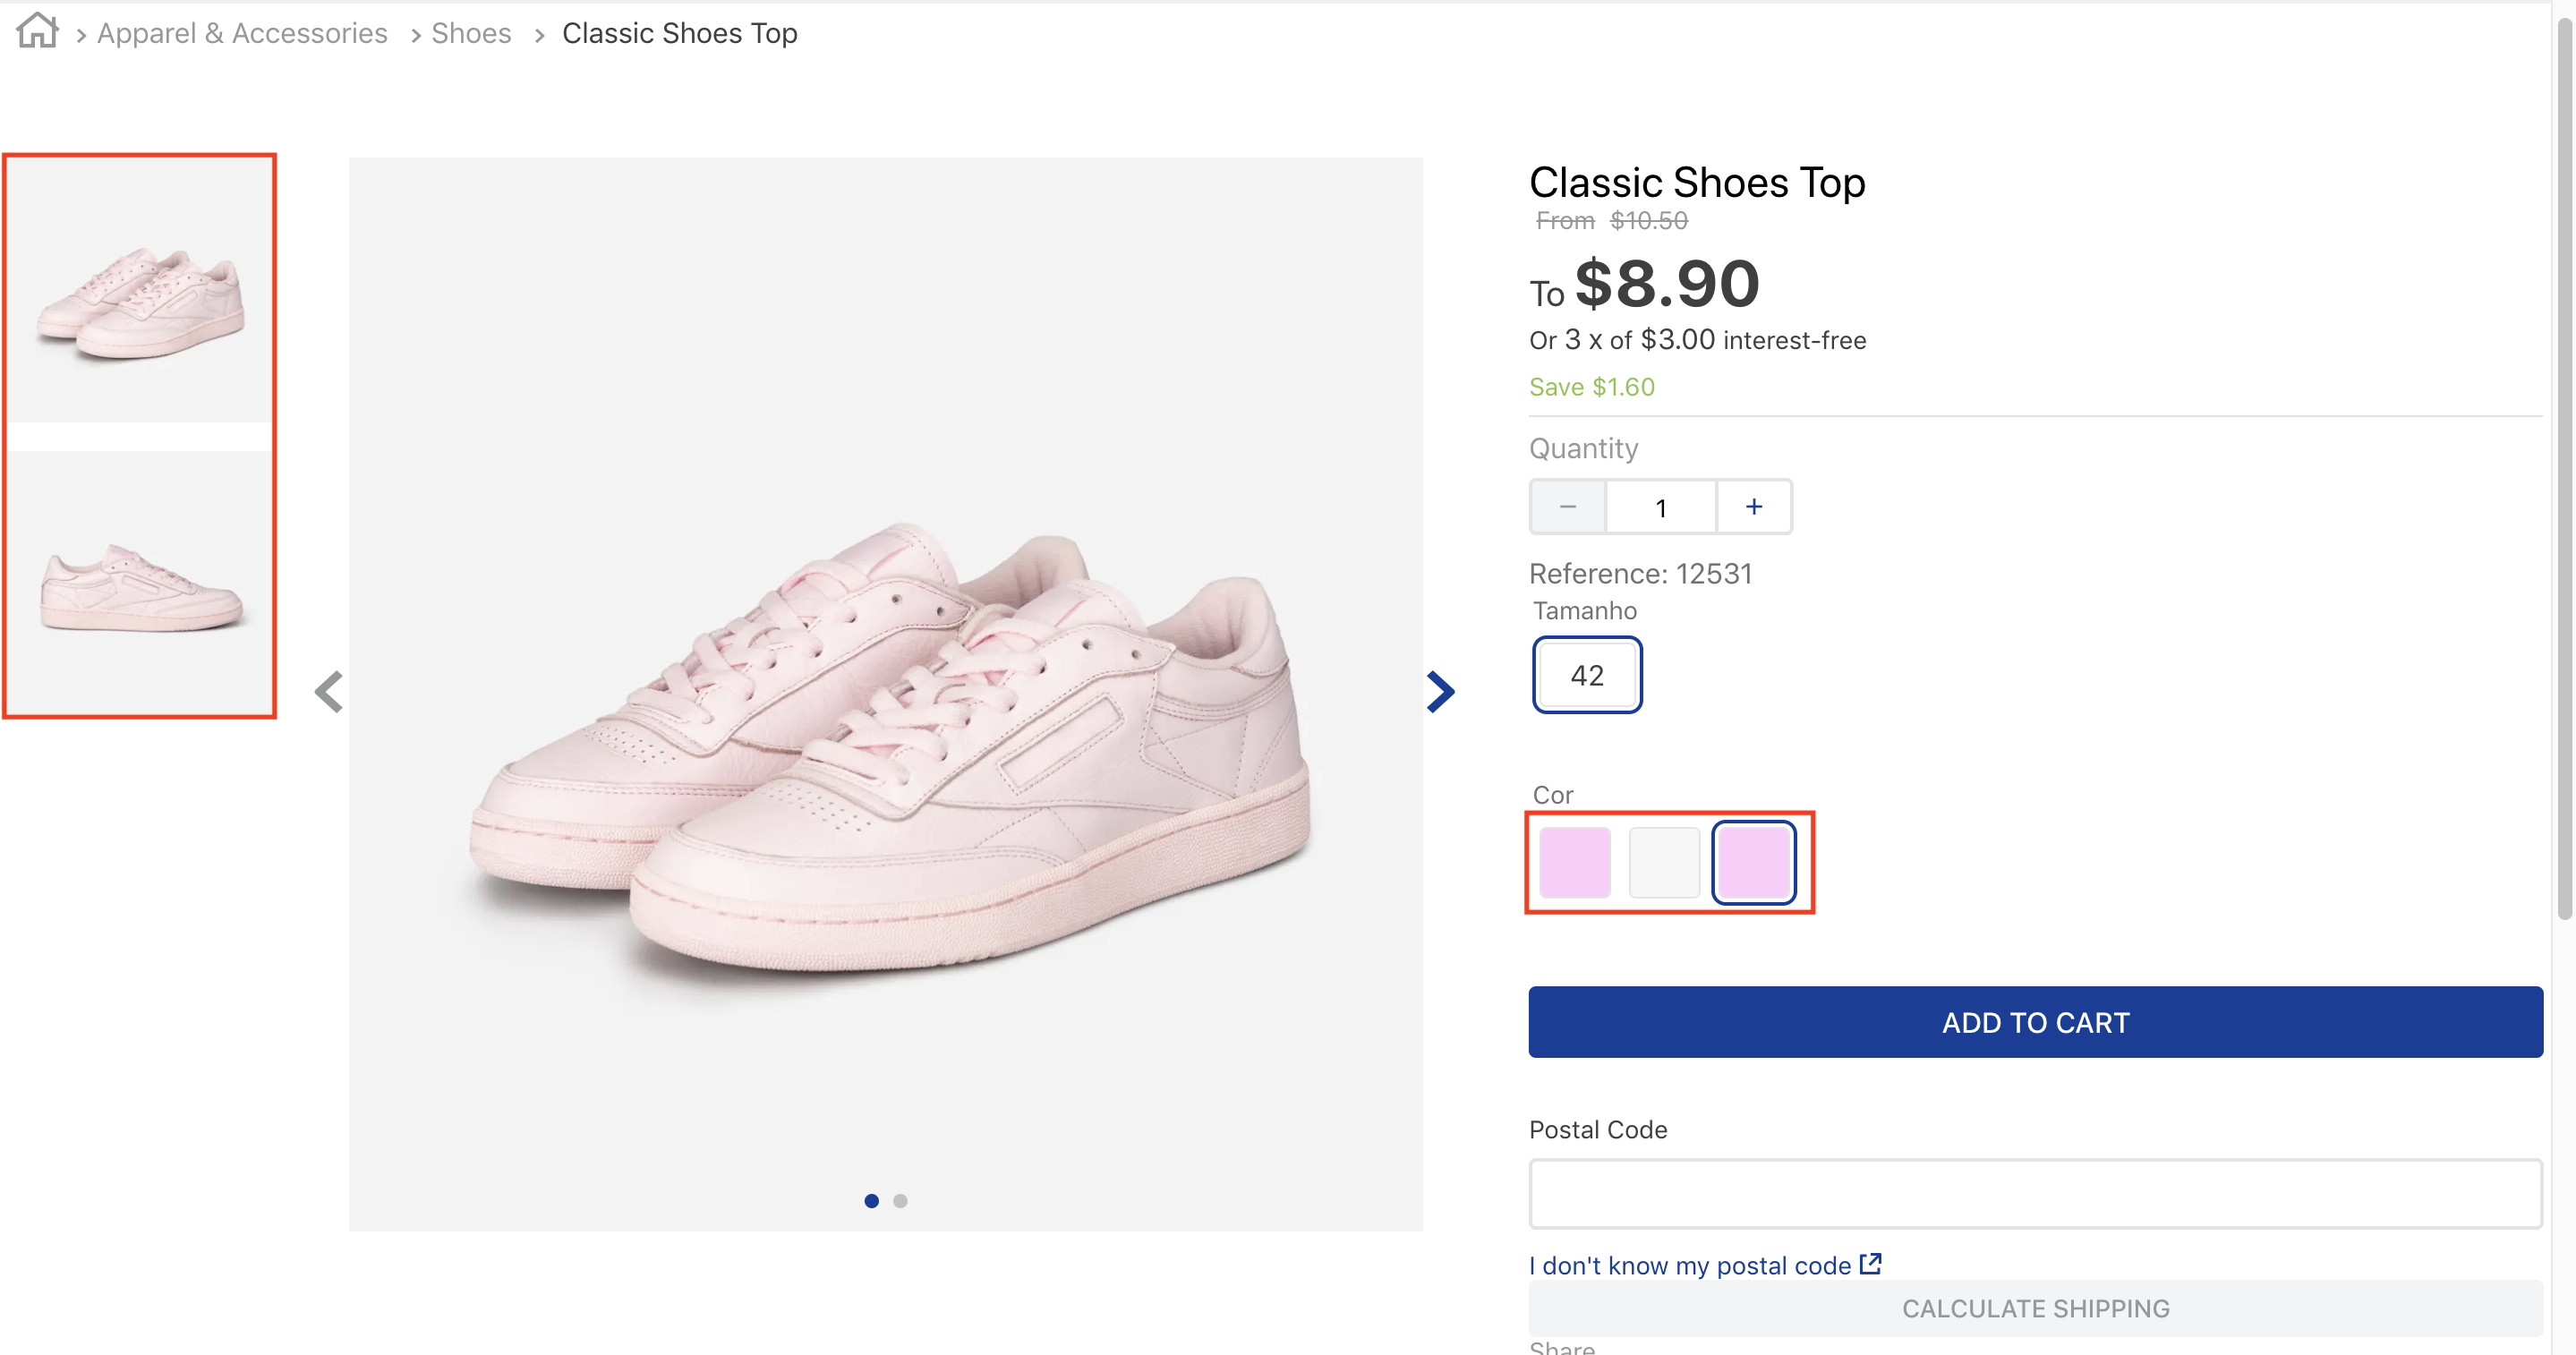
By default, the SKU selector component uses thumbnail images of the SKU when rendered, as shown below. The component uses images from the SKU's information in the Admin Catalog:
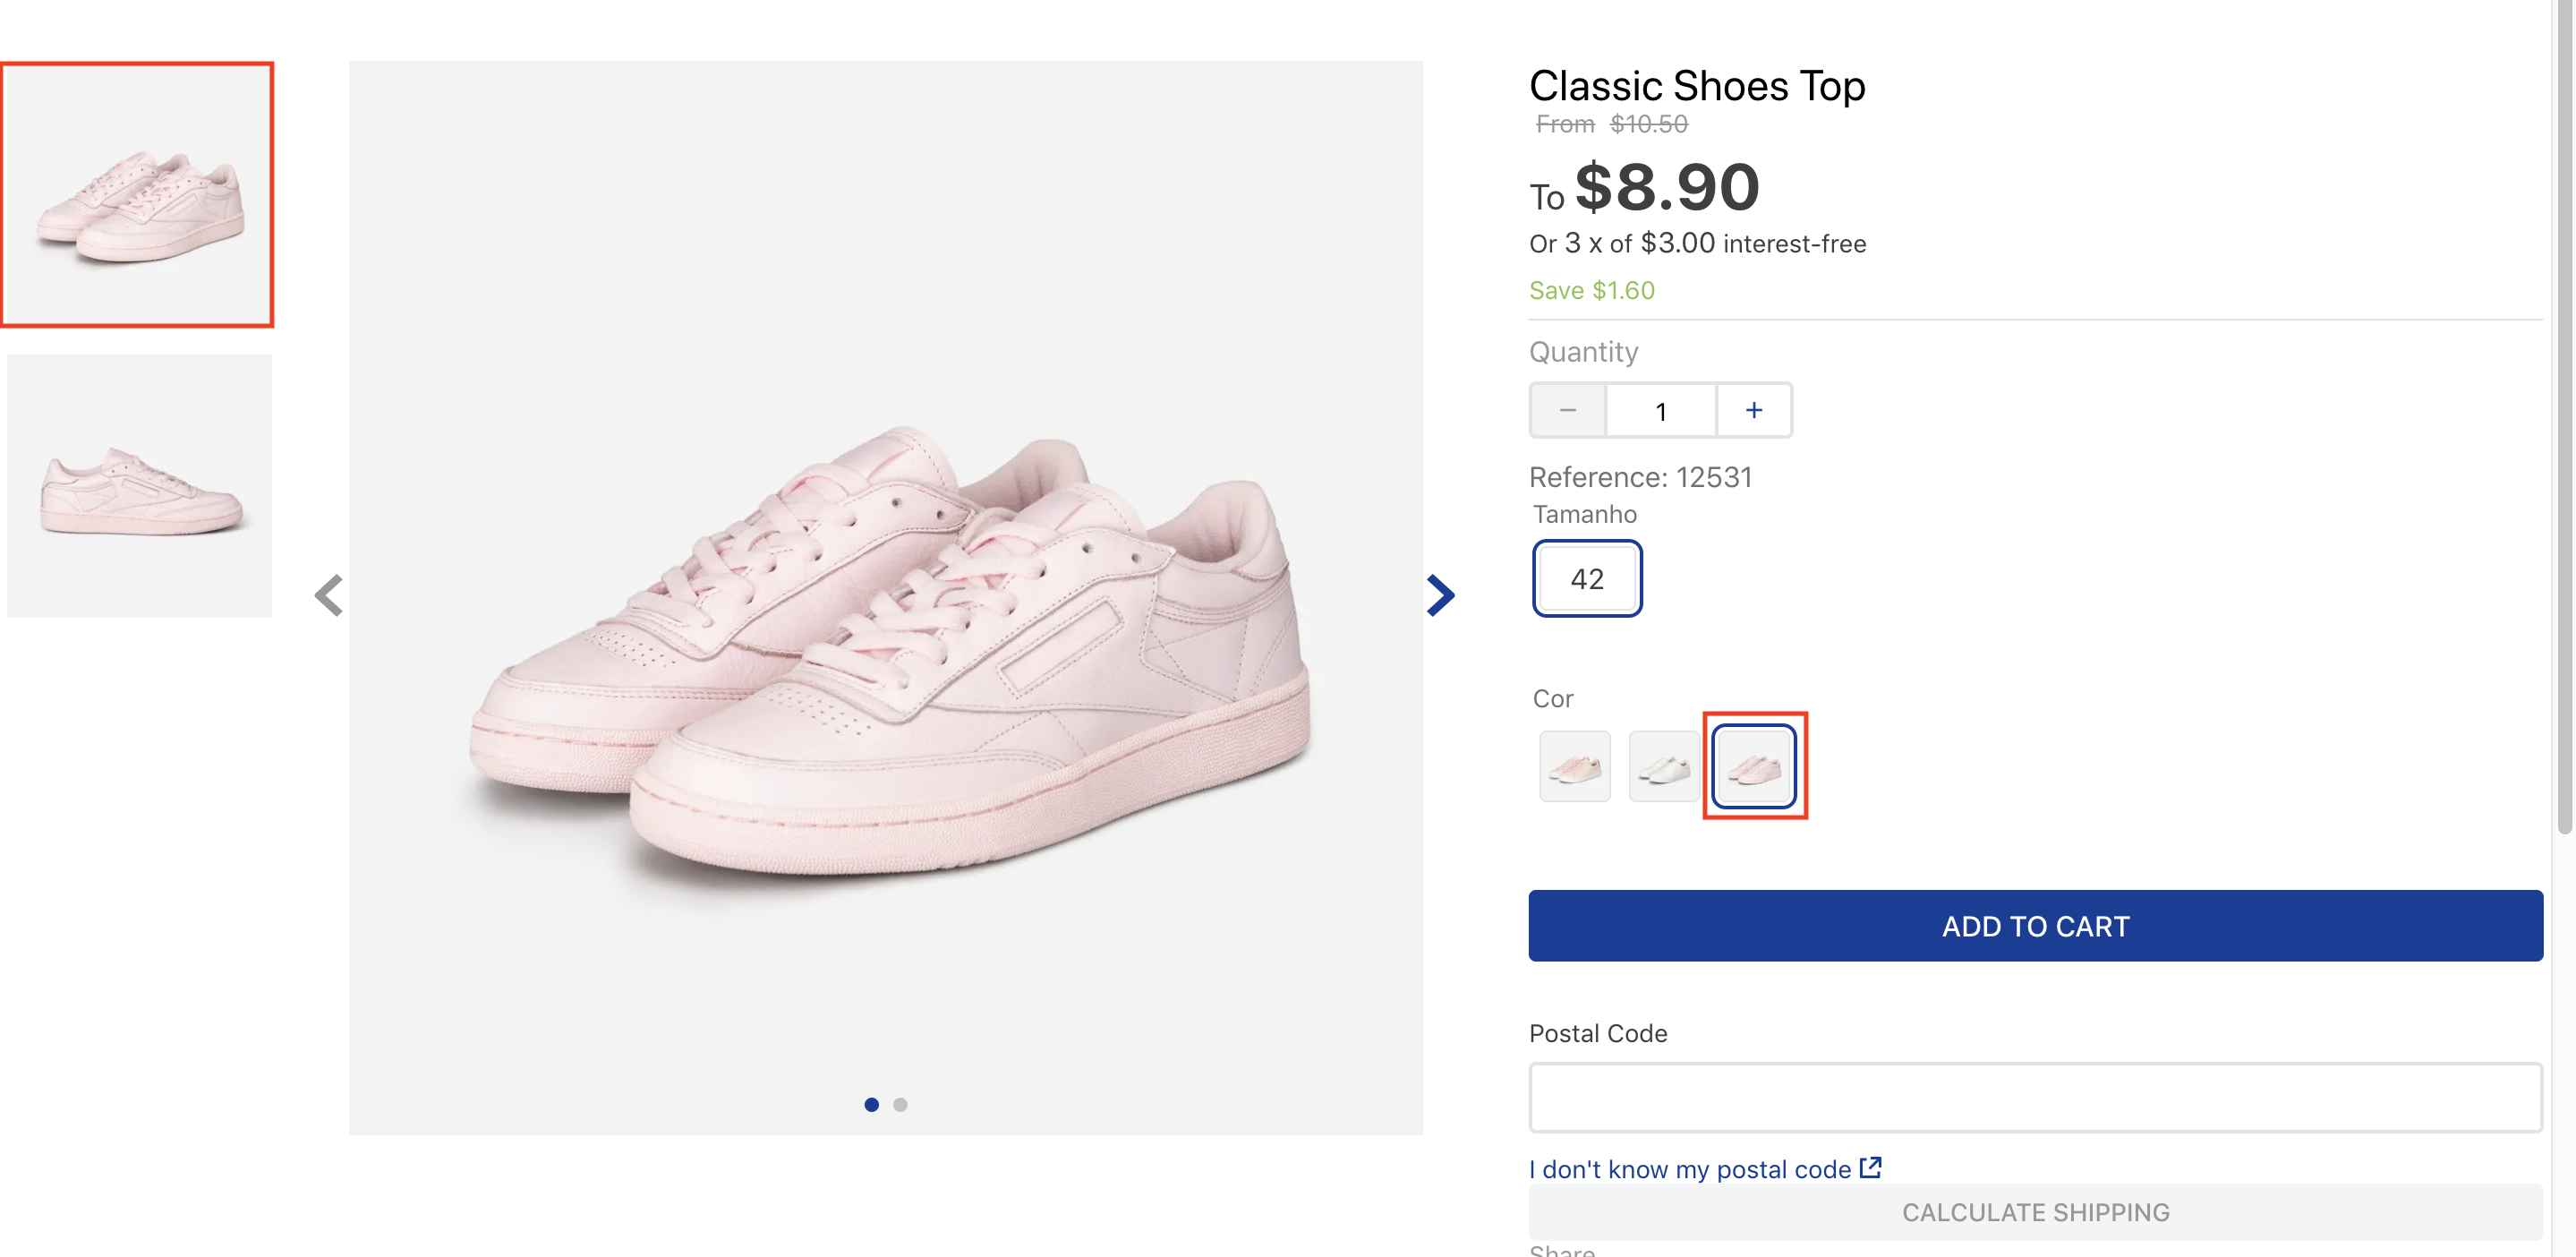
However, you can configure the SKU selector to display a custom image, that is, an image different from the default one used by the SKU. For example:
Instructions
Step 1 - Adding an image to an SKU
To display a custom image in the SKU selector, first, you need to upload the image and associate it with the desired SKU:
- In the VTEX Admin, go to Catalog > Products and SKUs.
- Find the desired product and click the down arrow to see its SKUs.
- Click the desired SKU to edit it.
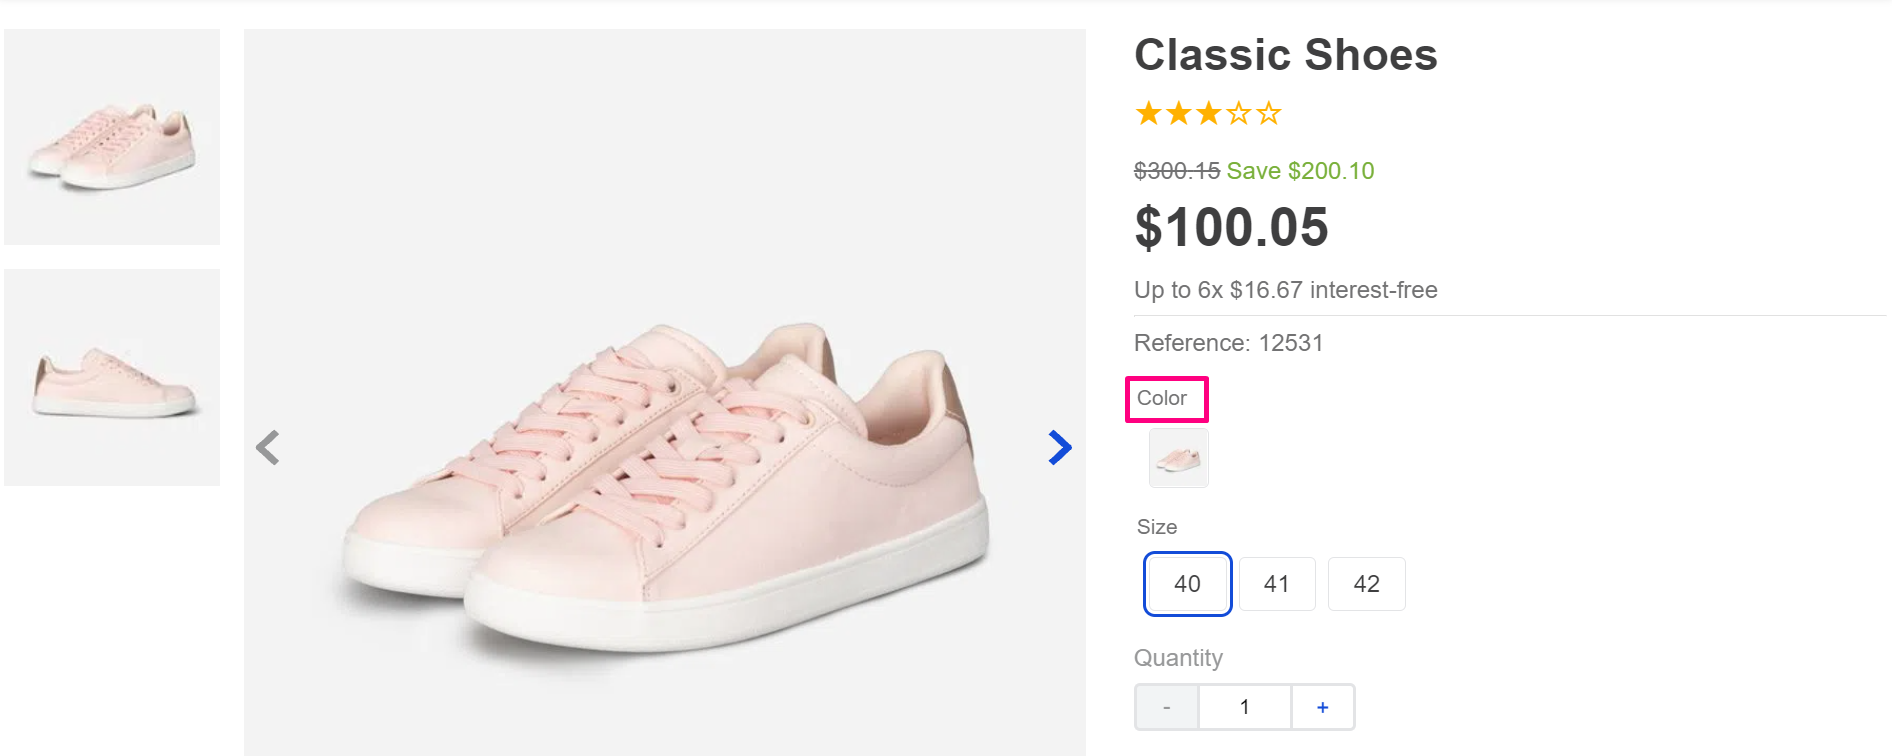
- In the Media > Images section, click
Addand choose one of the options to upload an image:- Choose files: Upload images stored on your computer.
- Add links: Upload images using a URL.
- Hover over the uploaded image, click the menu icon (
⋮), and then clickEdit Metadata. - In the Label field, enter a unique ID for the image. This label will be used to identify the custom image.
- Click Save to save your changes.
Step 2 - Configure the sku-selector block
Now, you must configure your theme to use the custom image in the SKU selector component:
- In your theme's code, find the
sku-selectorblock. - Add the
thumbnailImageprop, setting its value to the label you created in the previous step. For example:
_10"sku-selector":{_10 "props": {_10 "thumbnailImage": ["LabelId"]_10 }_10},
Replace
LabelIdwith the exact label you set for your custom image.
After completing this step, your SKU selector will display the new custom image.
Step 3 - Hide the custom image from the main product gallery
By default, the custom image you added will also appear in the main product image gallery. To prevent this behavior, you can hide it by following these steps:
- In your store theme's code, find the
product-imagesblock. - Add the
hiddenImagesprop, setting its value to the same label used for your custom image. For example:
_10"product-images": {_10 "props": {_10 "displayThumbnailsArrows": true,_10 "hiddenImages": ["LabelId"]_10 }_10},
Replace
LabelIdwith the exact label you set for your custom image. All SKUs using a custom image must use the same label value for boththumbnailImageandhiddenImagesprops.
After completing this step, you'll have a custom image exclusively for your SKU selector, which won't appear in the main product gallery.
Step 4 - (Optional) Specify SKU color variations
To display color variations for SKUs with specific names, you can create an SKU field.
Follow these steps to configure SKU color variations:
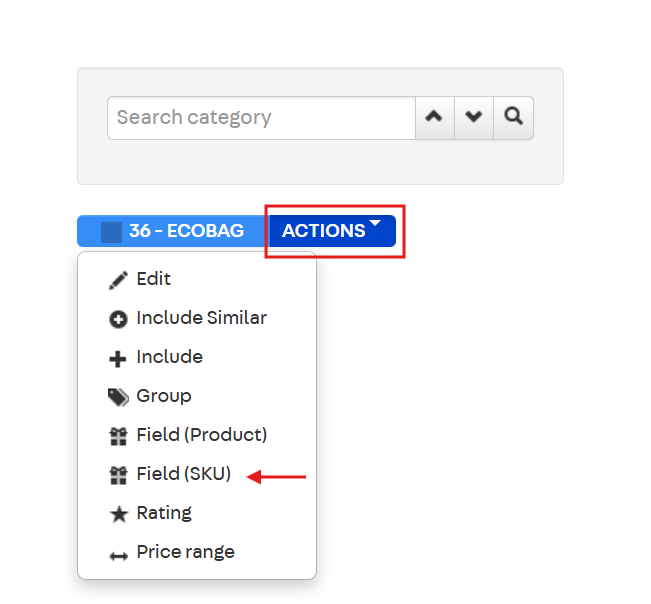
- In the VTEX Admin, go to Catalog > Categories.
- Click the desired category, then click
ACTIONS. - From the dropdown menu, select
Field (SKU).
- Click
New fieldand configure each field accordingly. For more details on this, see the instructions on Creating an SKU field. - Click
Saveto create the new field.

Once created, SKU fields can't be deleted, and required fields must be completed for all SKUs in that category, or they may become inactive.
- In the row of the field you just created, click the down arrow next to the
Editbutton and selectValues. - Create a
New valueorEdita previously defined value. - In the Name field, enter each color value on a new line (for example, Off-white, Blue, Black).
- Click
Saveto save your changes.
Learn more about this process in the guide Adding SKU specifications or fields.
Your changes will now be available for SKUs with thumbnail images.