Setting up Google Tag Manager
Explore how to track and analyze store data using Google Analytics 4.
After installing the VTEX IO Google Tag Manager app, configure the necessary variables, triggers, and tags to set it up in your store.
In this guide, you will learn how to track and analyze store data using Google Analytics 4 (GA4). The guide covers:
- Configuring GA4 events by downloading and importing a container file; adding the necessary tags, triggers, and variables; and updating the Measurement ID field with your Google tag ID.
- Testing the GA4 Configuration tag to ensure it fires correctly on every page and confirming that GA4 Event tags accurately track user actions, such as viewing a product or adding a product to the cart.
- Using Google Analytics DebugView and Reports to check if events are being received and data is populating your reports.
- Tracking key user actions — including product impressions, add-to-cart events, and completed orders — by leveraging Pixel Apps and GA4 events.
Before you begin
Get the VTEX IO Google Tag Manager app
Install and configure the VTEX IO Google Tag Manager app. For more information, see the guide Installing Google Tag Manager.
Create a Google Analytics 4 (GA4) Configuration tag
Create a Google Analytics 4 (GA4) Configuration tag using your Measumerent ID in Google Tag Manager (GTM). For more information, see the Google article Set up the Google Analytics 4 Configuration tag.
Instructions
Step 1 - Setting up GA4 events
After creating the GA4 Configuration tag, set up GA4 events as follows:
-
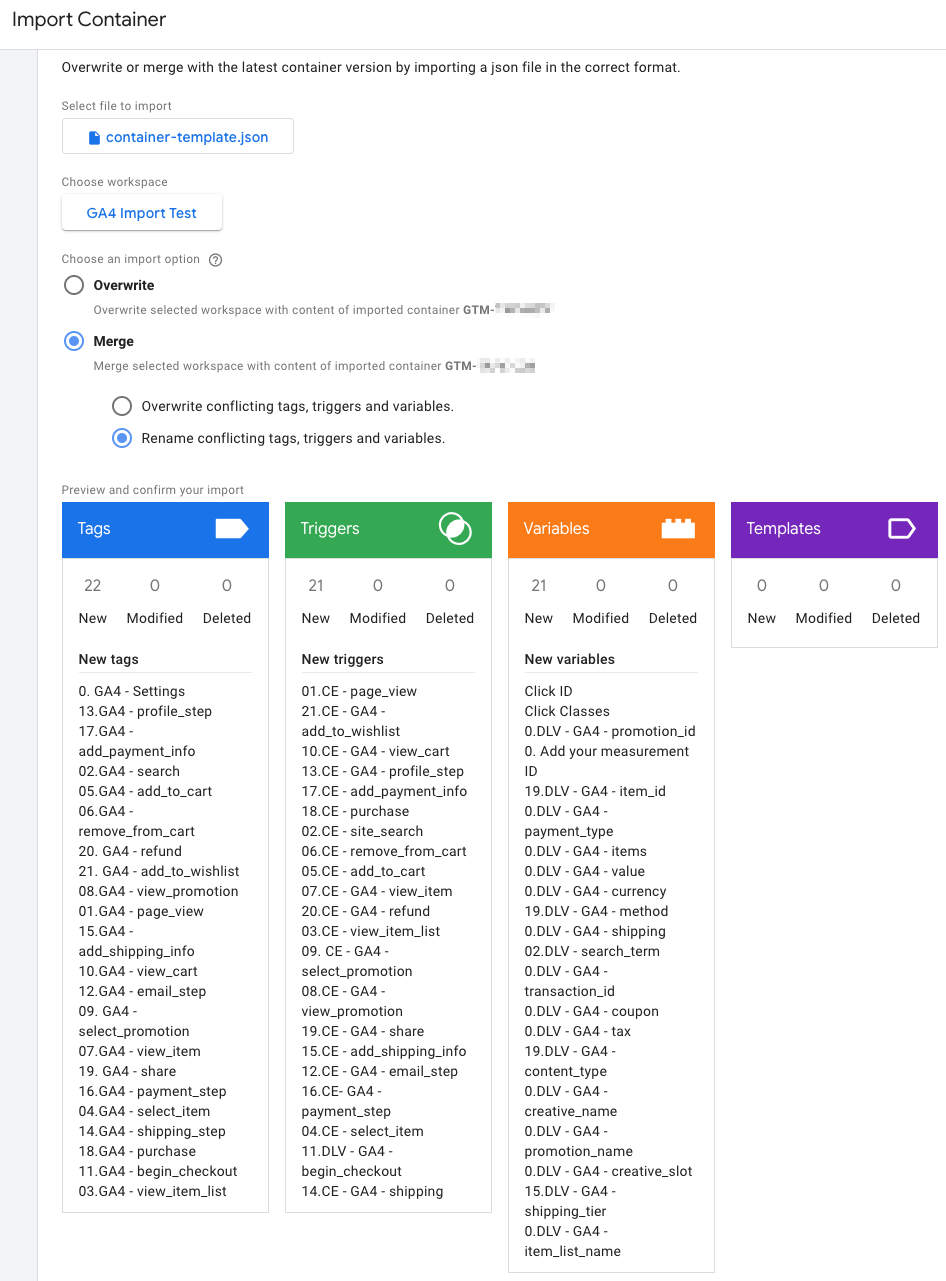
Download the GTM container file to preload all necessary tags, triggers, and variables.
-
Import the container file by following Google’s Import a container guide. This will add all the necessary tags, triggers, and variables to the workspace.
-
In the GTM container, go to the GA4 Configuration tag, and edit the Measurement ID field with your Google tag ID (G- ID).
To find your Google tag ID, check the Find your Google tag ID guide.
Step 2 - Testing tags in Google Tag Manager
To test if the GA4 Configuration tag is firing correctly on every page, use the Preview mode in GTM. Additionally, check if the GA4 Event tags are firing accurately for user actions, such as viewing a product or adding a product to the cart.
Step 3 - Testing events sent to Google Analytics 4
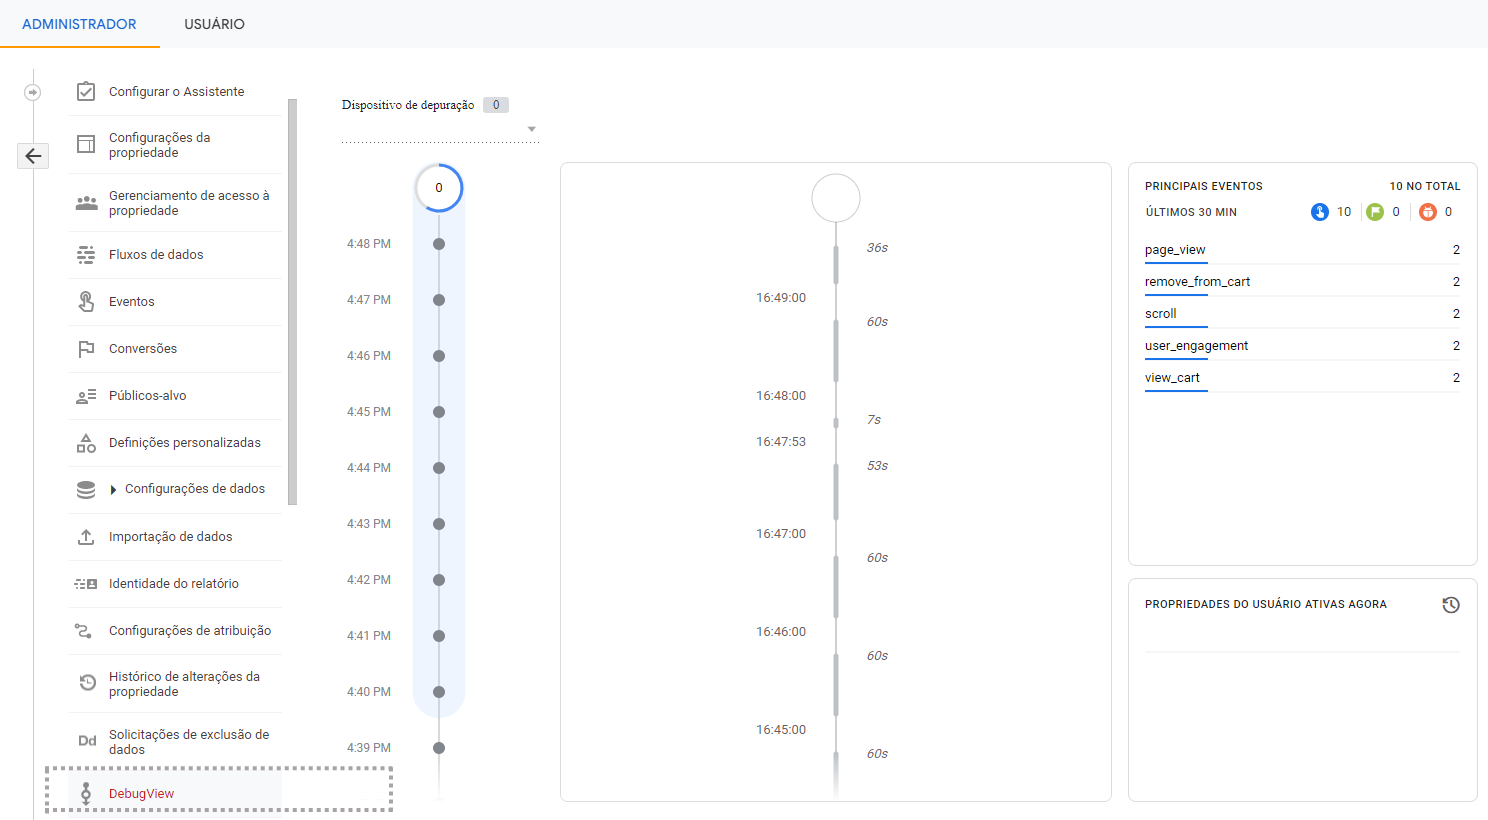
To check if the events are being received and the reports are populated with data, go to the Google Analytics Admin and use the DebugView to make sure the events are arriving and the Reports are getting the data.
To see the available events that GA4 can track, check the Overview of trackable events section.
Overview of trackable events
This section provides a list of events that GA4 can track and explains the view_promotion event, which is usually attached to the promotion banner carousel displayed by the Slider Layout block.
View promotion
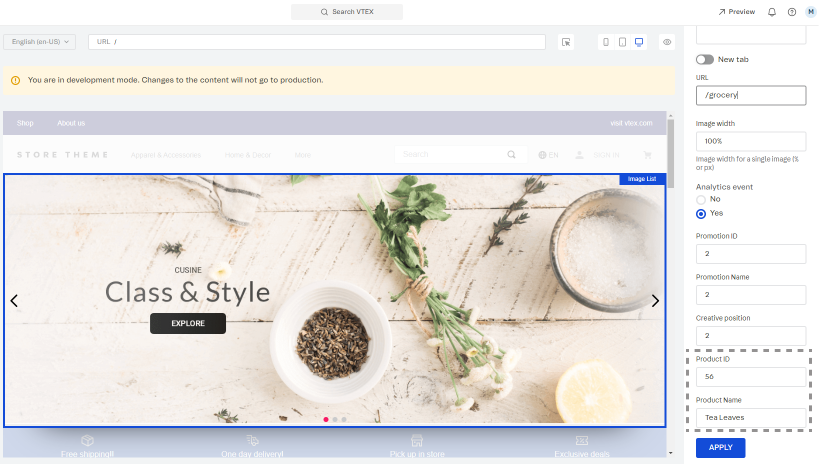
The GA4 view_promotion event expects the product name or ID associated with it.
This event is commonly attached to the promotion banner carousel displayed by the Slider Layout block. For example, you can use Site Editor to configure the Product ID and Product Name. To access Site Editor, go to Storefront > Site Editor in the VTEX Admin.
Supported events
Check the available events that Pixel Apps can listen to, along with their corresponding names in Universal Analytics (UA) and Google Analytics 4 (GA4):
| VTEX | UA | GA4 |
|---|---|---|
| vtex:promoView | promoView | view_promotion |
| vtex:promotionClick | promoClick | select_promotion |
| vtex:productImpression | impressions | view_item_list |
| vtex:productClick | click | select_item |
| vtex:productView | detail | view_item |
| vtex:addToCart | add | add_to_cart |
| vtex:removeFromCart | remove | remove_from_cart |
| vtex:viewCart | Not applicable | view_cart |
| vtex:beginCheckout | checkout | begin_checkout |
| vtex:addShippingInfo | Not applicable | add_shipping_info |
| vtex:addPaymentInfo | Not applicable | add_payment_info |
| vtex:orderPlaced | purchase | purchase |
| vtex:refund | Not applicable | refund |
| vtex:search | Not applicable | search |
| vtex:share | Not applicable | share |
| vtex:addToWishlist | Not applicable | add_to_wishlist |
Partially supported events
The following events are not fully supported yet. Although the GTM app will listen and format them into GA4, corresponding VTEX event triggers have not been implemented yet:
| VTEX | GA4 |
|---|---|
| vtex:login | login |
| vtex:signUp | sign_up |