Setting up DKIM for transactional emails
To enhance security for outgoing email and improve deliverability, the DKIM standard adds an encrypted signature to the header of all outgoing messages. Email servers that receive signed messages use DKIM to decrypt the message header and verify the message was not changed after it was sent.
This guide explains how to use the Message Center API to generate DKIM keys that can be stored in your DNS provider so that all transactional emails sent by VTEX can be recognized as legitimate.
These instructions only apply if the sender is set up using VTEX mail servers. If you use your own SMTP provider, you need to enable DKIM in your mail server.
DKIM endpoint
It is necessary to use the POST Generate DKIM keys endpoint from Message Center API, as follows:
POST https://{accountName}.{environment}.com.br/api/mail-service/pvt/providers/{EmailProvider}/dkim
{accountName}should be replaced with your store account name (e.g.apiexamples).{environment}should be replaced with the environment you are using (e.g.vtexcommercestable).{EmailProvider}should be replaced with the configured email address (e.g.help@valdie.co).
See the Message Center API reference for more details.
Generating a DKIM key for your domain
Follow the steps below to create a DKIM key for your domain:
-
Make a request to the
POSTGenerate DKIM keys endpoint.Before you have set up a sender in Message Center using VTEX mail servers, this is the expected response from the DKIM endpoint:
_10{_10"status": "emailNotFound",_10"dkimKeys": null_10} -
Follow this guide to set up a sender on Message Center.
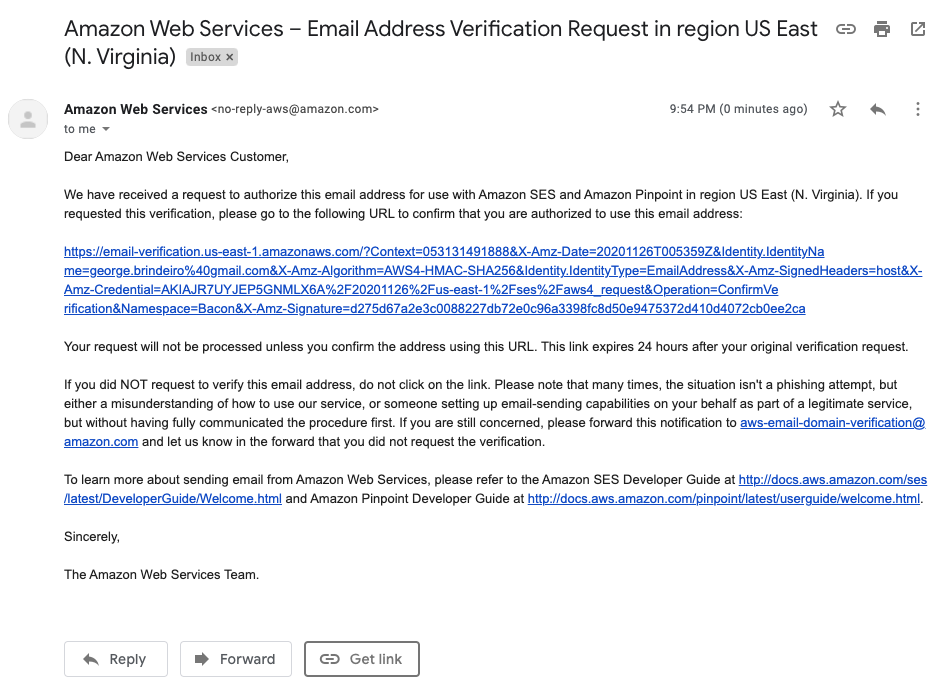
Once the sender has been set up, you should receive an email from Amazon Web Services requesting you to authorize the configured email address to use Amazon SES, as illustrated below:
-
Click the confirmation link provided in the email body to verify you are the owner of the configured email address. This is required for the mail server to send mail on your behalf.
Until this is done, this is the expected response from the DKIM endpoint:
_10{_10"status": "emailNotVerified",_10"dkimKeys": null_10} -
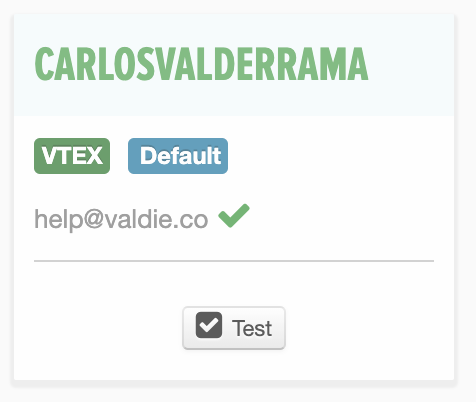
Once you have clicked the confirmation link, test your SMTP configuration on VTEX Admin at Email Templates > Senders by clicking the ✅Test button, as shown in the image below:
You should receive an email from the VTEX mail server using the sender you selected. The email message sent follows the Message Center template
messageservice_teste_email, which you can customize as in the image below by following the How to create and edit transactional email templates guide.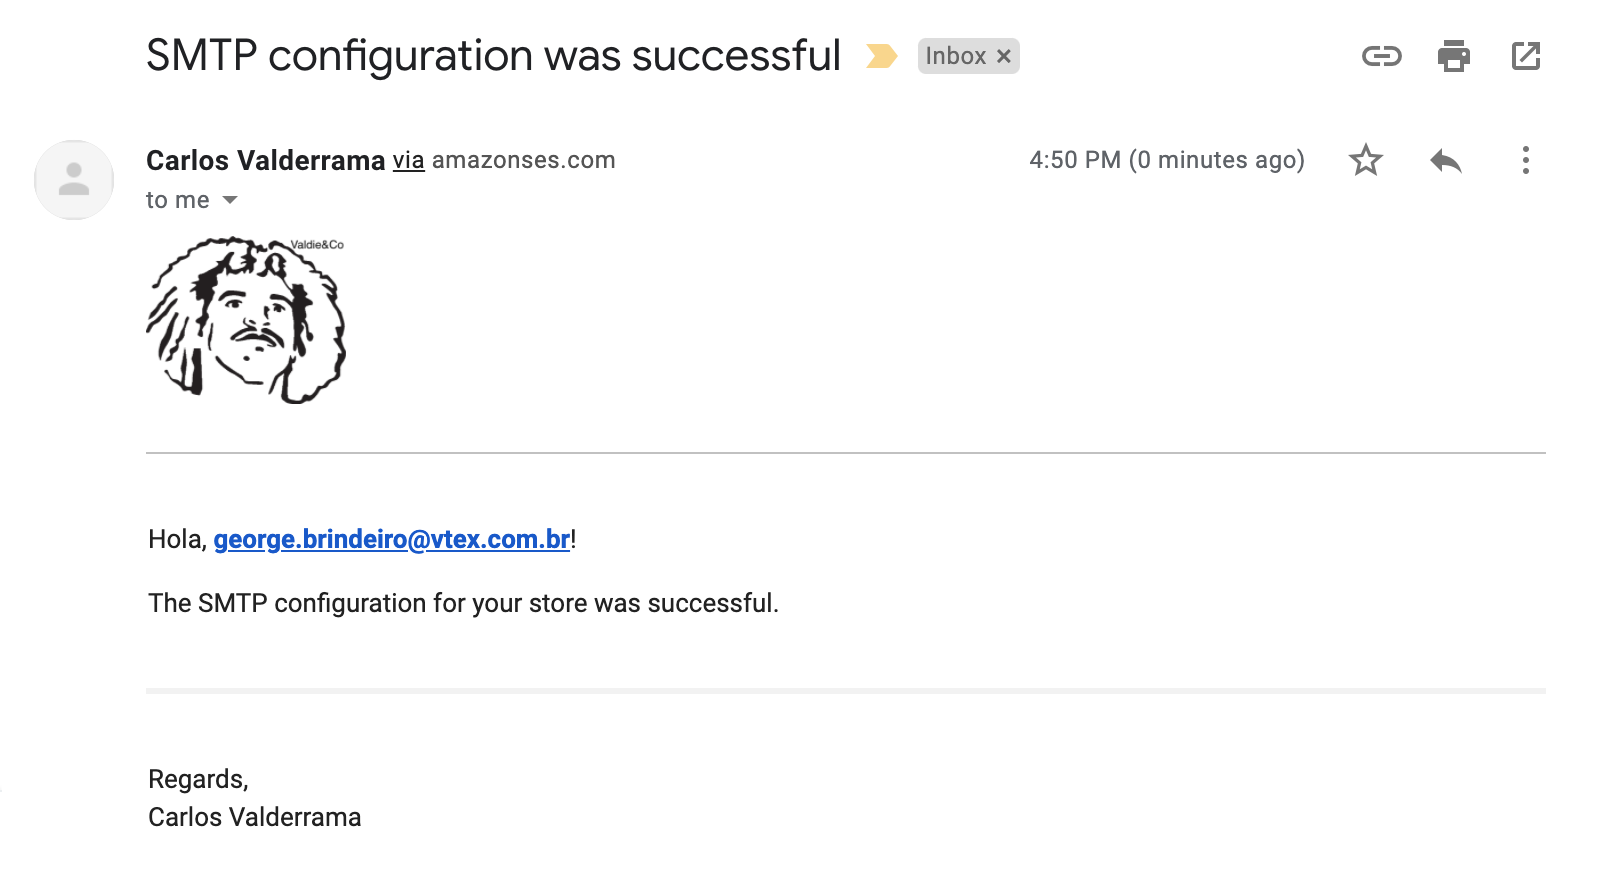
If you do not receive any messages, review your sender configuration and try again.
-
Once you have correctly set up a sender in Message Center using VTEX mail servers, make a request to
POSTGenerate DKIM keys endpoint again.The response should be similar to the one below:
_10{_10"status": "created",_10"dkimKeys": [_10"'n4zbltwizctxpgcmqrars4bmfdd3zlyo._domainkey.valdie.co','CNAME','n4zbltwizctxpgcmqrars4bmfdd3zlyo.dkim.amazonses.com'",_10"'sq3iae4be52fhqq3wm44btttvndeecfv._domainkey.valdie.co','CNAME','sq3iae4be52fhqq3wm44btttvndeecfv.dkim.amazonses.com'",_10"'n4z5g2g7yfy4pnhjklfesxrrkt4o2ha4._domainkey.valdie.co','CNAME','n4z5g2g7yfy4pnhjklfesxrrkt4o2ha4.dkim.amazonses.com'"_10]_10}
Adding the public key to your DNS records
Now that you have generated a DKIM key for your domain, you need to add the values listed in dkimKeys in your DNS records. Read the documentation for your domain name for specific instructions on how to do that, but this is the general flow:
- Sign in to the management console for your domain host.
- Locate the page where you update DNS records.
- Add a CNAME record for each corresponding DKIM key.
- Save changes.
In up to 72 hours, all settings will be applied automatically, and our servers will start adding a DKIM signature to all outgoing messages.