Understanding Delivery Promise operation
This feature is in closed beta, meaning only selected customers can access it. If you're interested in implementing it, please contact our Support team.
This guide explains how Delivery Promise operates, covering the following:
- Hooks: Discover the hooks used to manage user location, fulfillment options, and Delivery Promise workflows.
- Filter options: Learn how shoppers can filter products by delivery or pickup methods.
- Location priority: Understand the order and logic used to determine the shopper's location for accurate delivery estimates.
To learn how to implement Delivery Promise in your store, see the guide Implementing Delivery Promise.
Hooks
This feature introduces the following hooks as part of the regionalization and location workflow:
useGeoLocation: Uses the browser's geolocation API or other client-side methods to auto-detect the user's location when not provided.useRegion: Accesses or updates the user's region information, such as a postal code or location and manages region validation flows.useRegionModal: Handles modal display logic for region selection, especially when the location input is mandatory.useDeliveryPromise_unstable: Manages all logic for querying, displaying, and updating delivery availability filters and states.deliveryPromiseStore_unstable: Stores and retrieves Delivery Promise data (pickup points, default/global selection, simulation state).
Filter options
Delivery Promise offers shoppers two product filtering options:
- Global filters: Apply to all store navigation.
- Product List Page (PLP) or search page: Apply only to the current page the shopper is viewing.
Learn more about filter usage and user flows on the Delivery Promise Figma Community page.
Global filters
Global filters remain active across all user navigation and are applied to all product searches until they are changed or cleared.
Shoppers can filter available products globally using the Filter by store option, which displays only products available for pickup at a specific store. This filter shows all available pickup points within a 50-km radius, as configured in Checkout. The number of pickup points displayed is unlimited.
PLP or search page filters
On PLPs or search pages, shoppers have the following options for applying filters: Delivery Methods, Delivery Option, and Availability.
To edit the filter labels, follow the instructions in Managing filters and badges.
Delivery Methods
This filter displays available products according to the shopper's location, allowing them to filter using the following options:
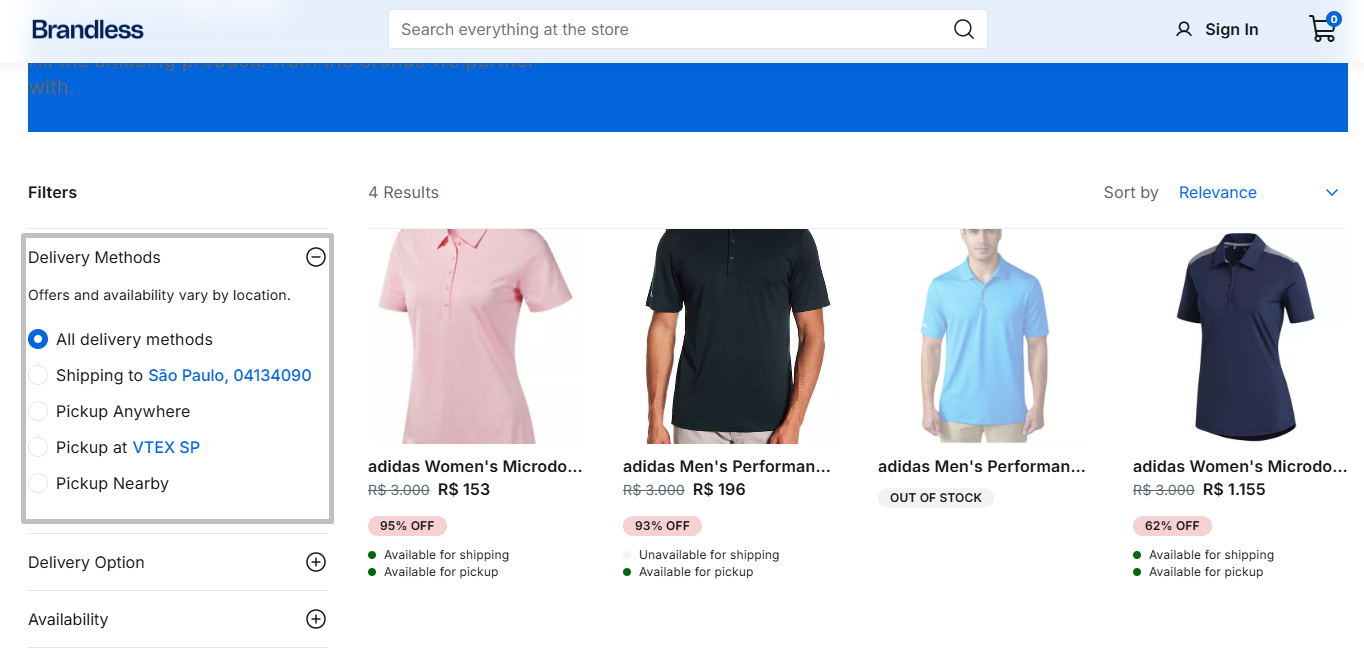
| Filter option | Description |
|---|---|
| All delivery methods | Displays products that match all active delivery method filters: Shipping to, Pickup anywhere, Pickup at, and Pickup nearby. |
| Shipping to | Displays products that can be shipped to the shopper's specified location. |
| Pickup anywhere | Displays products available for pickup at any participating store within the merchant's network, rather than restricting results to a selected pickup location or geographic proximity. This is often used by B2B stores, and this filter is deactivated in Headless CMS by default. |
| Pickup at | Displays the store specified in the global pickup point filter or the one closest to the shopper's location. To change the store set in Pickup at {storeName}, the shopper can click on it and select a new store in the slideover that opens. This slideover shows all available pickup points within a 50-km radius, as configured in Checkout. |
| Pickup nearby | Displays products available for pickup at the shopper's nearby stores. This filter considers up to 40 pickup points within 10 km of the shopper's location. |
Delivery Option
This filter allows shoppers to refine search results based on the type of delivery or pickup method available for each item, helping to find products that match the shopper's preferred fulfillment method.

To create, configure, and manage delivery options in the VTEX Admin, see the instructions in the Delivery Option (Beta) guide.
While following the instructions to create the delivery options, make sure to enable the option Use option as a filter on the store product. This will allow shoppers to filter products by the delivery option using Intelligent Search filters.
Availability (In-stock filter)
This filter helps shoppers refine product results based on whether items are available for purchase and fulfillment, preventing the display of products they can't immediately buy in their preferred fulfillment method and narrowing results to only what’s actually in stock.
The Availability filter is disabled by default in the Headless CMS. This filter is helpful for stores where the
discovery.config.js file has hideUnavailableItems set to false. Otherwise, when this setting is true, unavailable products are already hidden by default, so the Availability filter would have no functionality in this scenario.To enable this filter in your store, follow the instructions in Enabling the Availability filter.
Badges
When Delivery Promise data is available, the
ProductCard automatically displays badges so shoppers can quickly see shipping and pickup availability for their location.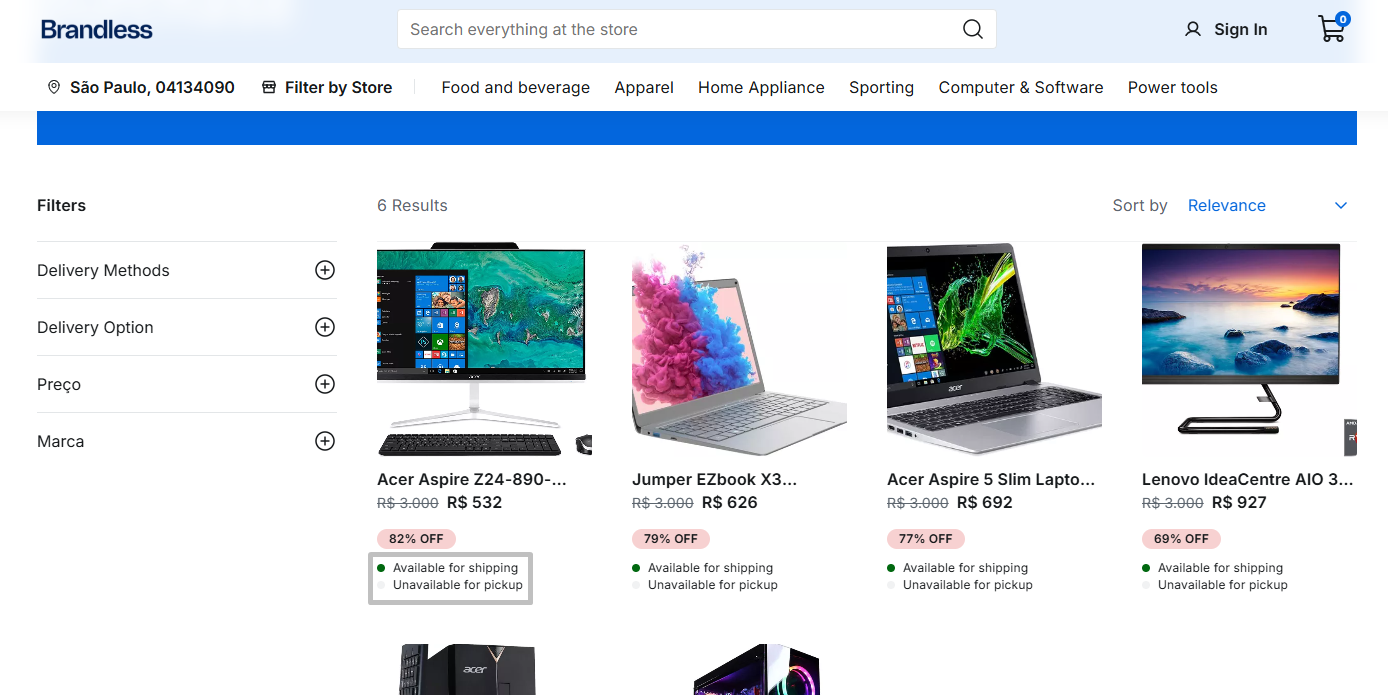
In the following table, see the available types of badges:
| Badge label | Description |
|---|---|
Available for shipping or Unavailable for shipping | Indicates whether the product can be shipped to the shopper's postal code. |
Available for pickup or Unavailable for pickup | Indicates that the product can be collected from a nearby pickup point. |
| No badges available | The product is out of stock. Delivery and pickup are unavailable. |
To edit the badge labels or disable the badges, follow the instructions in Managing filters and badges.
Understanding location priority
To provide accurate Delivery Promise estimates, FastStore projects determine the user's location based on the following priority:
-
Logged-in user's address: If the user is logged in and has a saved address, this information is used.
-
User-provided location: If the user is logged in but doesn't have a saved address, or isn't logged in but provides their location (like a postal code), this data is used.
-
Default postal code: If the user hasn't provided a location, isn't logged in, or has no saved address, we check if the merchant has configured a default postal code for all buyers. Learn how to do so in Defining a default postal code.
-
No postal code (optional): If no postal code is provided and not required, products are displayed without using Delivery Promise.
-
No postal code (required): If no postal code is provided when required, a modal is displayed that the buyer cannot close until a postal code is entered. To make the postal code required, open your
discovery.config.jsfile and change themandatoryfield in thedeliveryPromiseobject totrue, as shown in the Default settings section.
To better understand how this flow works, see the following diagram: