3. Creating a Store Theme project
Discover how to create your very first Store Framework storefront.
This guide explains how to start building a Store Theme, a VTEX IO project that uses the store builder and Store Framework blocks to create the storefront of a VTEX store. The Store Theme defines the store's visual and interactive elements, including layout, colors, typography, icons, and animations.
To kickstart our storefront project, we'll use a pre-defined Store Theme boilerplate app, which simplifies the process of creating a custom Store Theme by providing pre-defined templates and styles. For more information about available themes, see the guide Store Theme.
Before you begin
Have the Edtion Store app
Make sure your VTEX account has the Store Edition app installed, as recommended in this track's second step Configuring your account. Otherwise, you won't be able to successfully implement the VTEX Store Framework.
Learn about the Store Theme app’s structure
Familiarize yourself with the Store Theme’s structure. Understanding the purpose of each file and folder will help you configure the store’s templates and visual theme according to your needs. Learn about in Project structure.
Instructions
Step 1 - Downloading the Store Theme app
The VTEX IO CLI provides pre-defined app templates to simplify the creation of a new VTEX IO project. Follow these steps to set up a Store Theme project:
-
Open your terminal and run the following command to create a new project:
_10vtex init -
When prompted, select
store. The CLI will ask for confirmation before cloning theminimum-boilerplate-theme. Typeyto proceed.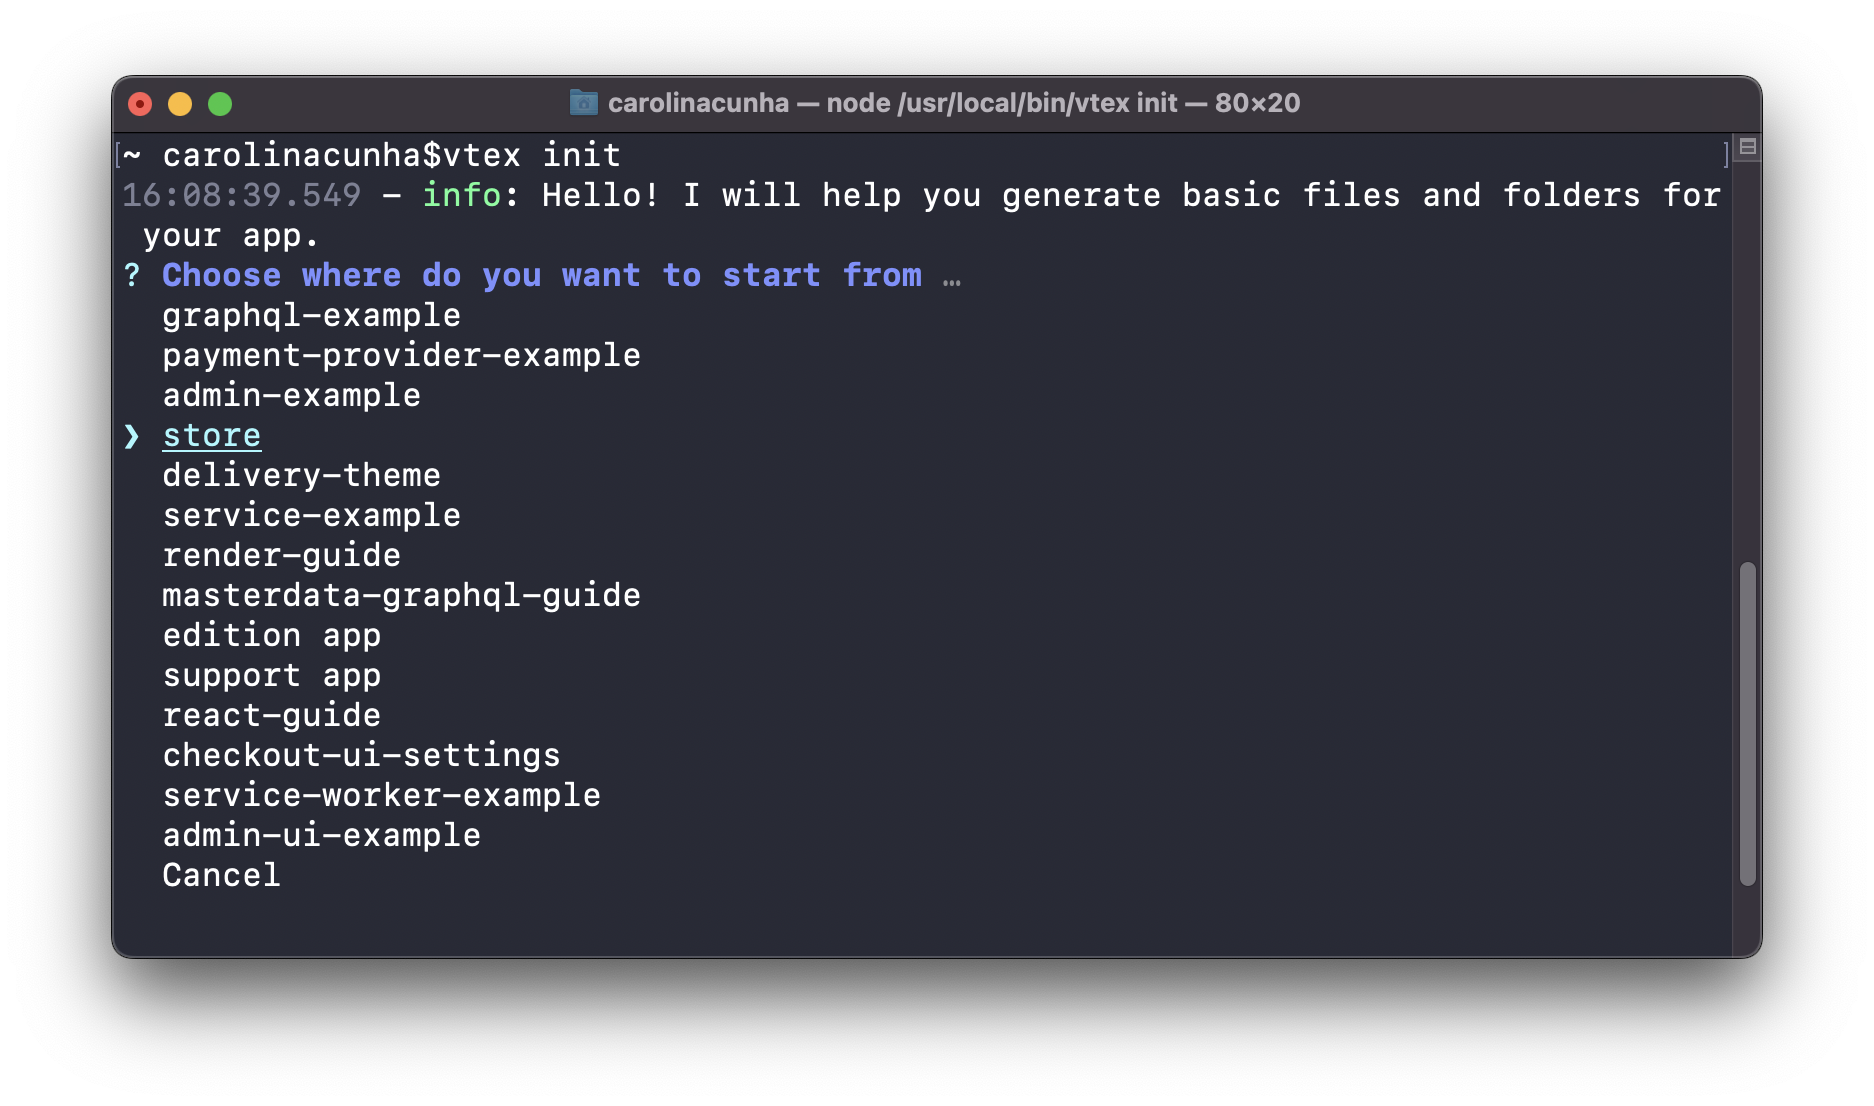
-
Open the
minimum-boilerplate-themein your preferred code editor. -
Go to the
manifest.jsonfile and replace the predefinedvendorvalue with your store's account name. This ensures you can publish your Store Theme app correctly.
Step 2 - Linking your local code to the VTEX IO platform
Since the Store Theme boilerplate app already includes a default theme, you can immediately see how this theme affects your website frontend by following the instructions below:
- Open the terminal and log in to your VTEX account.
_10 vtex login {accountName}
Replace
{accountName}with the name of your VTEX account.
- Create a development workspace by running the following command:
_10 vtex use {workspaceName}
Replace
{workspaceName}based on your scenario.
- Change to the
store-themedirectory. - Link the Store Theme app to the current workspace by running the following command:
_10 vtex link
The vtex link command sends your code to the platform, allowing you to see your changes in real time.
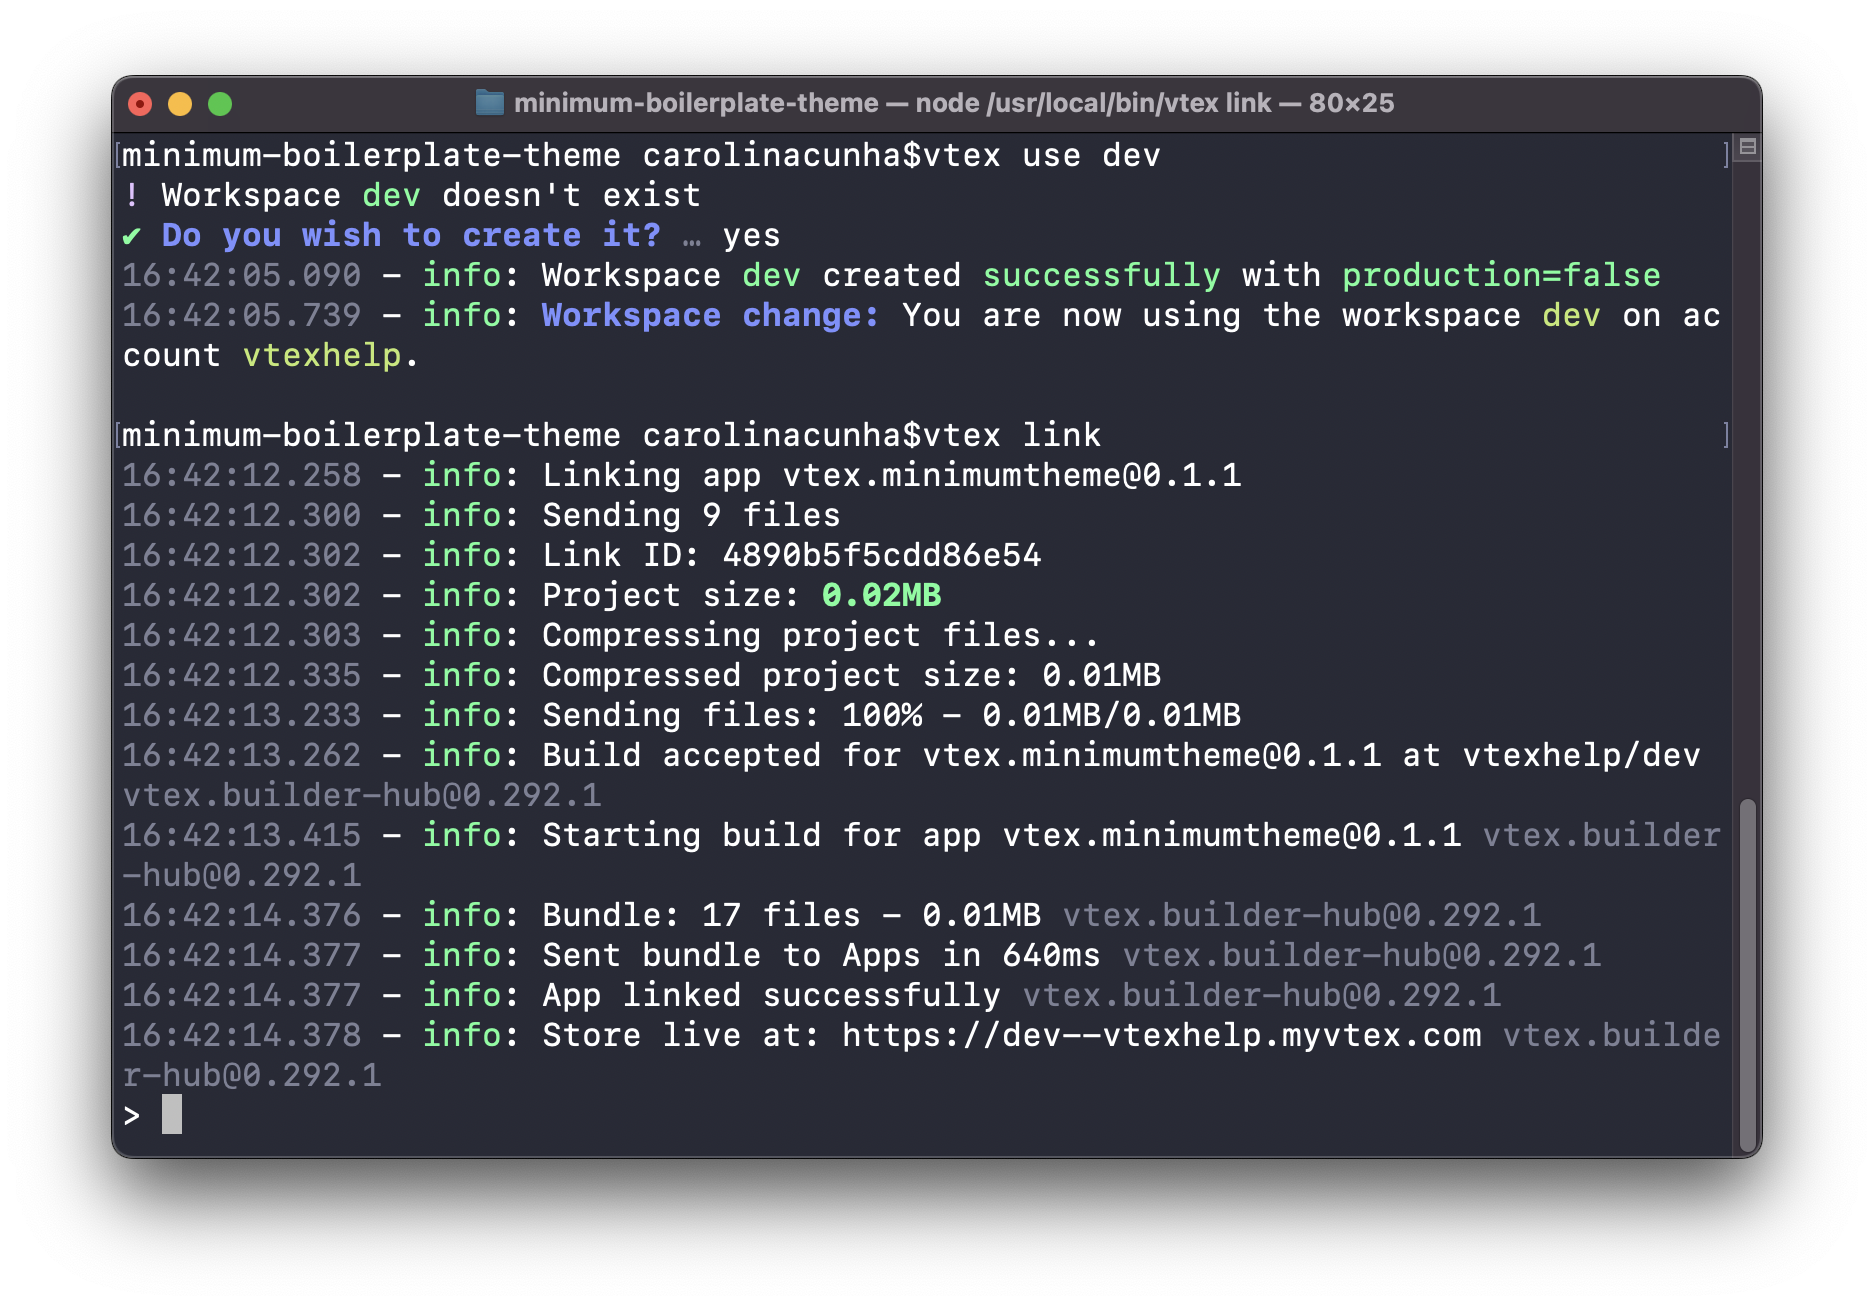
By successfully running this command in your terminal, your local code is sent to the VTEX IO cloud-native infrastructure and reflected in the development workspace you're currently working in. Any changes made to your Store Theme app files will now be automatically reflected on your website in real time.
Step 3 - Checking out your new Store Theme
To view your new Store Theme in action on your store's website, run the following command in your terminal:
_10 vtex browse
This command will open your browser with the workspace you're working on. Alternatively, you can navigate directly to https://{workspaceName}--{accountName}.myvtex.com, replacing the placeholders with your development workspace and VTEX account name.
Once you're logged in, you should see the following Store Theme rendered on your store's website:
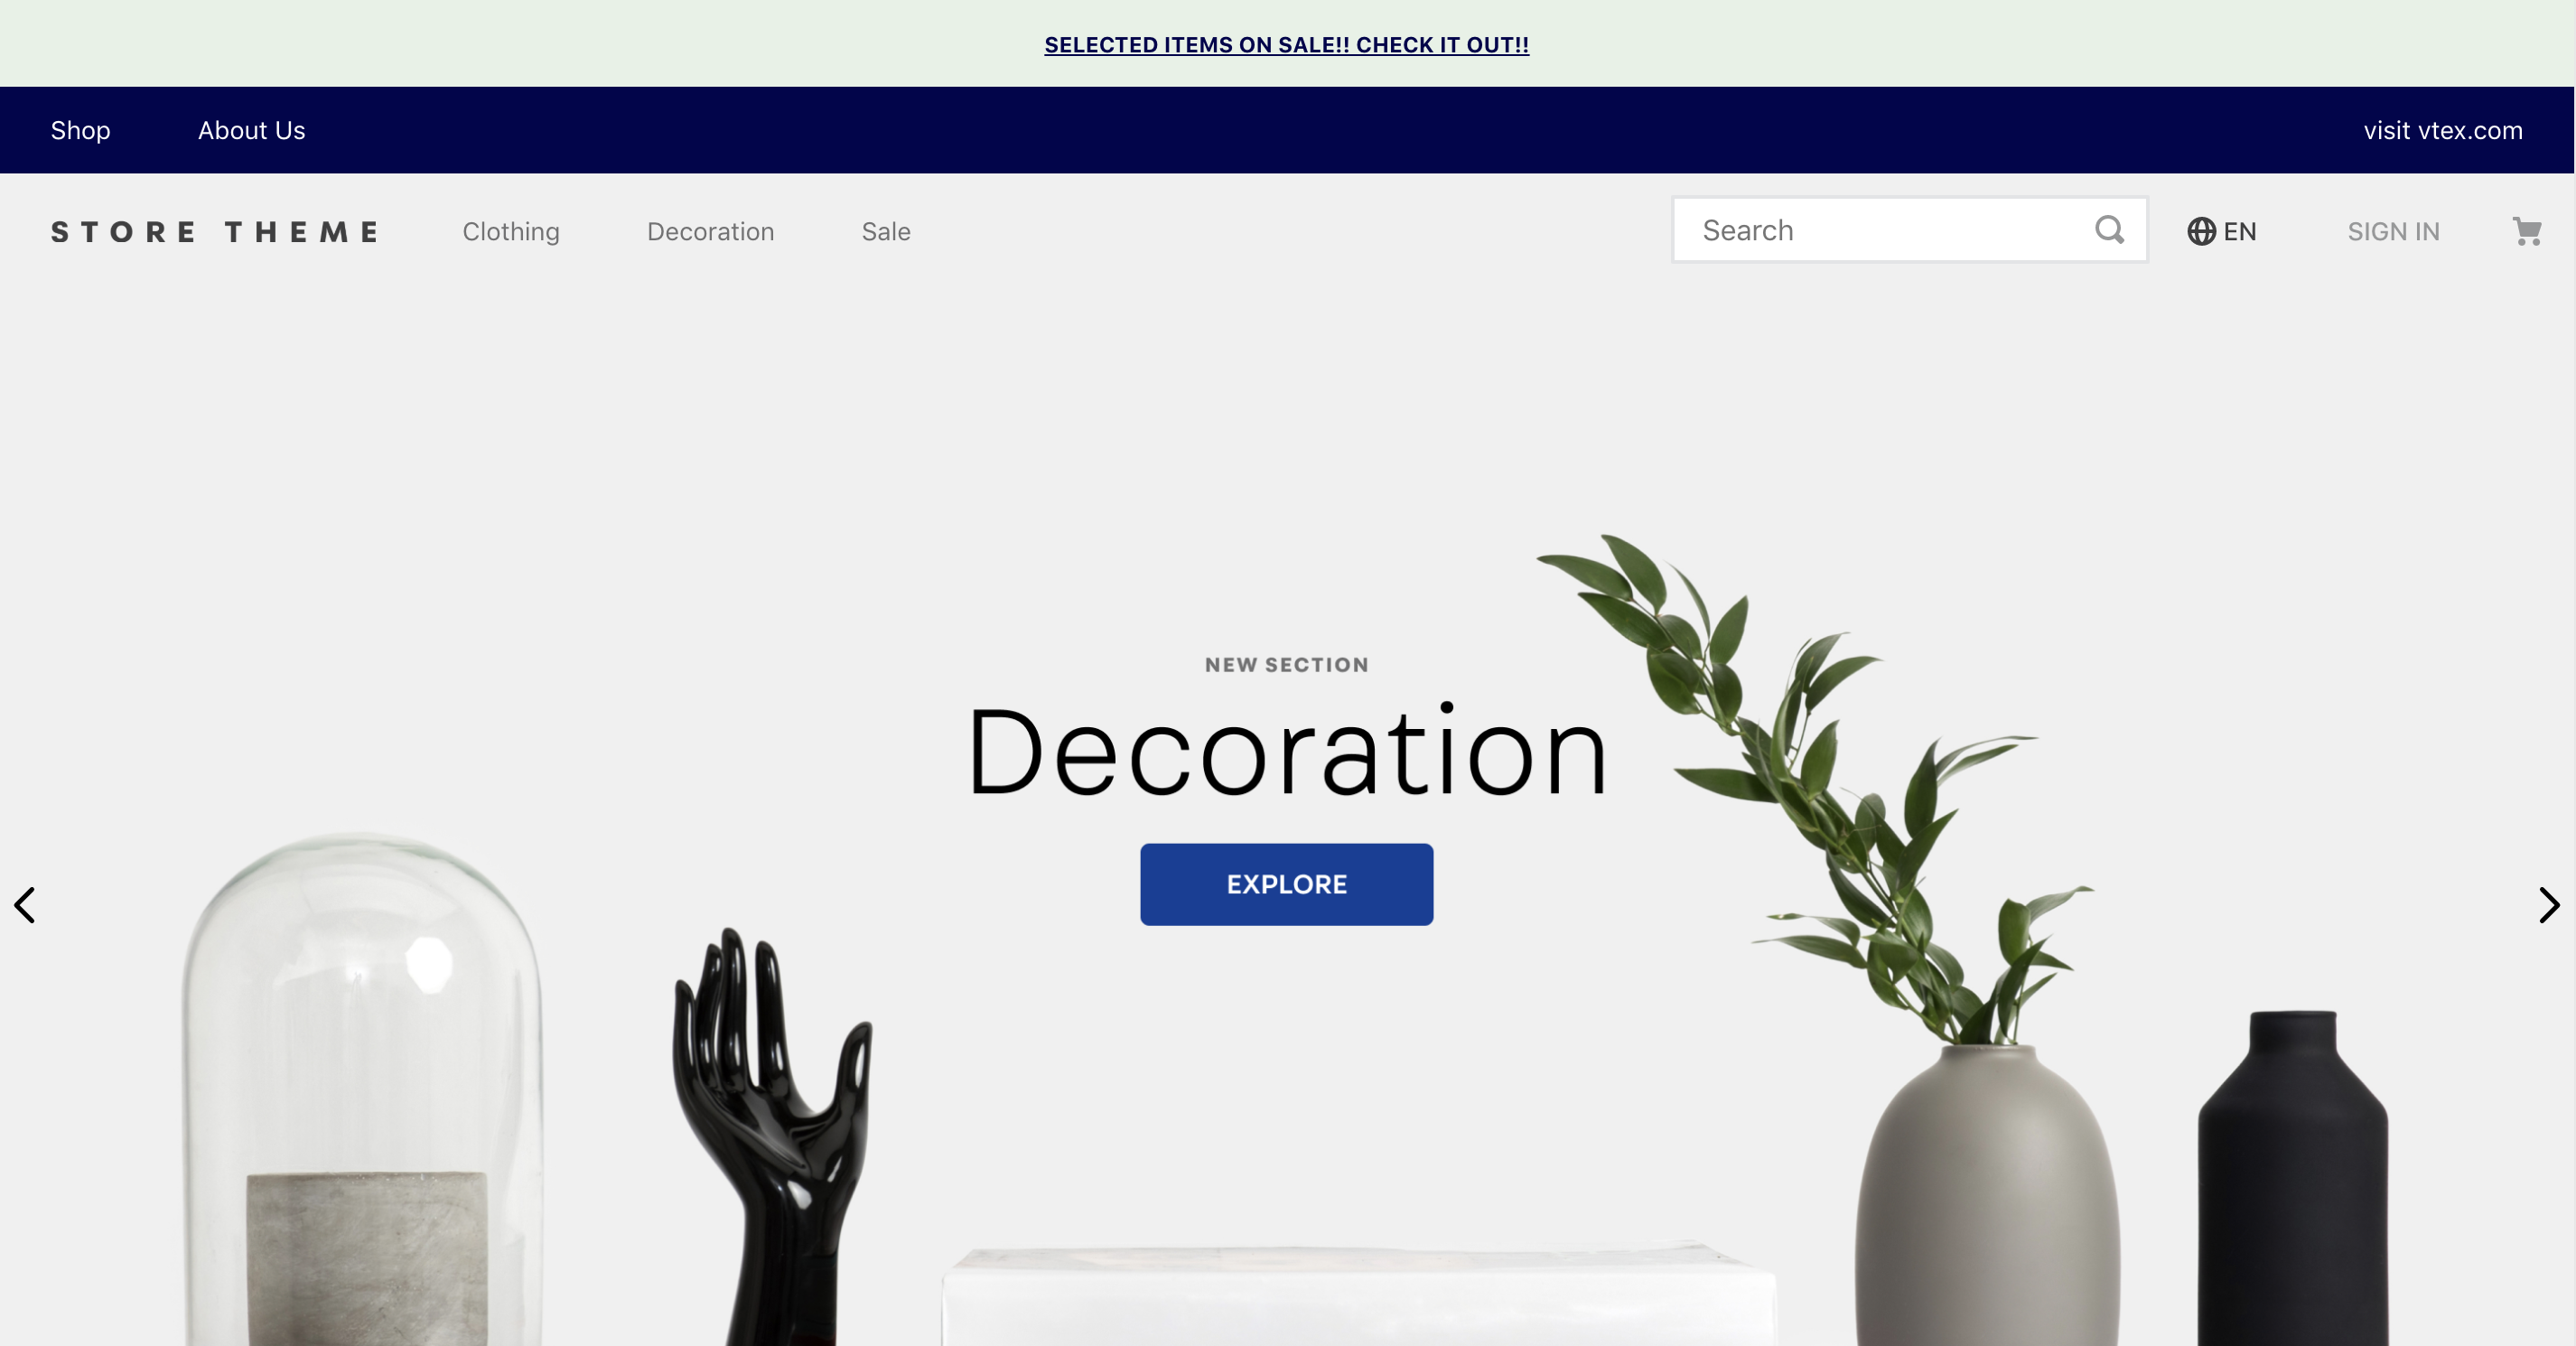
Now that your store is using a default theme code, you can start configuring the Store Theme app to match your store needs. This includes changing templates and customizing styles to create a unique identity for your store.
In the upcoming guides of this tutorial, you'll learn how to define templates by configuring and combining components for each store page, as well as declaring styles such as colors, typography scales, and spacing.