Newsletter
The Newsletter component is a section with at least one input text with an action allowing users to submit their input.
Uses
NewsletterForm, NewsletterHeader and NewsletterContent as compound components.Example
Code
Usage
Import the component
_10import {_10 Newsletter,_10 NewsletterAddendum,_10 NewsletterContent,_10 NewsletterForm,_10 NewsletterHeader,_10} from "@faststore/ui";
Import styles
To apply styles, include the following in your stylesheet:
_10@import "@faststore/ui/src/components/organisms/Newsletter/styles.scss";
For details, see Importing FastStore UI component styles.
Examples
Example
Code
Color variants
Main
Example
Code
Light
Example
Code
Accent
Example
Code
Design tokens
| Local token | Default value/Global token linked |
|---|---|
--fs-newsletter-padding-mobile | var(--fs-spacing-5) |
--fs-newsletter-padding-desktop | var(--fs-spacing-9) 10% |
--fs-newsletter-border-radius | var(--fs-border-radius) |
Title
| Local token | Default value/Global token linked |
|---|---|
--fs-newsletter-title-size | var(--fs-text-size-title-section) |
--fs-newsletter-title-weight | var(--fs-text-weight-bold) |
Icon
| Local token | Default value/Global token linked |
|---|---|
--fs-newsletter-icon-size | var(--fs-spacing-5) |
Variants
Card
| Local token | Default value/Global token linked |
|---|---|
--fs-newsletter-card-border-radius | var(--fs-border-radius) |
Main
| Local token | Default value/Global token linked |
|---|---|
--fs-newsletter-main-bkg-color | var(--fs-color-primary-bkg) |
--fs-newsletter-main-text-color | var(--fs-color-primary-text) |
Light
| Local token | Default value/Global token linked |
|---|---|
--fs-newsletter-light-bkg-color | var(--fs-color-secondary-bkg-light) |
--fs-newsletter-light-text-color | var(--fs-color-text-display) |
Accent
| Local token | Default value/Global token linked |
|---|---|
--fs-newsletter-accent-bkg-color | var(--fs-color-highlighted-bkg) |
--fs-newsletter-accent-text-color | var(--fs-newsletter-light-text-color) |
Data attributes
You can target and override
Newsletter styles using the following data attributes:data-fs-newsletterdata-fs-newsletter-color-variant="main" | "light" | "accent"data-fs-newsletter-formdata-fs-newsletter-headerdata-fs-newsletter-header-titledata-fs-newsletter-header-descriptiondata-fs-newsletter-contentdata-fs-newsletter-addendumCreating the Newsletter data entity in VTEX Master Data
The Newsletter data entity, also known as the
NL acronym, is a Master Data entity that stores subscription information for the Newsletter component. This entity enables the newsletter subscription feature for stores using FastStore.When customers subscribe to the store newsletter, their information is saved in the
NL entity. For the newsletter to operate, such as when a user subscribes, the NL entity must be set up in the Master Data.To create the
NL entity, follow the instructions below based on the method you prefer: creating via Admin or creating via API.For more details about Master Data data entities, see the data entity article.
Creating via Admin
-
In the VTEX Admin, go to Store Settings > Storefront > Master Data.
-
In Master Data, click Applications > Advanced Settings > Data structure.
-
Click the Data Entities tab.
-
Click
Add new. -
Complete the fields of the Data Entity section with the following information:
Field name Value Acronym NLName Newsletter Primary key type Generate a unique GUID -
In the Fields tab, create three new fields:
Field 1
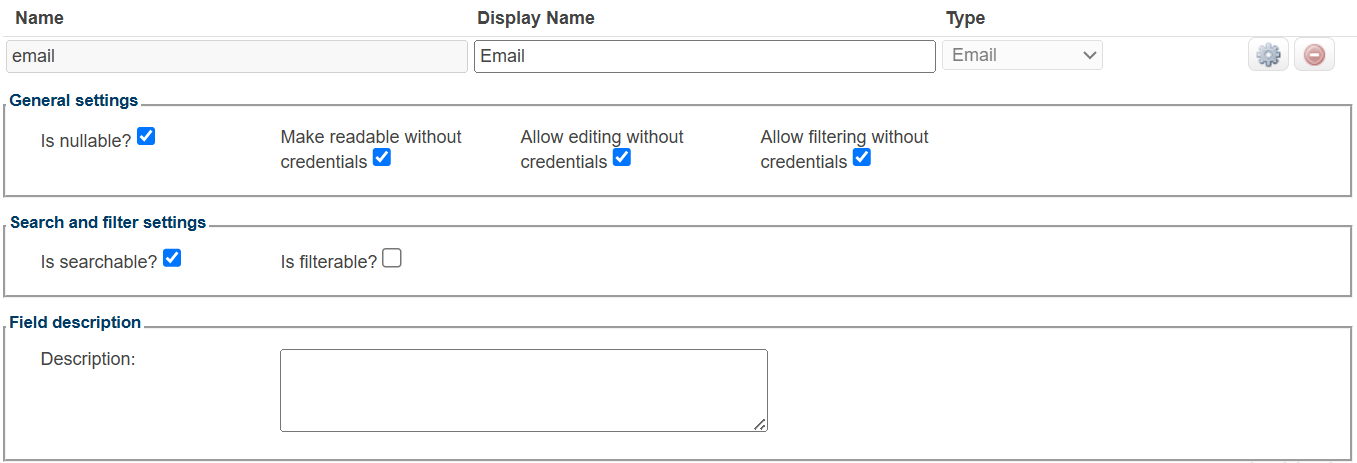
This field will store the customer's email address for newsletter subscription.-
Click
New Fieldand complete the fields with the following values:Name Display Name Type email Email Email -
Click the gear icon (⚙️) to open the field configuration options and check all the following options:
- Is nullable?
- Make readable without credentials
- Allow editing without credentials
- Allow filtering without credentials
-
In the Search and filter settings section, check the Is searchable? and Is filterable? options.
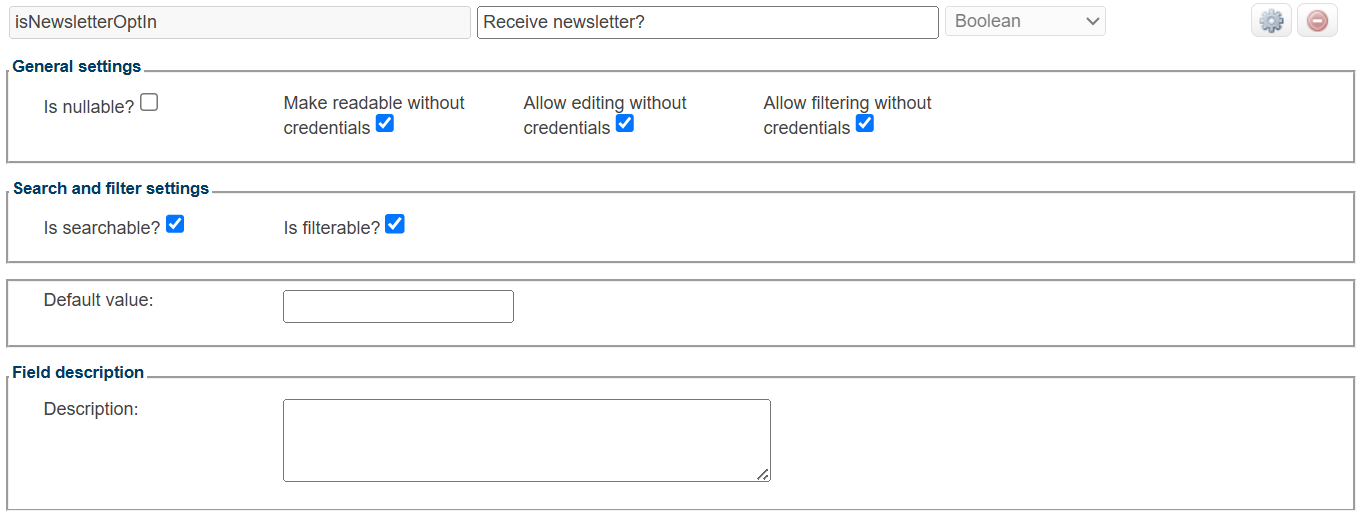
Field 2
This field will indicate whether the user will receive the newsletter.- Click
New fieldand complete the fields with the following values:
Name Display Name Type isNewsletterOptIn Receive newsletter? Boolean -
Click the gear icon ⚙️ to open the field configuration options and check all the following options:
-
Make readable without credentials
-
Allow editing without credentials
-
Allow filtering without credentials
- In the Search and filter settings section, check the Is searchable? and Is filterable? options.
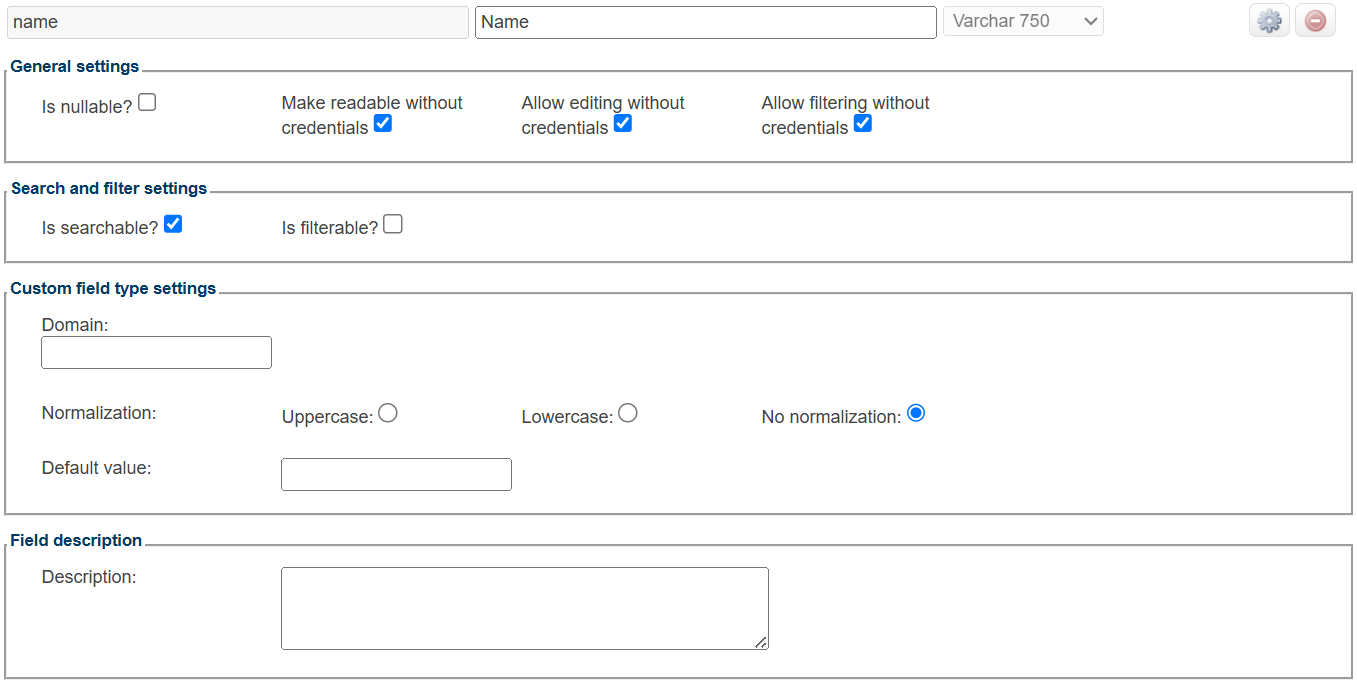
Field 3
This field will store the user’s name.-
Click
New Fieldand complete the fields with the following values:Name Display Name Type name Name Varchar 750 -
Click the gear icon (⚙️) to open the field configuration options and check all the following options:
- Make readable without credentials
- Allow editing without credentials
- Allow filtering without credentials
-
In the Search and filter settings section, check the Is searchable? and Is filterable? options.
-
-
Click
Saveand you will be redirected back to the Data Entity tab. -
In the row of the new
NLentity, click the diskette 💾 to publish the created data entity. -
Click
OK. -
Click the Applications tab to return to the Master Data homepage.
-
Click
Reload applications.
Creating via API
You can also create the Newsletter data entity using the Create partial document endpoint.
To create the three fields for the Newsletter data entity, see the Create document with custom ID or update entire document endpoint reference.
The field information must be the same as described in Creating via Admin.
Props
Newsletter
| Name | Type | Description | Default |
|---|---|---|---|
| card* | false | true | Enables the card Variant. | |
| colorVariant | "main" | "light" | "accent" | Specifies the component's color variant combination. | main |
| testId | string | ID to find this component in testing tools (e.g.: Cypress, Testing Library, and Jest). | fs-newsletter |
NewsletterAddendum
| Name | Type | Description | Default |
|---|---|---|---|
| addendum | string | Specifies the addendum for the subscription. | |
| testId | string | ID to find this component in testing tools (e.g.: Cypress, Testing Library, and Jest). | fs-newsletter-addendum |
NewsletterContent
| Name | Type | Description | Default |
|---|---|---|---|
| testId | string | ID to find this component in testing tools (e.g.: Cypress, Testing Library, and Jest). | fs-newsletter-content |
NewsletterForm
| Name | Type | Description | Default |
|---|---|---|---|
| onSubmit* | (event: FormEvent<Element>) => void | Function called when submit button is clicked. | |
| testId | string | ID to find this component in testing tools (e.g.: Cypress, Testing Library, and Jest). | fs-newsletter-form |
NewsletterHeader
| Name | Type | Description | Default |
|---|---|---|---|
| icon | string | number | false | true | {} | ReactElement<any, string | JSXElementConstructor<any>> | Iterable<ReactNode> | ReactPortal | Icon for the section. | |
| title* | string | Title for the section. | |
| description | string | A description for the section. | |
| testId | string | ID to find this component in testing tools (e.g.: Cypress, Testing Library, and Jest). | fs-newsletter-header |