Extending My Account for B2B stores
Learn how to extend the My Account page in your B2B FastStore project.
7 min read
In this guide, you'll learn how to extend the My Account page in your B2B store by creating custom CMS components and adding them to existing pages or to new CMS-managed pages.
Check if the default My Account pages meet your needs. If not, you can create a custom component and then add it to an existing page or use it in a new CMS-managed page. These extensions allow you to customize the My Account experience without changing its default structure.
All My Account routes are private and must include the/pvt/accountprefix. Custom routes are validated to ensure this prefix is included, but you should declare it. The validation compares complete path segments, so a route such as/pvt/accounting/dashboardisn't considered part of/pvt/account.
Before you begin
Make sure you have the following:
-
FastStore
v4.5.0or later. See Updating the CLI package version.The My Account extension features described in this guide requirev4.5.0. If you are on an earlier version, update your package before proceeding. -
My Account enabled in your project, as described in Enabling My Account for B2B stores. Without the
enableFaststoreMyAccountflag, all/pvt/account/*routes redirect to the legacy account. -
The
contentSourceobject set totype: "CP"in yourdiscovery.configfile. See CMS for FastStore storefronts. -
Access to the CMS Admin of your account, to publish content.
CMS-managed My Account pages aren't compatible with Headless CMS (legacy). The content type flow incms/faststore/pages/and the schema sync are only available in the CMS.
Creating a custom component
Before adding content to My Account pages, create a custom component following the standard FastStore CMS flow:
- Create the section in the
src/components/sectionsfolder and set its$componentKey. - Export the section in the
src/components/index.tsxfile. - Create the corresponding
.jsoncschema in thecms/faststore/componentsfolder. - Run
yarn cms-syncto make the section available in the CMS Admin.
For the complete step-by-step, see Creating a new section in the CMS.
Once your component is synced, you can place it in an existing My Account page or in a new CMS-managed page, as described in the sections below.
Choosing an approach
| What you want to do? | What to create? | Who edits the content afterwards? |
|---|---|---|
| Add a section before or after the content of an existing page | before.tsx or after.tsx in src/myAccount/extensions/ | Developer (code) |
| Create a new page with CMS-managed content | A route with contentType in navigation.ts and a content type in the CMS | Merchant (CMS Admin) |
Both options use the same
src/myAccount/navigation.ts file and can coexist in the same project.Adding new sections
To add a new section before or after the content of a My Account page, follow these steps:
- Open your FastStore project using the code editor of your choice.
- Open the
src/myAccount/extensions/{pageName}folder, wherepageNameis the URL path of the page without the/pvt/accountprefix. For example:- For
/pvt/account/orders, usesrc/myAccount/extensions/orders/. - For
/pvt/account/orders/[id], usesrc/myAccount/extensions/orders/[id]/. - For a custom route such as
/pvt/account/wishlist, usesrc/myAccount/extensions/wishlist/.
- For
- In the
src/myAccount/extensions/{pageName}folder, create two files:before.tsxandafter.tsx. Use thebefore.tsxfile to add a section before the existing content of the page, and useafter.tsxto add a section after the existing content. Each file must export a React component asdefault.
For example, to add a section after the order details page, you can implement the following:
Both default pages and custom routes created by your store can havebefore.tsxandafter.tsxextension sections.
Based on the example above, the new section will be placed after the current content on the order details page:
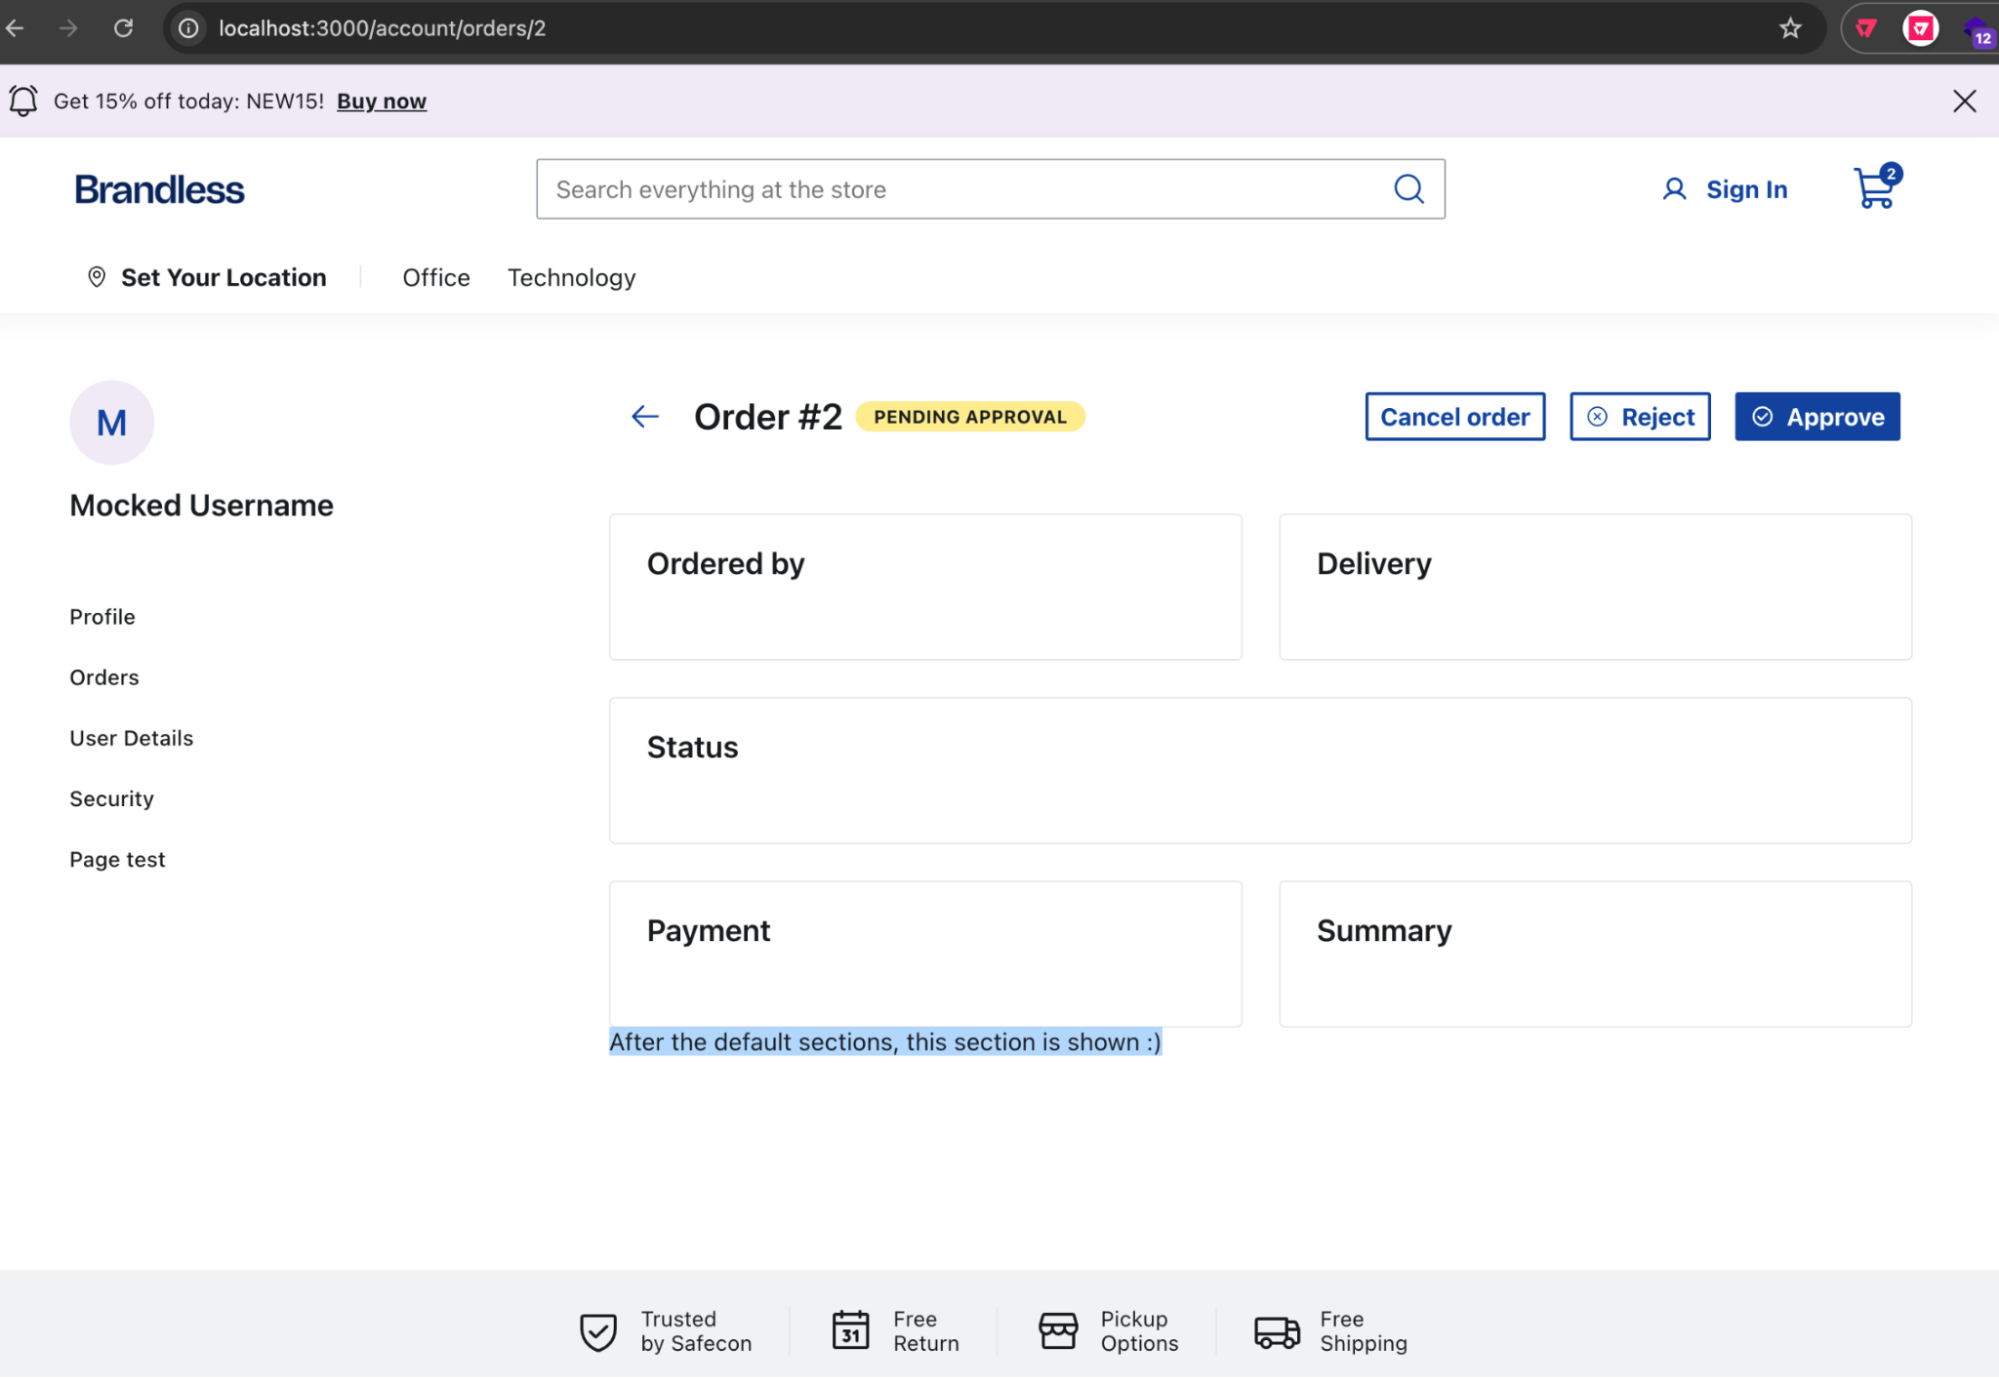
Creating a CMS-managed page
Use this approach when the merchant needs to build and edit the page content directly in the CMS Admin, without requiring a new deploy.
In this case, you don't create a
.tsx file. FastStore generates the page automatically, and its whole body is composed of the sections published in the CMS.Step 1 - Binding the route to a content type
In the
src/myAccount/navigation.ts file, add the contentType property to the route. Its value must be the exact identifier of the content type you'll define in the CMS:
_11import { getMyAccountRoutes } from "@faststore/core";_11_11export default getMyAccountRoutes({_11 routes: [_11 {_11 route: "/pvt/account/wishlist",_11 title: "Wishlist",_11 contentType: "myAccountWishlist",_11 },_11 ],_11});
The
contentType property is the only opt-in for CMS-managed content. Routes without it render no page body. The title property remains required, as it's the label displayed in the My Account menu. Route entries missing route or title are skipped with a warning at build time.Declare routes as static object literals. Thenavigation.tsfile is read through static analysis at build time, so routes built dynamically using variables,map, spread operators, or a function that returns the list aren't recognized by the page generator.
CMS-managed pages inherit the same protections as the default My Account pages, with no extra configuration: unauthenticated users are redirected to
/login, sessions that require a refresh are redirected to /pvt/account/403?from=<route>, and locale validation is applied, so localized content works as expected.Step 2 - Defining the content type in the CMS
Create the content type file in the
cms/faststore/pages folder of your project. The root key must match the contentType value declared in the route:$singleton: trueandidentifierKeys: []make the page a single instance, without replication per entity.$ALLOW_ALL_COMPONENTSin thesectionsproperty allows the merchant to use any section available in your store when building the page. To restrict the available sections, replace it with an explicitanyOflist.
Step 3 - Syncing the schema
Run the following command to send the new content type to the CMS:
_10yarn cms-sync
For more details about the sync flow, see Local setup and development.
Step 4 - Publishing the content in the CMS Admin
- In the VTEX Admin, go to Storefront > Content > All content.
- Open the content type you created, for example, My Account — Wishlist.
- Add and configure the desired sections.
- Save and publish your changes.
Step 5 - Checking the new page
Log in to your store and access the new route, for example,
/pvt/account/wishlist. The page appears in the My Account menu with the sections published in the CMS.If the content type was never published or its identifier doesn't match thecontentTypevalue, the page still loads with the menu, layout, and authentication, but with an empty body. See Common issues during extensions section.
Rendering order
When a route has more than one content source, FastStore renders them in the following order:
_10My Account layout_10 └─ before.tsx_10 └─ CMS sections_10 └─ after.tsx
Every layer is optional. FastStore renders only the ones available for that route.
Common issues during extensions
| Issue | Possible cause and solution |
|---|---|
| The page loads with the menu and layout, but the body is empty. | The content type was never published in the CMS Admin, or its identifier doesn't match the contentType declared in the route. Check that the root key of the .jsonc file, the contentType value, and the published content type are identical, then run yarn cms-sync again. |
The build shows the Skipping CMS route <route>: only /pvt/account prefixes are allowed warning. | The declared route is outside the private namespace. Move it to /pvt/account or one of its descendants. |
The build shows the Skipping CMS route <route>: native page takes precedence warning. | The route conflicts with a default My Account page. Native pages are always preserved. Use another path, or extend the existing page with before.tsx and after.tsx, as described in Adding new sections. |
The build shows the [my-account-cms] Could not statically parse routes in <file> warning. | The routes in navigation.ts aren't static object literals. Replace dynamic logic, such as variables, map, or spread operators, with literal objects. |
The build shows the [my-account-cms] Skipping CMS route entry missing route/title in <file> warning. | The route entry doesn't have the route or title property. Both are required. |