Setting up the Headless CMS
Define your first Content Type and sync it with Headless CMS to make it available for editing in VTEX Admin.
Now that Headless CMS is integrated with your FastStore project, you'll define your own Content Types and Sections so editors can create and manage pages in the VTEX Admin.
What you'll accomplish
By the end of this step, you will have:
- Created the CMS folder structure in your project for content type definitions
- Defined your first Content Type (Landing Page) with SEO settings
- Synced your CMS definitions to the Headless CMS app
- Verified that your Content Type appears in the Headless CMS interface
This establishes the foundation for content editing workflows. In the next step, you'll learn to structure more complex Content Types and Sections.
Before you begin
This guide assumes you are starting without existing CMS-related files. If your project already includes
content-types.json or sections.json, create only what’s missing. See Step 1: Creating the CMS folder.Instructions
Step 1: Creating the CMS folder
- Open the terminal and change to the root directory of your FastStore project.
- Create a new folder named
cmsat the root of your FastStore project and a subfolder namedfaststoreinside thecmsfolder. Run the following command to create them:
macOS and Linux
Windows
_10mkdir -p cms/faststore
- Create the two files below inside the
faststorefolder by running the following command:
If your project already includes the CMS-related files:content-types.jsonorsections.json, create only the necessary files for your project's requirements.
macOS and Linux
Windows
_10touch cms/faststore/content-types.json cms/faststore/sections.json
| File name | Description |
|---|---|
content-types.json | An array of JSON objects that describes the Content Types available for customization in the Headless CMS app. |
sections.json | An array of JSON objects that describes the content structure of the frontend Section components available for customization in the Headless CMS app. |
- Update the
sections.jsonfile with an empty array:
_10echo "[]" > cms/faststore/sections.json
- Open the
content-types.jsonfile in any code editor of your choice and add the following code:
Don't worry about the structure of this file for now, as we'll learn more about it later in this tutorial. However, notice that we have defined the Custom Page Content Type.
-
Save your changes in the
content-types.jsonfile. -
Open the terminal and run
yarn devto enable the watch mode for the FastStore CLI. This command will monitor any changes in the project, including the new section you have created, and automatically merge it with the default sections available infaststore/core.
Step 2: Syncing your changes
Let's now sync the changes with the Headless CMS app and see what happens.
-
Open another terminal and log in to your VTEX account.
-
Create a new development workspace by running the following command. Remember to replace the values between curly brackets according to your scenario:
_10vtex use {workspace}
Use a development workspace to try your definitions of Sections and Content Types before syncing them with the VTEXmasterworkspace.
-
Change to the root directory of your FastStore project.
-
Sync your changes in the
cmsfolder with the Headless CMS app:
_10yarn cms-sync
If you have the@vtex/cli-plugin-cms@1.0.7installed, you can use the{builderName}argument to synchronize a specific builder:vtex cms:sync {builderName}.
Once your changes are synced with the Headless CMS, the terminal will show the following message:
_10CMS synced successfully...
Step 3: Checking your changes
- Access the VTEX Admin using the workspace you created in Step 2 - Syncing your changes by navigating to the following path:
https://{workspace}--{account}.myvtex.com/admin. Make sure to replace{workspace}with the designated workspace name and{account}with your VTEX account. - Go to Storefront > Headless CMS.
- Click on Create New.
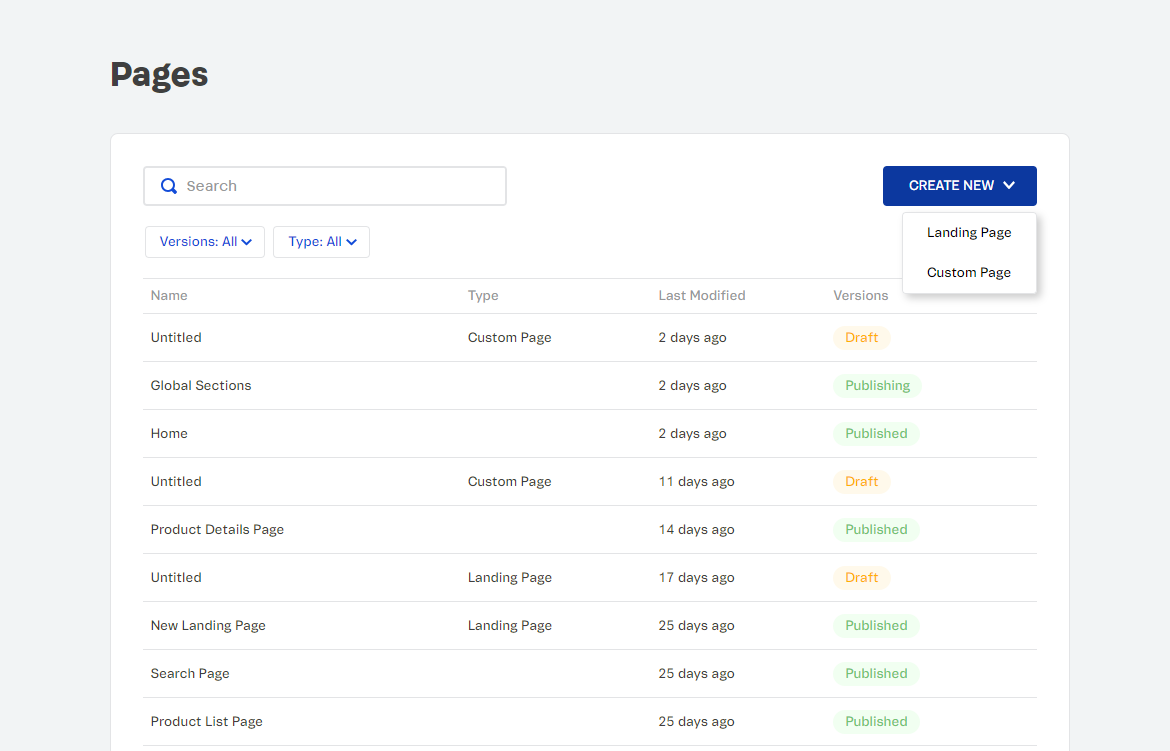
You should now see the content type we created in the previous step available for use in the Headless CMS app.
However, no Sections will be available yet. We'll learn more about this in the following part of this track, Structuring Content Types and Sections.
Next step
Now that you've created your first Content Type, learn to structure more complex Content Types and Sections: Structuring Content Types and Sections