Creating a new section in the CMS
4 min read
This guide applies only to stores using the CMS with FastStore versions 3 or 4. For stores using Headless CMS (legacy), refer to Creating a new section (Headless CMS legacy).
When your store requires a layout or behavior not natively available, you can create a new section component tailored to your brand or business rules. A section component gives you full control over the structure and content while integrating with the CMS.
In this guide, you'll learn how to create a new CallToAction section in your FastStore project.
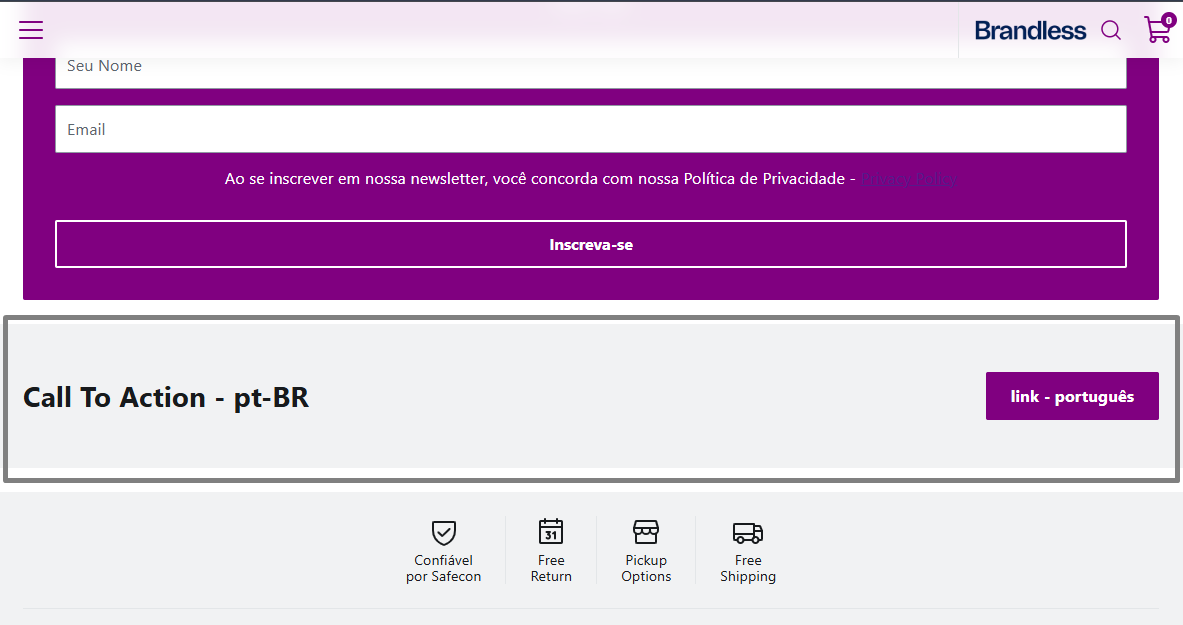
A section is a type of component that contains other components and acts as a dynamic container in page layouts. For more details, see Understanding components and sections.
Before you begin
- The CMS must be installed and enabled in your VTEX account. The CMS provides the Admin interface to configure and publish the CallToAction section you build in this guide.
- The Content plugin must be installed on your machine.
Instructions
Step 1 - Create the component
-
Open your store project in a code editor.
-
In the
src/componentsfolder, create theCallToAction.tsxfile. -
Add the following code to
CallToAction.tsx:_20import React from 'react'_20_20export interface CallToActionProps {_20title: string_20link: {_20text: string_20url: string_20}_20}_20_20export default function CallToAction(props: CallToActionProps) {_20return (_20<section>_20<h2>{props.title}</h2>_20<a href={props.link.url}>{props.link.text}</a>_20</section>_20)_20}_20_20CallToAction.$componentKey = 'CallToAction' -
Export the
CallToActioncomponent insrc/components/index.tsx:_10import CallToAction from './CallToAction'_10_10export default {_10CallToAction,_10} -
In
cms/faststore/components, create thecms_component__CallToAction.jsoncfile. -
Add the following schema to
cms_component__CallToAction.jsonc:_30{_30"$extends": ["#/$defs/base-component"],_30"$componentKey": "CallToAction",_30"$componentTitle": "Call To Action",_30"title": "Call To Action",_30"description": "Get your 20% off on the first purchase!",_30"type": "object",_30"required": ["title", "link"],_30"properties": {_30"title": {_30"title": "Title",_30"type": "string"_30},_30"link": {_30"title": "Link Path",_30"type": "object",_30"required": ["text", "url"],_30"properties": {_30"text": {_30"title": "Text",_30"type": "string"_30},_30"url": {_30"title": "URL",_30"type": "string"_30}_30}_30}_30}_30}
Step 2 - Verify the component locally
Before syncing your changes with the CMS, run the storefront locally to confirm your new component compiles without errors. This catches typos, missing imports, and invalid schemas before you sync with the CMS.
-
In the project root, start the FastStore development server:_10yarn dev
-
Open the development server in your browser and check the terminal output for compilation errors related to
CallToAction.
The section won't render visually yet because it hasn't been added to any page in the CMS. This is done in Step 4. At this point, you're only verifying that the development server starts and that your component code, schema, and registration are valid.
If the development server starts successfully and reports no compilation errors, you're ready to sync your changes with the CMS.
Step 3 - Sync the changes with the CMS
Before syncing, make sure you're logged in to your VTEX account by running
vtex login {accountName} in the terminal. Replace {accountName} with your store account, for example, vtex login mystore.From the root of your FastStore project, run:
_10vtex faststore cms-sync
This command detects your store's content source, generates the schema from the
cms/faststore/components and cms/faststore/pages folders, and uploads it to the CMS, prompting you to confirm the store ID and the schema version before publishing.This command is available from FastStorev4.4.0. Stores on earlier versions must upgrade first. See Local setup and development for details on the version prompt and best practices for choosing a version number.
Sync manually
If you prefer to run each step separately, for example, to preview the generated schema before uploading or automate the upload in a CI/CD pipeline, use the individual Content plugin commands instead:
-
Generate the schema:_10vtex content generate-schema cms/faststore/components cms/faststore/pages -o cms/faststore/schema.json
-
Open
schema.jsonand check whether the section was added to the section list. It should look similar to this:_10{_10"$ref": "#/components/CallToAction"_10} -
Upload the schema:_10vtex content upload-schema cms/faststore/schema.json
Step 4 - Add the component to the CMS
-
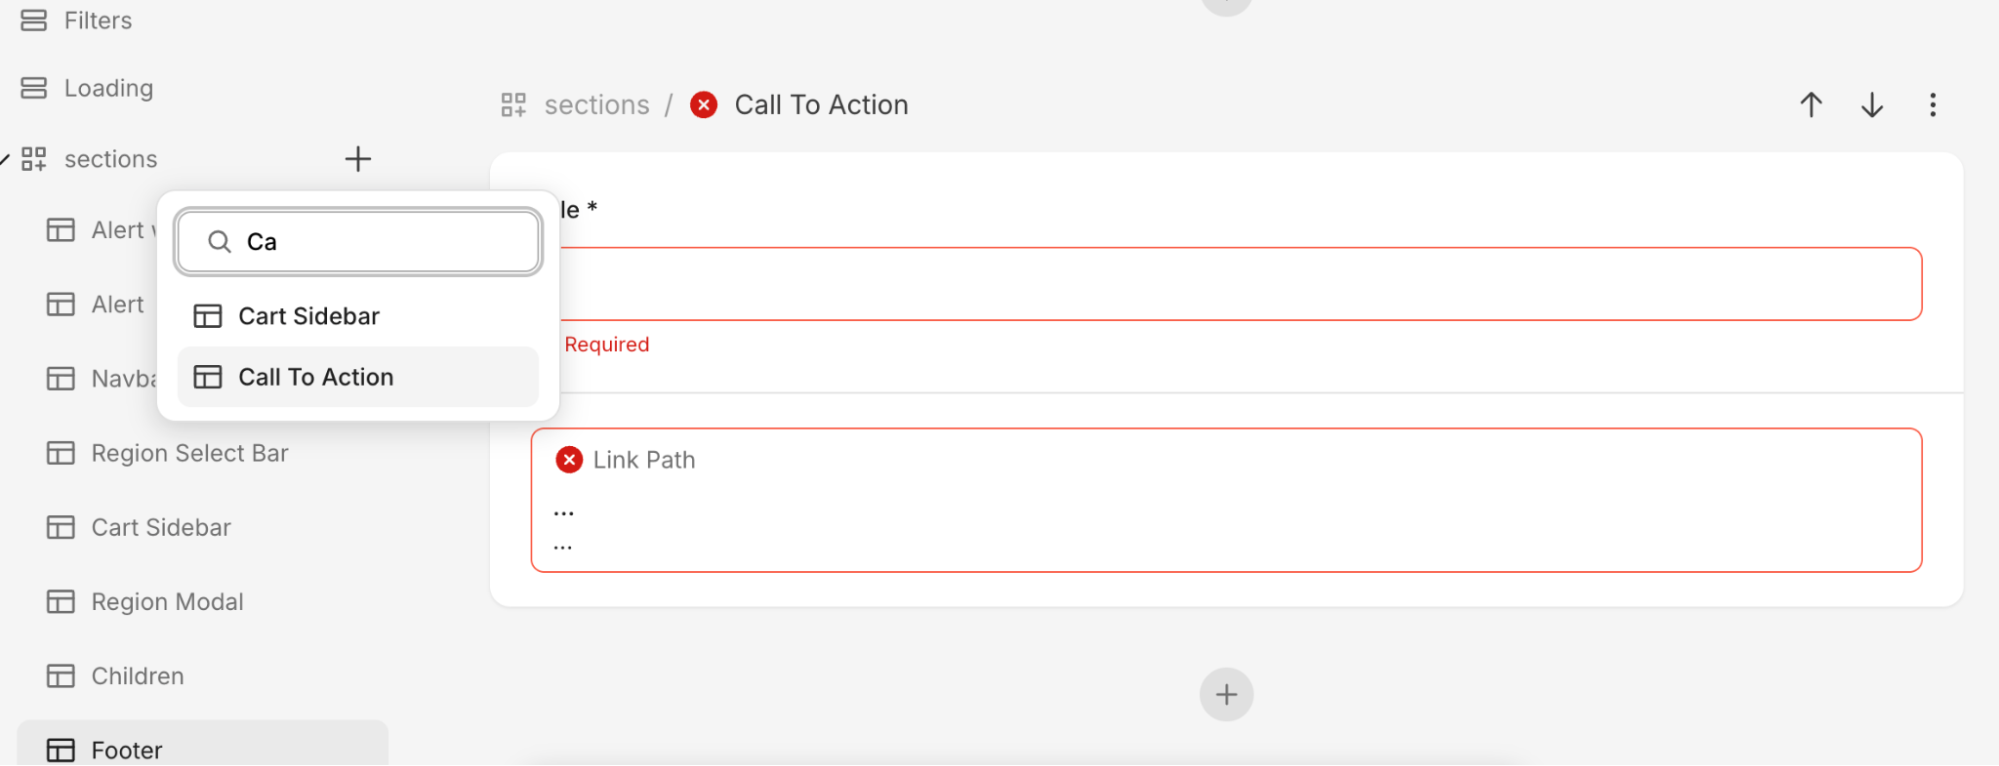
In the Admin, go to Storefront > Content, and open an entry, such as Home, to check whether the component was added.
-
Add the component and complete its fields.
-
Click Save.
-
With the FastStore development server still running from Step 2, refresh the page to preview the CallToAction section rendered with the values you configured.