This app is no longer maintained by VTEX. This means support and maintenance are no longer provided.
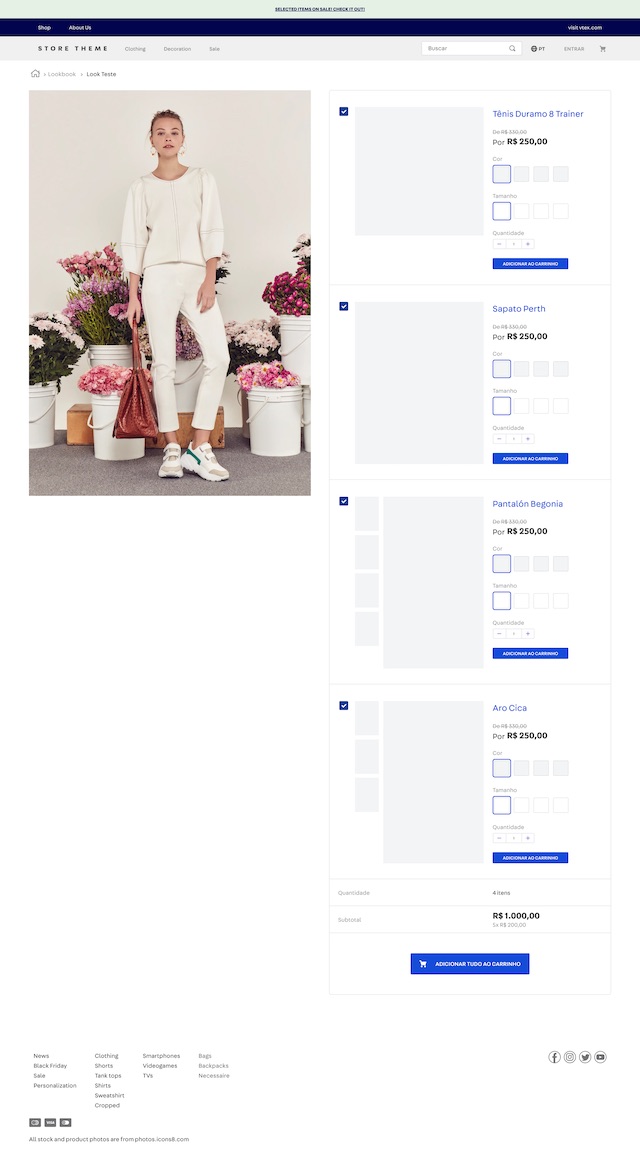
The Kit Look app displays relevant products to the shopper at the time of purchase, increasing the store's product sales.
The customer can choose the items from the kit they want to buy, or add the entire kit to the cart if they are interested in the combinations automatically highlighted by the store.
In the following sections, learn how to add the app to your store and configure it.
Before you start
Set up the Kit with all the products that will be displayed. To do so, refer to the tutorial Kit registration.
Instructions
Step 1 - Installing the app
- Go to the VTEX App Store and after logging into your account, click on
GET APP. - You will be redirected to the checkout and choose a payment method since the Kit Look is a paid app.
Since Kit Look is a paid app, you will be charged a US$0.01 fee to validate your credit card information. This will be refunded as soon as the payment is approved.
- To finish this step, import it into your store's
peerDependenciesinmanifest.json.
_10{_10 "peerDependencies": {_10 "vtexbr.kitlook": "5.x"_10 }_10}
Step 2 - Configuration
The Kit Look order is sorted by productId in ascending order by default, but it is possible to configure it to respect the Kit order registration through the settings in the Kit Look app in my applications.
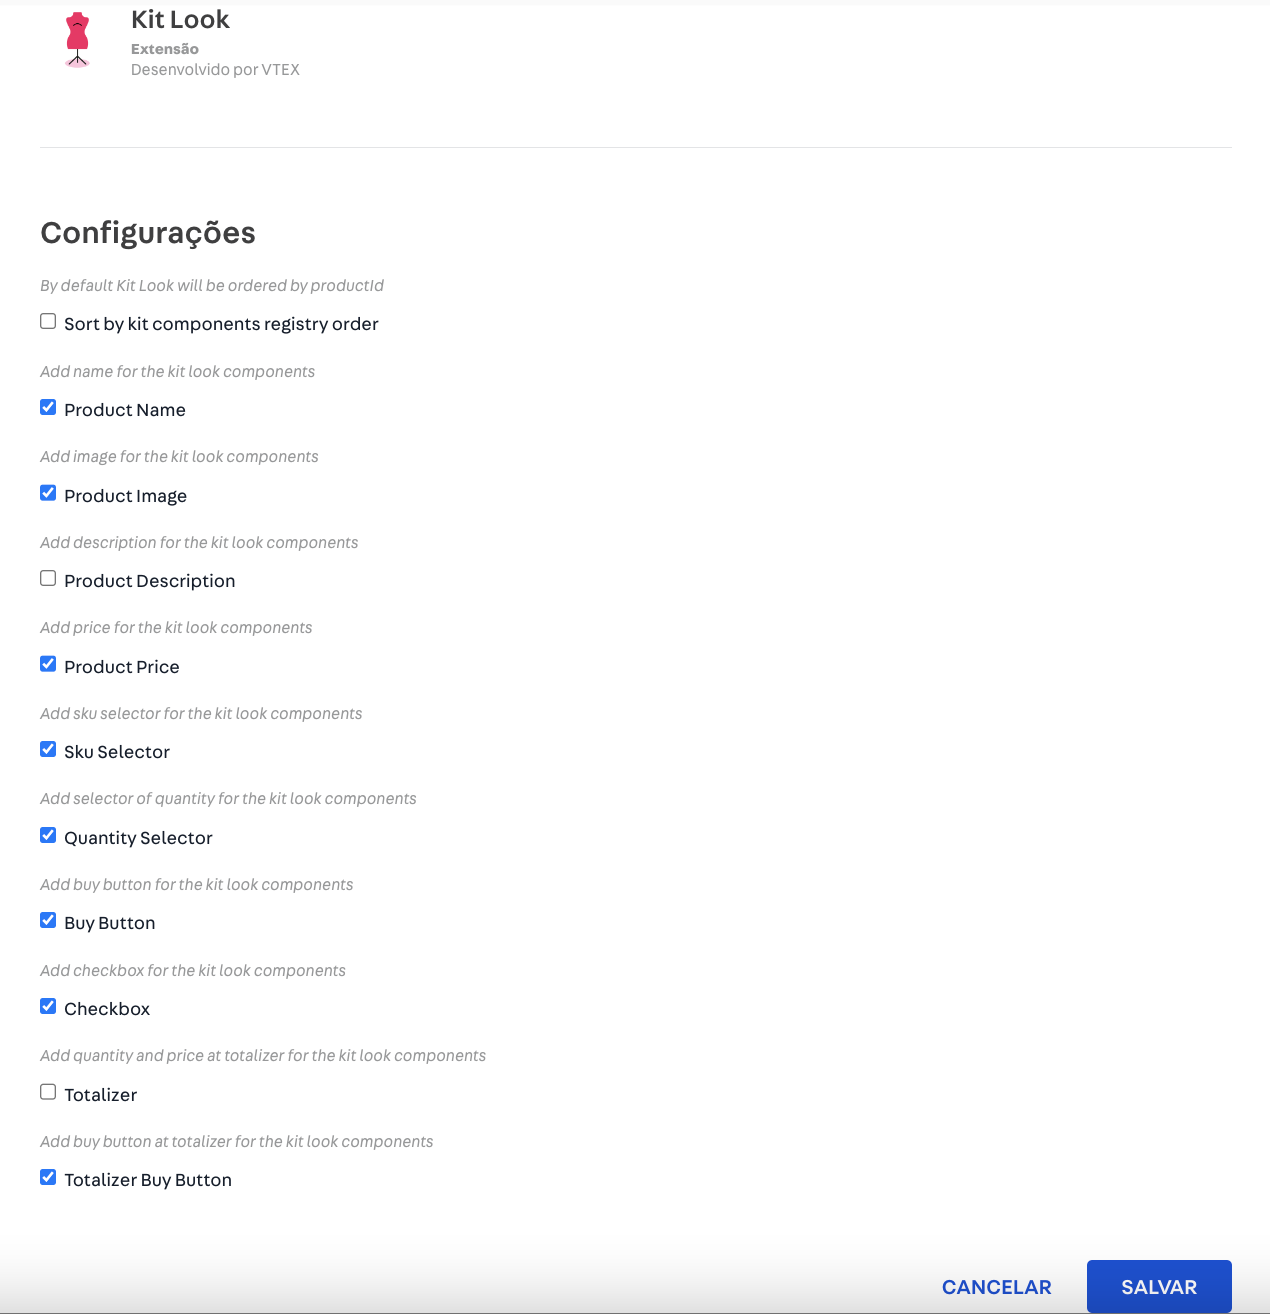
It is also possible to select which components the kitlook block should render. The default configuration is shown in the image:
The kitlook-layout interface alternates blocks when it detects that the product is a kit.
Therefore, you have to add its interface to your app store theme code. There are two ways to achieve this: add the kitlook-layout interface to interfaces.json or product.jsonc.
Check out the following sections to add the kitlook-layout interface.
Adding kitlook-layout in the interfaces.json
- Allow the Kit look interfaces by adding the Kit Look in the
store.productininterfaces.jsonof your app theme.
_10// interfaces.json_10{_10 "store.product.kitlook": {_10 "allowed": ["kitlook-layout", "kitlook"]_10 }_10}
- Then, add the
kit look-layoutinterface to the page you want to display a different block when the product is a kit.
_17// product.json_17{_17 "store.product.kitlook": {_17 "children": [_17 "flex-layout.row#product-breadcrumb",_17 "kitlook-layout", // <--- Here's our new block_17 "flex-layout.row#description",_17 "shelf.relatedProducts"_17 ]_17 },_17 "kitlook-layout": {_17 "children": [_17 "flex-layout.row#product-main", // <--- The first child is for regular product_17 "flex-layout.row#kitlook" // <--- The second one will show when a product is a kit_17 ]_17 }_17}
Keep in mind that the first block specified will always be for regular products, and the second one is for your custom product page that you want to display if the product is a kit.
- In your second block, you can use the
kitlookblock to display the kit items. For example:
_25// product.json_25{_25 "flex-layout.row#kitlook": {_25 "props": {_25 "colGap": 7,_25 "rowGap": 7,_25 "marginTop": 4,_25 "marginBottom": 7,_25 "paddingTop": 7,_25 "paddingBottom": 7_25 },_25 "children": ["flex-layout.col#kitlook", "flex-layout.col#stack"]_25 },_25 "flex-layout.col#kitlook": {_25 "props": {_25 "colGap": 7,_25 "rowGap": 7,_25 "marginTop": 4,_25 "marginBottom": 7,_25 "paddingTop": 7,_25 "paddingBottom": 7_25 },_25 "children": ["kitlook"]_25 }_25}
In the example above, we are reusing the flex-layout.col#stack block, which is shared with your regular product blocks.
Adding kitlook-layout in the product.jsonc
- Add
product-details.kitlookas a child in yourstore.productinstore/blocks/product.jsonc.
_12{_12 "store.product": {_12 "children": [_12 "flex-layout.row#product-breadcrumb",_12 "product-details.kitlook",_12 "shelf.relatedProducts",_12 "product-reviews",_12 "product-questions-and-answers"_12 ]_12 },_12 ..._12}
- In your
product-details.kitlookaddkitlookas a block.
_21{_21 "product-details.kitlook": {_21 "blocks": [_21 "kitlook",_21 "product-images",_21 "product-description",_21 "product-specifications",_21 "buy-button",_21 "sku-selector",_21 "shipping-simulator",_21 "product-highlights",_21 "availability-subscriber",_21 "product-price",_21 "product-name",_21 "share#default"_21 ],_21 "props": {_21 "displayVertically": true_21 }_21 }_21}
Customization
In order to apply CSS customizations in the kitlook block, follow the instructions given in the recipe on Using CSS Handles for store customization.
| CSS Handles |
|---|
kitlookContainer |
kitlookBox |
kitlookImage |
kitlookDetails |
kitlookName |
kitlookDescription |
kitlookPrice |
kitlookButton |
kitlookCheckbox |
Product Summary
If you have any shelves that may display kits, you need to replace the product-summary or product-summary.shelf interface with product-summary.kitlook-layout in those shelves in store/blocks/home/home.jsonc.
_18{_18 "shelf#home": {_18 "blocks": ["product-summary.kitlook-layout"],_18 "props": {_18 "orderBy": "OrderByTopSaleDESC",_18 "paginationDotsVisibility": "desktopOnly",_18 "skusFilter": "FIRST_AVAILABLE",_18 "productList": {_18 "maxItems": 10,_18 "itemsPerPage": 5,_18 "minItemsPerPage": 1.5,_18 "scroll": "BY_PAGE",_18 "arrows": true,_18 "titleText": "Top sellers"_18 }_18 }_18 }_18}
We recommend you do the same for your
galleryblock so the new layout is used on search results and category pages.
_10{_10 "gallery": {_10 "blocks": ["product-summary.kitlook-layout"]_10 }_10}
Now that you're using product-summary.kitlook-layout, you may want to specify a custom block for your regular products and another for kitlook.
To do that, somewhere in your blocks.json, add the block product-summary.kitlook-layout.
You can specify two children's blocks. The first will be displayed for regular products and the second for kitlooks.
_10{_10 "product-summary.kitlook-layout": {_10 "children": ["product-summary.shelf", "product-summary.kitlook"]_10 }_10}
Advanced
By default, product-summary.kitlook displays a list of the items in the kit, including their names and prices.
However, it is possible to achieve a wide range of customizations using product-summary-kitlook ( different from the product-summary.kitlook)
You can specify any interface that a regular product-summary accepts, e.g., product-summary-image, product-summary-buy-button, to name a few.
You can also use flex-layout and stack-layout to achieve the maximum level of control.
Take a look at how to do that.
- Create a new custom
product-summary.kitlookso you can modifyproduct-summary-kitlookandproduct-summary-buy-button#kitlooklater on. For example:
_11{_11 "product-summary.kitlook#custom": {_11 "children": [_11 "product-summary-image",_11 "product-summary-name",_11 "product-summary-space",_11 "product-summary-kitlook",_11 "product-summary-buy-button#kitlook"_11 ]_11 }_11}
- Then, create a
flex-layout.rowandflex-layout.colcolumns to go inside it. In one column, put the product image usingproduct-summary-image, and in the other,product-summary-nameandproduct-summary-price.
_37{_37 "product-summary-kitlook": {_37 "children": ["flex-layout.row#product-summary-kitlook"]_37 },_37 "flex-layout.row#product-summary-kitlook": {_37 "children": [_37 "flex-layout.col#kit-item-image",_37 "flex-layout.col#mini-summary"_37 ],_37 "props": {_37 "colGap": 3,_37 "border": ["top"],_37 "borderWidth": 1,_37 "borderColor": "silver",_37 "paddingTop": 5_37 }_37 },_37 "flex-layout.col#kit-item-image": {_37 "children": ["product-summary-image"],_37 "props": {_37 "width": "33%"_37 }_37 },_37 "flex-layout.col#mini-summary": {_37 "children": ["product-summary-name", "product-summary-price#mini"],_37 "props": {_37 "horizontalAlign": "left"_37 }_37 },_37 "product-summary-price#mini": {_37 "props": {_37 "showLabels": false,_37 "showInstallments": false,_37 "showListPrice": false_37 }_37 }_37}
Everything put together:
_54{_54 "product-summary.kitlook-layout": {_54 "children": ["product-summary.shelf", "product-summary.kitlook#custom"]_54 },_54 "product-summary.kitlook#custom": {_54 "children": [_54 "product-summary-image",_54 "product-summary-name",_54 "product-summary-space",_54 "product-summary-kitlook",_54 "product-summary-buy-button#kitlook"_54 ]_54 },_54 "product-summary-kitlook": {_54 "children": ["flex-layout.row#product-summary-kitlook"]_54 },_54 "flex-layout.row#product-summary-kitlook": {_54 "children": [_54 "flex-layout.col#kit-item-image",_54 "flex-layout.col#mini-summary"_54 ],_54 "props": {_54 "colGap": 3,_54 "border": ["top"],_54 "borderWidth": 1,_54 "borderColor": "silver",_54 "paddingTop": 5_54 }_54 },_54 "flex-layout.col#kit-item-image": {_54 "children": ["product-summary-image"],_54 "props": {_54 "width": "33%"_54 }_54 },_54 "flex-layout.col#mini-summary": {_54 "children": ["product-summary-name", "product-summary-price#mini"],_54 "props": {_54 "horizontalAlign": "left"_54 }_54 },_54 "product-summary-price#mini": {_54 "props": {_54 "showLabels": false,_54 "showInstallments": false,_54 "showListPrice": false_54 }_54 },_54 "product-summary-buy-button#kitlook": {_54 "props": {_54 "buyButtonBehavior": "alwaysGoToProduct"_54 }_54 }_54}
After that, do not forget to change the default product page interface on CMS > Pages to use the store.product.kitlook interface.
You can expect to have a similar result as the following:
