Implementing Live Shopping for FastStore previous versions
This is an experimental feature.
Live Shopping for FastStore adds a customizable player on your storefront to transmit Live Shopping events. This guide explains how to integrate Live Shopping into a FastStore v1 or v2 project. After the implementation, you will be able to configure and manage event transmissions via VTEX Admin.
If you use the latest version of FastStore, refer to the guide Implementing Live Shopping for FastStore.
Before you begin
Before installing Live Shopping for FastStore previous versions, make sure you've installed the Headless CMS on your page to be able to customize it via VTEX Admin, as described in the FastStore documentation.
Getting the Live Shopping app
Follow the steps below:
- Access VTEX Live Shopping on VTEX App Store. You can also access it via the VTEX Admin through Apps > App Store > VTEX Live Shopping.
- Click
Get appto install the app. Log in to your VTEX account if necessary. - Click
Place order. - Click
Go to install page. - Click
Install. - Agree to the Terms of Service by clicking
Install.
Configuring the Live Shopping component
Once you have the Live Shopping app on your store project, follow the instructions to integrate the component:
Creating the component
To create the Live Shopping component, follow the steps below:
- In your FastStore project, go to
src/components/sections. - Create a new folder named
LiveShopping. - Inside this folder, create the following files:
index.tsx
_10export { default } from './LiveShopping'_10export type { LiveShoppingProps } from './LiveShopping'
LiveShopping.tsx
_28import Section from '../Section'_28_28_28export interface LiveShoppingProps {_28 script: string_28}_28_28_28function LiveShopping(section: LiveShoppingProps) {_28 return (_28 section?.script && (_28 <Section className="liveshopping__section">_28 <div id="nz-player" />_28_28_28 <script_28 key="nz-player-script"_28 id="nz-player-script"_28 type="module"_28 async_28 src={`${section?.script}&originOfProducts=faststore`}_28 />_28 </Section>_28 )_28 )_28}_28_28export default LiveShopping
Once you're done, your directory structure should look like the one below:
_10src/_10 └── components/_10 └── sections/_10 └── LiveShopping/_10 ├── index.tsx_10 └── LiveShopping.tsx
Connecting the component to the CMS
To connect the component to the CMS, follow the steps below:
- Locate the CMS renderer file (usually
RenderCMS.tsx). - Import the previously created component:
_10import LiveShopping from 'src/components/sections/LiveShopping'
- Add it to the
COMPONENTSconstant, which contains an object with the components related to sections added to the CMS.
_10const COMPONENTS: Record<string, ComponentType<any>> = {_10 LiveShopping,_10}
Configuring CMS sections
- Go to
cms/faststore/sections.json. - Edit the
sections.jsonfile by adding the following schema:
_15{_15 "name": "LiveShopping",_15 "schema": {_15 "title": "LiveShopping",_15 "description": "Setting LiveShopping",_15 "type": "object",_15 "required": ["script"],_15 "properties": {_15 "script": {_15 "type": "string",_15 "title": "Script"_15 }_15 }_15 }_15 }
- Save changes.
- For the Live Shopping section to be available on your VTEX Admin, sync your CMS by running the command below:
_10vtex cms sync
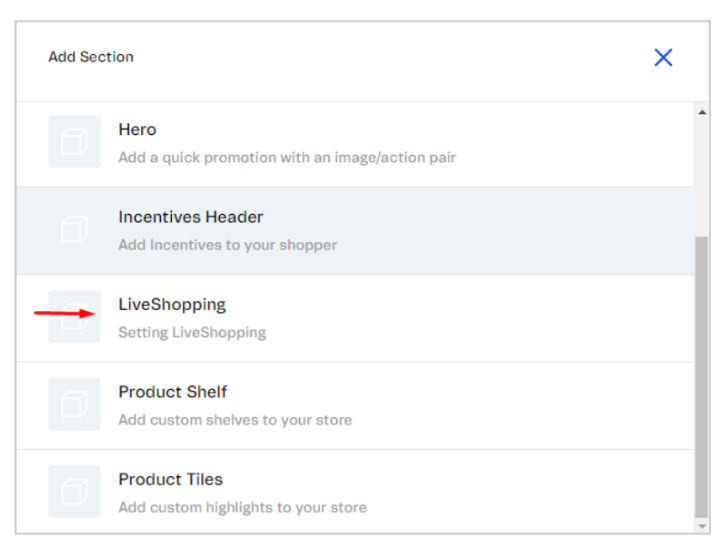
You will be able to add the Live Shopping section to the store's CMS:
First Live Shopping event
The first step is to create an event on VTEX Admin. After that, there will be two other moments that will require configuring the CMS:
- Start the event: Place the component to show the player on the storefront.
- End the event: Delete the component to remove the player.
Be aware that not all Live Shopping configurations are available for previous versions of FastStore, as explained in the section Feature restrictions.
Placing the component
To place the component on your project, follow the steps below:
- In the VTEX Admin, go to Apps > Live Shopping > Events, or type Events in the search bar at the top of the page.
- In the Action column, click the arrow button to go to the Event page.
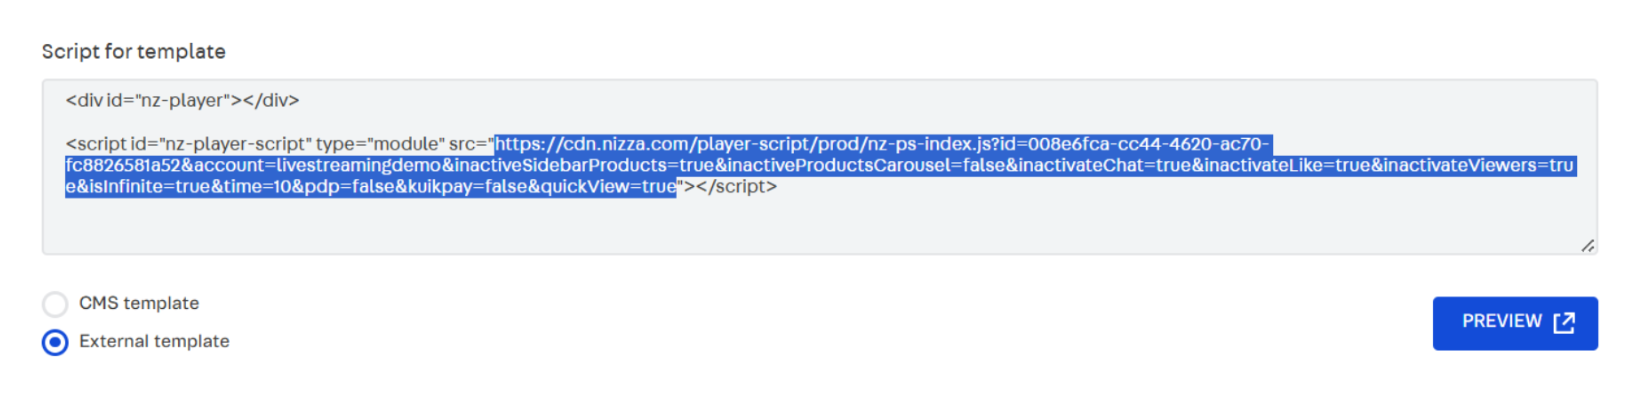
- In the CMS Configuration section, select the
External templateoption in Script for template. - Copy the
srcattribute value from the<script>tag, without the quotation marks.
- Go to Storefront > Headless CMS and add the LiveShopping section to a page.
- On that page, paste the
srcvalue you've copied on the LiveShopping field. - Save changes.
- Publish the page.
After that, you will be able to transmit a Live Shopping event. If you don't have the expected result, check Troubleshooting script not rendering.
Removing the component
To delete the component from your store, follow the steps below:
- In the VTEX Admin, go to Storefront > Headless CMS, or type Headless CMS in the search bar at the top of the page.
- Select the page where you've added the Live Shopping Player.
- On the
Sectionstab, in the Live Shopping Player section, click More > Delete. - Click
Save. - Click Publish > Publish Now.
- (Optional) If the page version had been published before and the Overwrite Published Version window opens, click
Overwrite.
Feature restrictions
Since the Live Shopping Player isn't a native solution for FastStore previous versions, there will be some feature limitations. The recommendations you must follow while configuring a Live Shopping event are listed below:
Make sure to follow our recommendations on CMS and Settings configurations, as misconfiguration can compromise the transmission of the Live Shopping event.
- ❌ UTM configuration: Not supported as a native solution, so data tracking isn't available.
- ❌ Add to Cart configuration: Not supported as a native solution, but can be used while presenting a different behavior. When the customer clicks
Add to Carton the Live Shopping event, instead of adding the product to the cart, it will open the product details page (PDP) in a new tab, from where the customer can add the item to the cart. - ❌ Quick View configuration: Not supported as a native solution and mustn't be activated on the CMS section of the events page. Otherwise the customer might have cart errors while using the Add to Cart configuration.
- ❌ Popup transmission configuration: Not supported as a native solution and mustn't be activated on the events page. Otherwise it may delete the live event itself. It can be found under the Player configuration on the Settings section.
Troubleshooting script not rendering
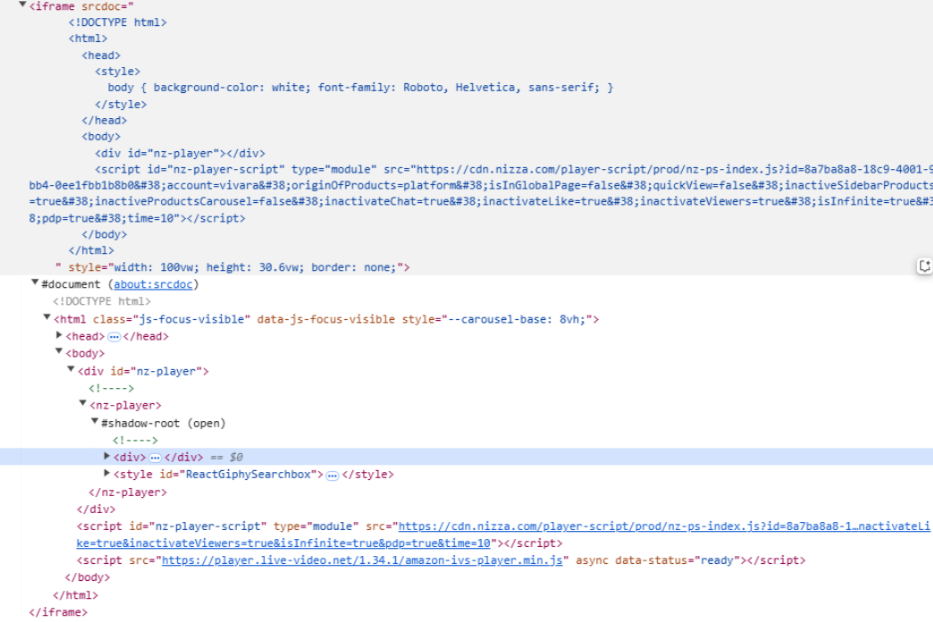
After placing the Live Shopping component on your FastStore project, if the Live Shopping application does not render or display on the storefront, even though the script appears when inspecting elements, try wrapping the Live Shopping script in an iframe instead.
Alternative LiveShopping.tsx (with iframe)
After doing so, when inspecting the elements you should see something like the following example: